Thinking back on my journey as an artist so far I think the biggest and hardest lesson for me to internalize was that we, as artists, are responsible for everything that goes into an image. This includes removing distractions that detract from the image like dust, blades of grass and other things.
“But Dave!”, you may reply, “You out in a field in an environment you don’t control, with wind, and dust, and furry creatures great and small. Surely you can’t be responsible for everything!”
Yes, I do, and I’ll explain why.
Distractions Distractingly Distract
One don’t have to spend much time on social media to understand that people are very good about overlooking the message and skip to pointing out the flaws. One of the side effects of photography is that flaws get accentuated. This is doubly true for toy photography where everything in the image is magnified. With toys a spec of dust becomes huge in camera.
My goal as an artist is to get people’s attention so they will take a moment to look at my images. If they spend those precious seconds being distracted by the flaws instead of studying the subject matter, I’ve failed.
So, as the artist, if I ensure they won’t be distracted so they can spend their energy enjoying my photograph, I am that much closer to my goal. That is the responsibility I am speaking of.
I am of the opinion that my images do not need to be perfect. However I also believe that I need to decide if those imperfections help or harm the image. If they harm it, they need to go before I show it to others.
So, let’s look at some practical things we can do to make our images distraction free and become food for our viewers eyes.
Things to Consider
Border Patrol
The edge of the frame is the boundary between our images and the rest of the world. Things that cross that boundary need to make sense to the image. Common issues with this are tree branches sticking in from the side of a frame that appear to be floating.
To combat this I make it a habit to scan my image borders for distracting elements and remove them, either in camera by recomposing, or in post-production by cropping, or using a cloning tool.
Along with the frame edge, I also like to scan the edges of the model for distracting elements, especially if I am shooting outdoors. It is very easy for a stick or a blade of grass to sneak in front of the model.
Due to differences in scale, a small blade of grass can become a huge distraction and obscure large parts of a minifig. It is a lot more important that these distractions are removed in camera, and not in post production.
Backgrounds
Backgrounds are important as it provides a sense of location. However they can be both a blessing and a curse. These are some things to consider with backgrounds However before you click the shutter ask yourself if the background make sense for the image. If not, you may wish to move the model, or recompose the image in camera, to change the background.
Alternately you can change your depth of field to minimize it (See Lizzi’s excellent tutorial on this called Aperture Science).
Another thing to consider with backgrounds is that if your model is placed in front of long slender shapes (tree branches, fence posts, light poles etc.) it can give the appearance that the long slender shape is growing from the model. Check the following image for an example.

First image: tree is behind the figure, so it looks like it is growing out of his helmet. Second image: Moving the camera slightly over fixes the issue.
This is a subtle but annoying distraction. The viewer may not even identify it, but they will just sense something is a bit off. The easiest way to avoid this is in camera. Simply move the camera, or the model, sideways until the lines in the background don’t intersect with your model in odd ways.
This last point I’ll cover more in a future post on light, but if your background is brighter than your model, it can draw the eye away from the model. There are valid reasons why your background may be brighter than your model (silhouettes for example), so you need to determine if it is a distraction or not for your own image.
However if it is a distraction, one way to deal with it is to add some light to your model. I carry a small tactical flashlight in my kit for this exact purpose.
Dust
Dust is something most photographers don’t worry about too much, but is the bane of existence for us toy photographers. If a human sized model has a speck of dust on their shoulder, it may not even show up in camera. However if a LEGO minifig has even the smallest spec of dust, it shows up as a huge bright spot on the model in camera. A single spec of dust has been enough to ruin many a shot for me.
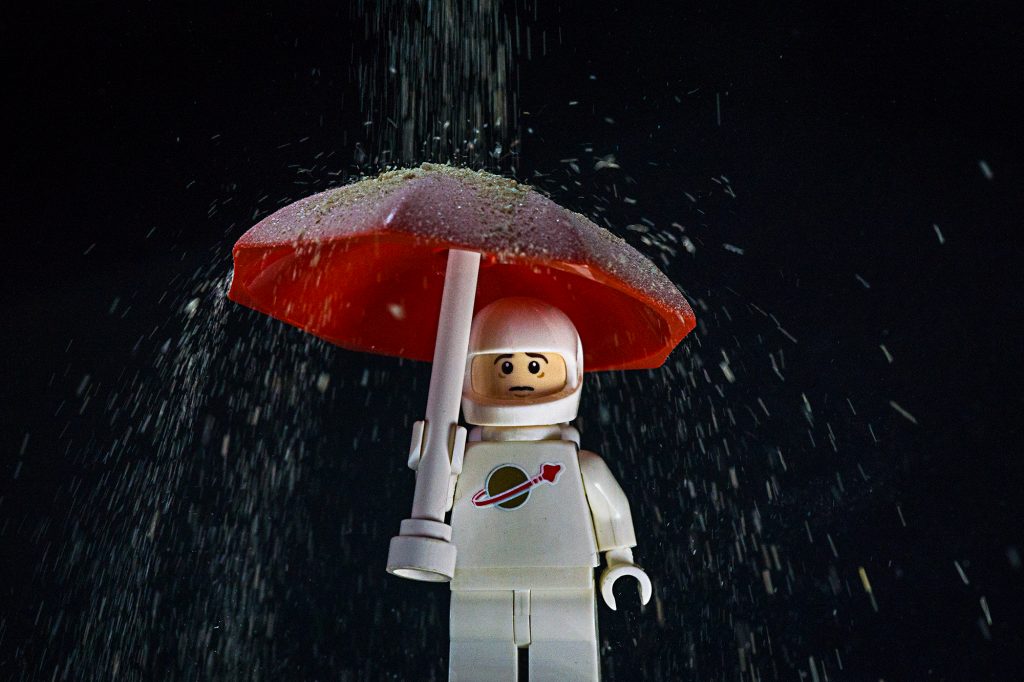
Don’t be this guy.
The best way to deal with dust is to remove it from the scene before you take the photo in the first place. James has a great post on how to deal with dust in his post “Got Dust? Here’s The Secret Weapon…”.
However you will inevitably get dust somewhere in your image eventually. Fortunately many photo editors have tools for removing dust specs. The spot healing brush in Photoshop for example is my goto tool for dust removal.
Assignments
Homework time! (Completely voluntary of course). Take a look at the last 10(-ish) images you shot, and consider if they contain any distractions. You may wish to start by asking yourself the following questions:
-
- Is the background appropriate for the image? Does it have too much or too little detail? Does it have distracting lines or bright spots? If so, how could I have changed how I shot and/or processed this image to reduce or remove the issues?
- Is there anything poking into my image from out of frame that is causing a distraction? How about anything covering the model? How could those be dealt with?
- Are there any dust specs or other bits of dirt that are causing distractions in the image?
If you have any questions or comments, please drop them in the comments. Otherwise I’ll see you next month!
[dave]
If you like what we’re doing we invite you to support the blog by purchasing our book that celebrates our first year A Year in the Life of Toy Photographers, 2017. The book is available for purchase as either an eBook or as a physical copy.
If you’ve made it this far, come continue the discussion over at our G+ community! And while you’re at it, subscribe to our weekly email round up so that you never miss a post!



Such a great post Dave! I adore that dust covered umbrella shot! I’m forever having to clean off unnoticed dust in post! Especially on black minifigure trousers!
Thanks Lizzi.
Dust is the bane of my existence. I even had to clean up dust from that dust umbrella shot 🙂
I find the Darth Vader minifig to be the worst for dust. I think part of the dark side of the force is a dust magnet 🙂
Another great post in this series Dave!
So often we hear the word distraction and think of things that distract us from taking photos of toy…ooh look, a butterfly!
But rarely do we think about the distractions that distract the viewer from the underlying message or story within our images. The tree growing out of the spaceman’s helmet is a wonderful example of how an overlooked detail can distract the viewer. I can’t stop looking at it now!
And don’t get me started on dust! You’re spot on (pun intended), Darth is horrible for attracting it!
heh, thanks Brett – glad you got some new insights out of this post 🙂
DUST!!! I can totally relate to that…especially when shooting black figures. Even after brushing the figure with a soft brush, the dust still shows up.
I also agree with you 100% about distraction. I may have spent 15 minutes getting everything right , but if I see any distraction, on or around the figure, I would gladly take a chance of everything falling apart just to get rid of that offending item.
heh, I hear ya. Nothing is worse than spending 15 minutes getting everything set up, balanced just so, then having to use a brush to remove a speck of dust and knocking it all over. So you start again get it all setup and balanced perfectly, then bam! more dust.
On the other hand, if you really want to become an expert at the clone tool and healing brush in Photoshop, shoot a black toy 🙂
A really insightful and educating read. Thank you for sharing.
I do put a lot of thought into my ideas, and I do try to remove any distractions when I’m setting up the shot. The environment is important to me, so I only ever move fallen leaves or branches, if the background is otherwise perfect. I’m not a big fan of using editing software. I’m a little bit old school in that I’d rather spend the hour setting up a shot and taking maybe 20-40 shots and choosing the one that I’m happiest with. I’m like that with building MOCs. I draw my ideas then build as I go instead of using LDD. For me LEGO has always been therapy and relaxing, an expression of my thoughts and ideas. I enjoy playing with the bricks outdoors and would rather spend the time outdoors recreating the shots in different locations instead of using photoshop. For me, lighting and the weather can be challenging. I have an idea and I know how I want it to turn out. But some days I’ll pack my bag, go to the national park or a beach, but the weather isn’t on my side on that day. There is always another day though and plenty more wet rainy days to come for us in Australia. I have a photo in my head that involves mud and and plants ? so I’m waiting for that day to shoot a new photo.
When I read about Dust, the first thing I thought about was not so much dust, but of photos of modular buildings or photos of mini cities where the tiles are not aligned or a brick or plate on the wall is out of alignment. I try not to get distracted, but I do, when I see the imperfections. I would never criticise or comment on an imperfection on a human. Flaws are to be embraced. But with LEGO buildings, I think I’m a bit of a perfectionist. The haunted house is different. It’s the photos of buildings where you notice the dust or sometimes finger prints on transparent parts. When I’m outdoors photographing, especially the new speed champions cars ( which I absolutely love the new releases ) I always take a cotton t-shirt to wipe any dust or fingerprints off first.
I’m now off to do my homework, looking at the last 10 photos I’ve shared. I’ve been on a creative break lately, but I’ll look at the last 10 photos in my camera too.
Thanks for your insightful comments!
I totally forgot about misplaced LEGO bricks – non straight hair pieces are another source of issues. I agree they can be distracting if they should be straight. I’ve had to do many a reshoot because a minifig hairpiece is off center, or a hand is askew in a way that looks odd.
It all just goes to show details matter a lot 🙂
…and those little bits of fibrous gunk! Where do they even come from? Clothes? Furnishings? Tiny synthetic aliens with scalp problems? For some reason I can see dust reasonably well, but miss those little strands. I’ve also found they are also a lot harder to hide in post processing than dust.
Thanks for the insightful post Dave.
I have become a master of cloning out my dogs stray hair from my shots. I am pretty sure that stuff is magic as it appears out of nowhere, and shows up like a shining beacon in my photos.