You’ve probable heard the term ‘depth of field’ or DoF thrown about a lot in respect to toy photography. If you’re not familiar with the term, it’s simply how much of the image, from front to back, that is in focus. The size of this plane of focus is determined by how big or small your aperture is.
If your camera has an adjustable aperture, the smaller the number (ie: 2.8 or 4.0 ) the larger the opening will be and less of the area in front of and behind your subject will be in focus. This is called a shallow depth of field. The larger the number (ie: 11 or 16) the smaller the opening will be and the more of the area in front of and behind your subject will be in focus.
Simply put: small number = small DoF, large number = larger DoF
If you’re capturing a landscape scene you will probably want to use a large aperture to maintain focus in a large area. But if you’re photographing on a macro / small scale you may want to use a small aperture and minimize what is in focus.
Why?
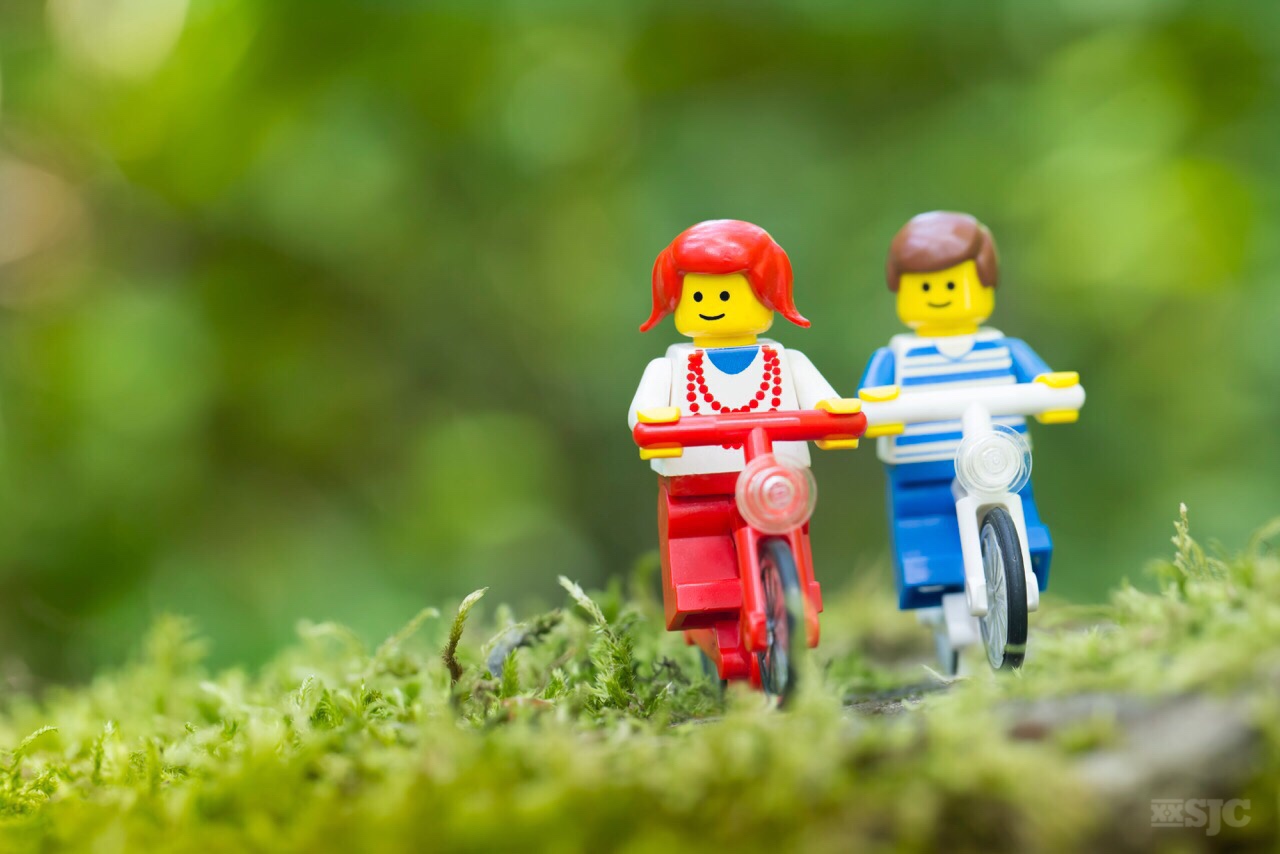
By keeping the background distractions minimal, you can keep your viewers attention on your subject. (For an excellent example please check out this handy before and after by FourBricksTall.) When you’re photographing small toys, they’re rarely in scale to their surroundings. A single blade of grass can distract from the illusion of reality that many toy photographers strive for.

In this case I liked the blades of grass and how they imply a relaxing bicycle ride through a summer forest.
Another advantage of a short DoF is that you can photograph nearly anywhere. In fact you can use the same (or similar) locations for many different photos, and no one will be the wiser. When you use a short DoF, your location can be nearly anywhere you can imagine. That patch of sand sure looks like Tatooine. That patch of moss and a couple of soft focus ferns bear a striking resemblance to Middle Earth. And I think we all know by now that a little baking powder and clever lighting can look an awful lot like Hoth.
If focus is critical, yet you like the effects created with a shallow DoF, try your hand at focus stacking. Simply put, focus stacking is taking one image several times with different areas in focus. You then combine them using your computer, the same way you might composite a HDR image. This clever trick allows you to control exactly what is and is not in focus. It also helps to extend the range of focus if you are working in low light situations and you aren’t able to photograph with a smaller aperture. If you’re interested in creating images utilizing these micro adjustments, you will need to add a sturdy trip-pod and possibly a focusing rail to your bag of tricks.
Another way to control your Depth of Field is to move your subject away from the background. You can create dreamy soft focus backdrops to your toys if your main subject is several feet away from the background. If you’re shooting with a mobile phone, you may have to make that hundreds of feet, but the effect is the same. If you still can’t get the blurred background of your dreams…there’s an app for that. Check out AfterFocus (available for both Android and iOS) With this handy little app you can create effects similar to what you would achieve with a DSLR camera. If you’re a short DoF fan like me, this little app is a great way to bring a big camera look to your mobile photos.

My favorite photo from last years summer vacation. Walking along the beach taking mobile phone photos while my daughter and Julochka (in the distance) were looking for rocks. I love the effect created by the distance between the two subjects.
As always there is no right or wrong way to create interesting toy photography. This series is here to help you understand the tools that you have at your disposal and to help you capture those amazing images that you want to make.
~ Shelly
Is there a specific technical subject your would like me to cover? Please leave your comments and questions below.




Amazing text Shelly! Really interesting. I don’t have any subject for this kind of post but any technical subject is appreciated and fun to read 🙂
Thank you Zao. If you think of anything let me know. In the mean time I will keep posting along the same lines.
Thank you for being a part of our community!
“Simply put: small number = small DoF, large number = larger DoF”
This is the BEST explanation I have ever read! So simple, so understandable. instead of “Higher nr- smaller opening, lower nr-bigger opening”..sounds so complicated. Thank you, thank you
Thank you Stefan! I appreciate the kind words. In the interest of full disclosure I did not come up with that brilliant synopsis. I have added a link to the original article. If you read text like the one you quoted, I can see why people have a hard time understanding the principle. Also a lot of tech people will through in ISO at the same time, which just muddles the whole concept. We will save that for another post. Happy shooting!!
I doff my hat to you for this wonderful DoF explanation . 😀
Thank you Brett, Im trying to keep this as simple as possible. I think tech talk is a red herring, I would rather talk about content, intent and conceptual topics, but our audience seems to respond well to these posts, so I will keep writing them. I would love to see the caliber of toy photography keep getting better and better! 🙂
Great tutorial!
You really helped me.
Depth of Field is something amazing.
I have a request for a post.
If it is possible, it will help me a tutorial about a good camera and a list of objectives; I’m going to change my camera from a old Fujifilm to a Canon.
The details of the camera are:
> Canon E0S 700D + EF18 – 55IS STM
What do you think about it?
Ok, Its not my forte, but I will give it a go. As always, I am going to assume you will do your own research and this will only be one more opinion you will add into the mix. Look for it this weekend or top of the week.:D
Ok, thank you so much!
You are awesome. 😉
wilderbricks,
I would just drop a note here to say that any of the Nikon or Canon (these are what I am familiar with though there are other brands too) are decent starter cameras. I have been using an entry level Nikon (d3300) for about a year and it has been great as far as picture quality and for teaching what I will want in an upgrade. Remember though, ultimately it is the photographer that makes the photograph. Equipment will have an effect up to a certain point, but it’s your creative vision that wins the day.