I love taking toy photos with my Sony / Lensbaby set up, but every now and again I want to use my phone. It’s convenient, I have it with me, and the workflow from photo to posting is quick and easy. But I’m also addicted to my Lensbaby lenses and their fun bokeh. Will I ever find a good match between style and convenience?
When Apexel Photo reached out to ask if we wanted to review their 100mm macro lens I new this was a no brainer. I said yes! But rather than only my photos, I asked Chellie H and Sabrina P to give me a hand with the review. If we’re going to put this lens through its paces, I wanted to see different viewpoints and styles. This is more reflective of the many styles I see in our community.
Why do you need a lens that can get super close to your subject?
The more I step into the realm of storytelling or image series, I realize the need to create images with variety. In visual storytelling it’s helpful to give your viewers a range of viewpoints on the subject. This way they can be visually and emotionally entertained. Fill the Frame and Only Details are two challenges that everyone struggles with. While these type of photos create visual interest they’re not that easy to capture. You simply cant get that close to your subject with a large 100mm macro lens on a full size camera.
My hope is that a lens like the Apexel 100mm macro lens for a phone will solve the problem. While I’m a huge fan of the Laowa Probe lens for this reason, the price tag for the Apexel is easier on the wallet.
Once I figured out what the main lens is on my phone I had attached the lens and I was off. Since I mainly photograph my scenes outdoors I concentrated my test photos on outdoor scenes.
I had a great time playing with this slip on macro lens. Now let’s take a look at what our reviewers discovered as they tested out the Apex 100mm Macro Lens.
Chellie Hyre
I often find small LEGO sets challenging to photograph. My “normal” toy photography setup is a Canon R6 and 35 mm f/1.8 macro lens. With a minimum focus distance of 6.7” and a wide field of view, it’s a great lens for toy photography. But for small LEGO sets I often need to build out the set or add a background to create a “complete” scene. Additionally, if I want close-up or detail images, I need to crop or alternatively, use my iPhone, which means sacrificing the shallow depth of field I can get with my 35 mm lens. I hoped the Apexel 100 mm macro lens, with its small field of view and shallow depth of field, could help overcome these limitations. So I pulled out a few small LEGO sets for the test photos.
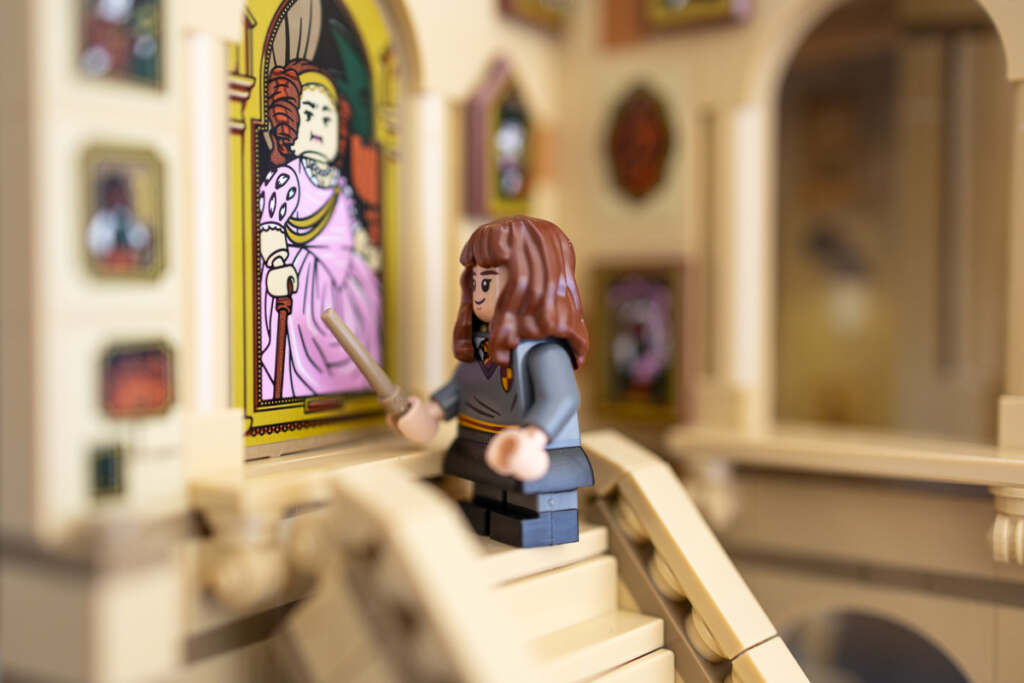
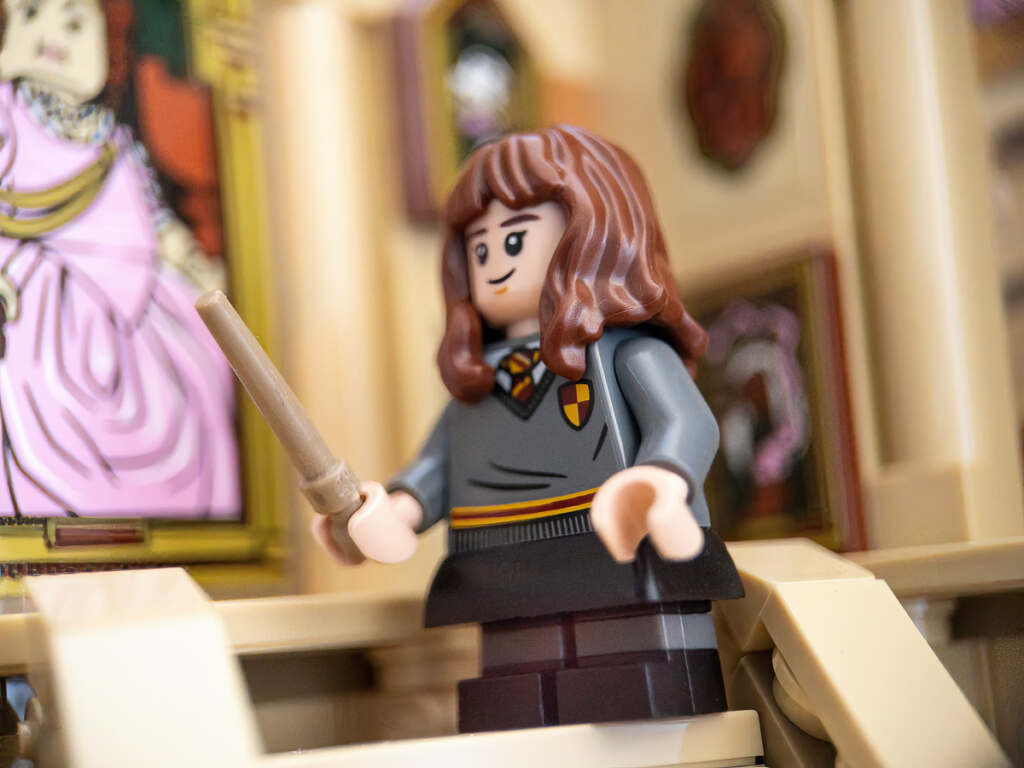
First up was the Harry Potter “Hogwarts: Grand Staircase” set (40577). I used my 35 mm lens and the Apexel lens to demonstrate the difference in field of view. Both images were successful, and I appreciate how the Apexel lens really draws attention to Hermione.
The phone holder is very sturdy and comfortable to grip. It attaches quickly and easily and does not interfere with the phone buttons. I did have to remove my phone case because it has a ring stand (otherwise the phone holder would easily have fit over my case). The macro lens was also easy to attach and align with the phone’s main lens, and it nearly always stayed in place (the one time it didn’t was due to operator error).
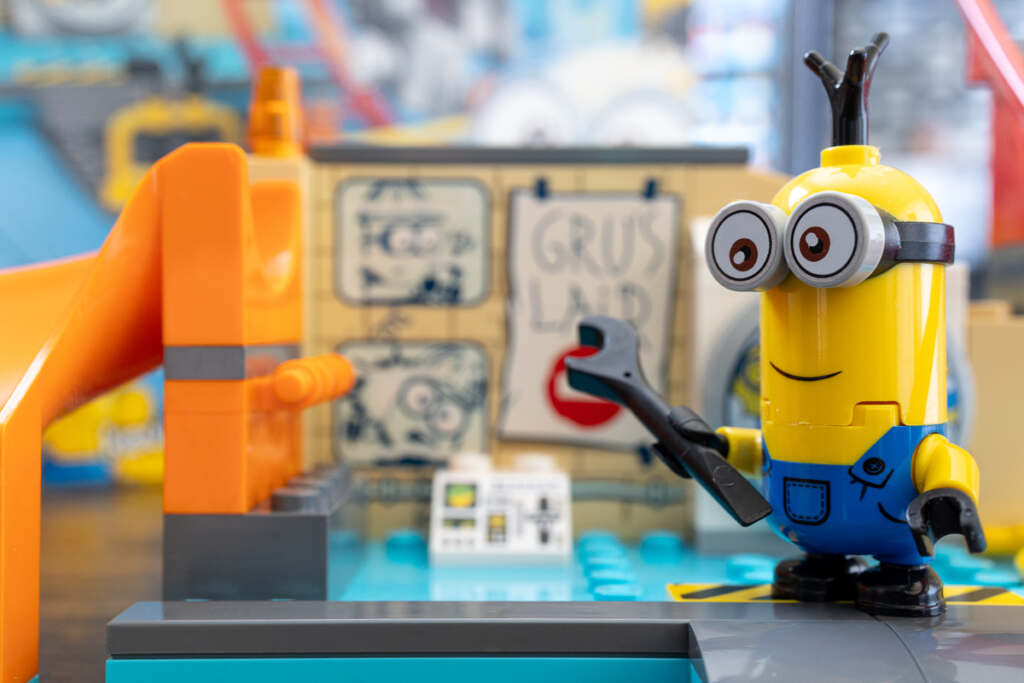
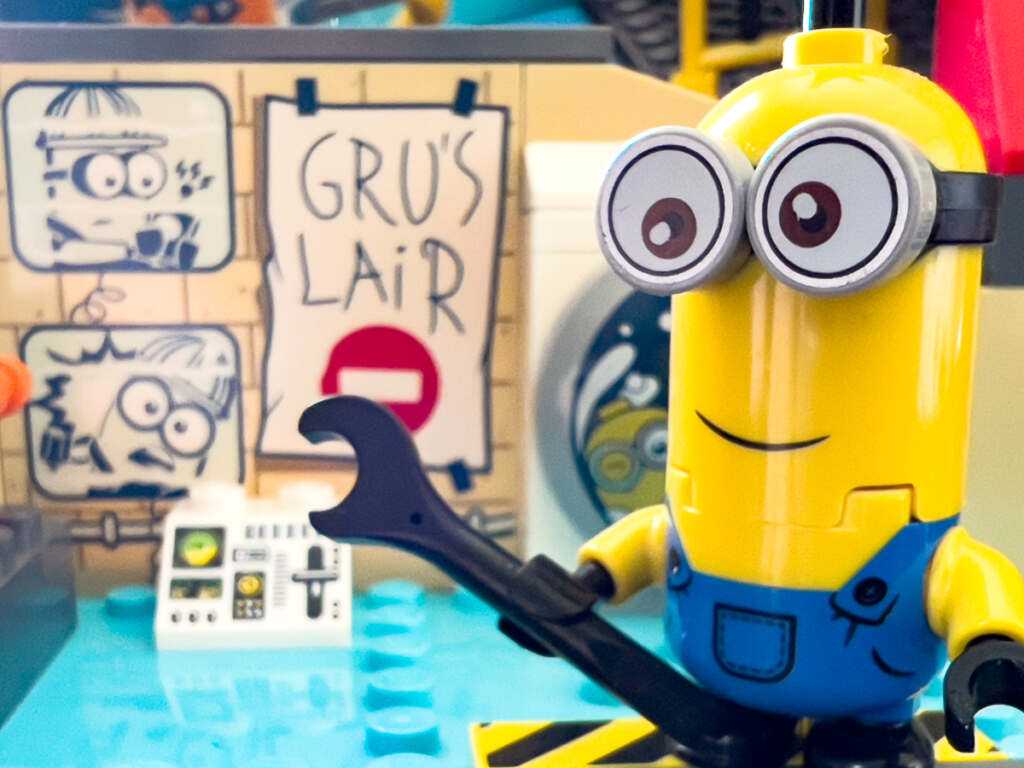
Next up for testing was the “Minions in Gru’s Lab” set (75546). I used the 35 mm lens, the native iPhone camera in macro mode, and the Apexel lens.

I was generally able to use the autofocus on my native phone camera. But occasionally the phone camera would “hunt” for focus, even when I selected the area I wanted in focus. In those cases, I switched to the Lightroom Mobile camera, which allowed more precise manual focus. Due to the narrow focus distance (1.57 to 2.75 inches), I tended to get better results using a tripod or flexible (gooseneck) clamp mount when taking the macro photos. On the kit I received, the tripod mounting port is located on the opposite end of the phone holder from the camera lens. When I photograph toys with my phone, I often position it with the lens closest to the ground. So using a tripod or gooseneck was awkward or not possible for some of my setups. The Apexel website shows other kits (like the HB100CPL) that appear to have a phone holder with the tripod mount port on the same end as the camera lens.
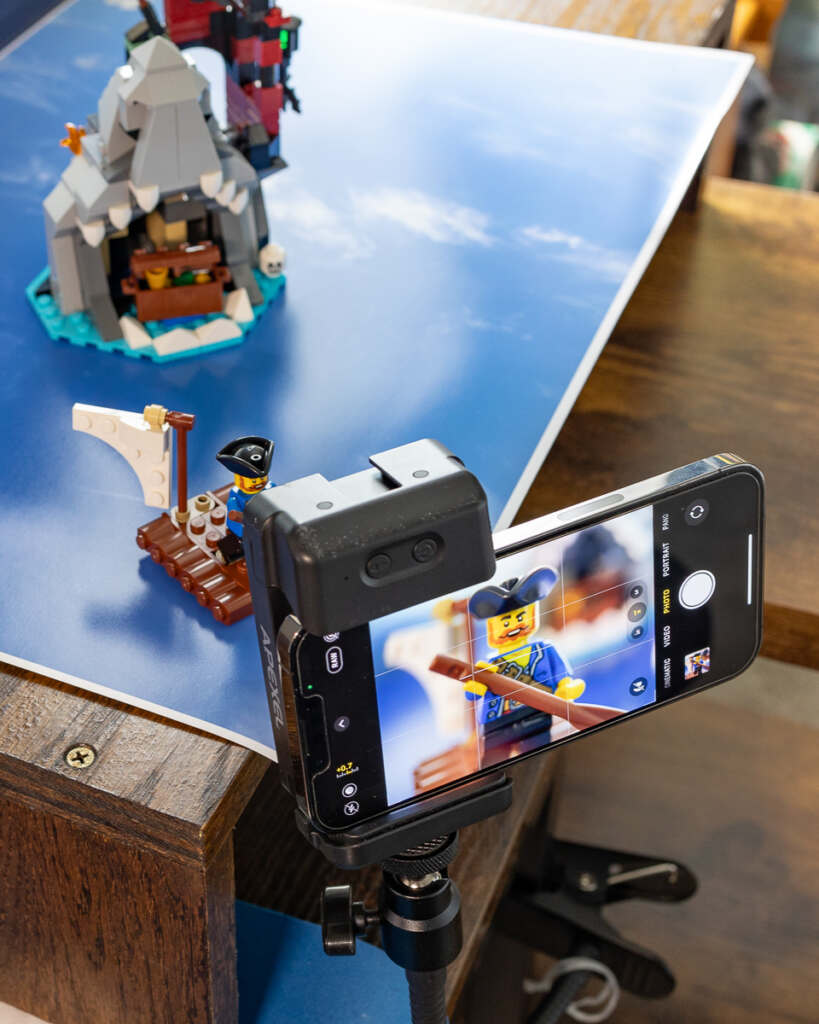
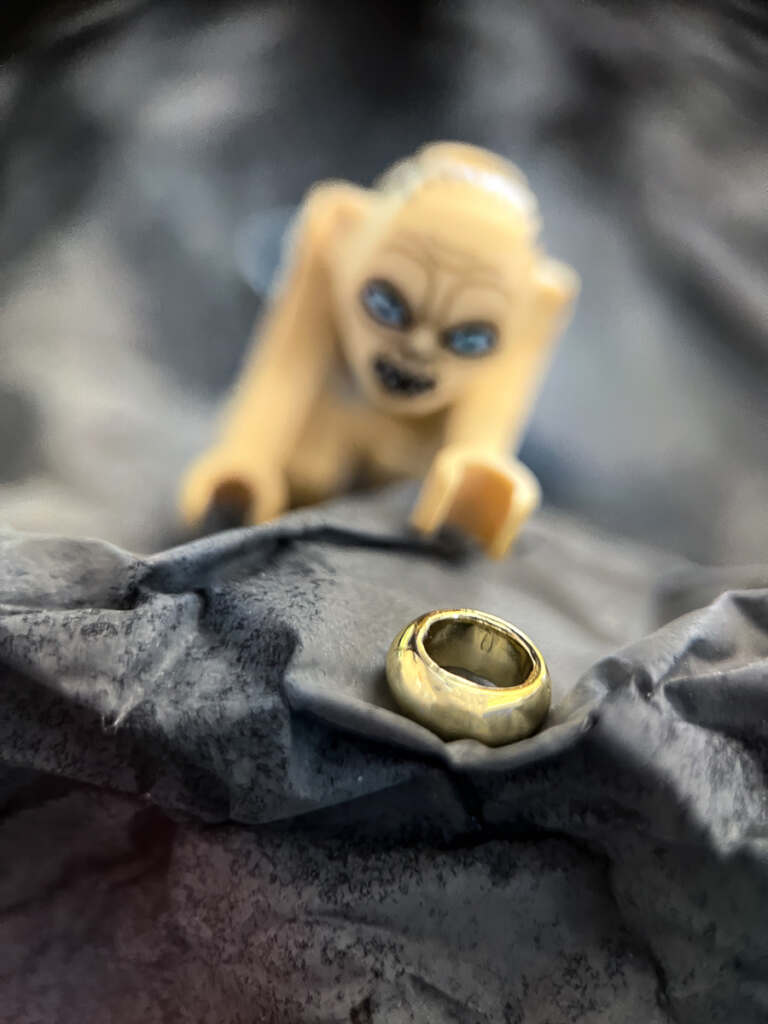
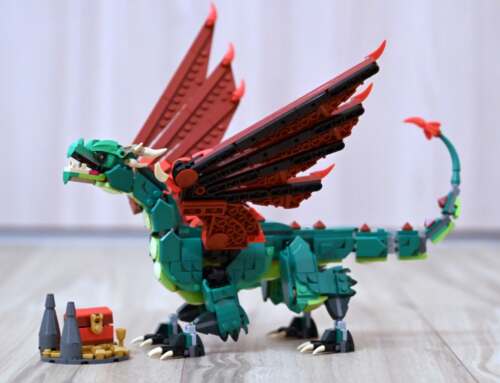
On to the third set – “Scary Pirate Island” (40597). I photographed this with the Apexel lens and absolutely loved the resulting image quality and bokeh. But the island with its awesome shark-mouth cave and treasure chest is sadly unrecognizable. A series of images created with various lenses would work better to tell this story. I included a setup photo to show how close I was to the pirate raft.

The kit I received (FL23HB100) had a built-in fill (ring) light. I found it too direct and too bright, even at the lowest setting. Perhaps it is more useful in outdoor settings?
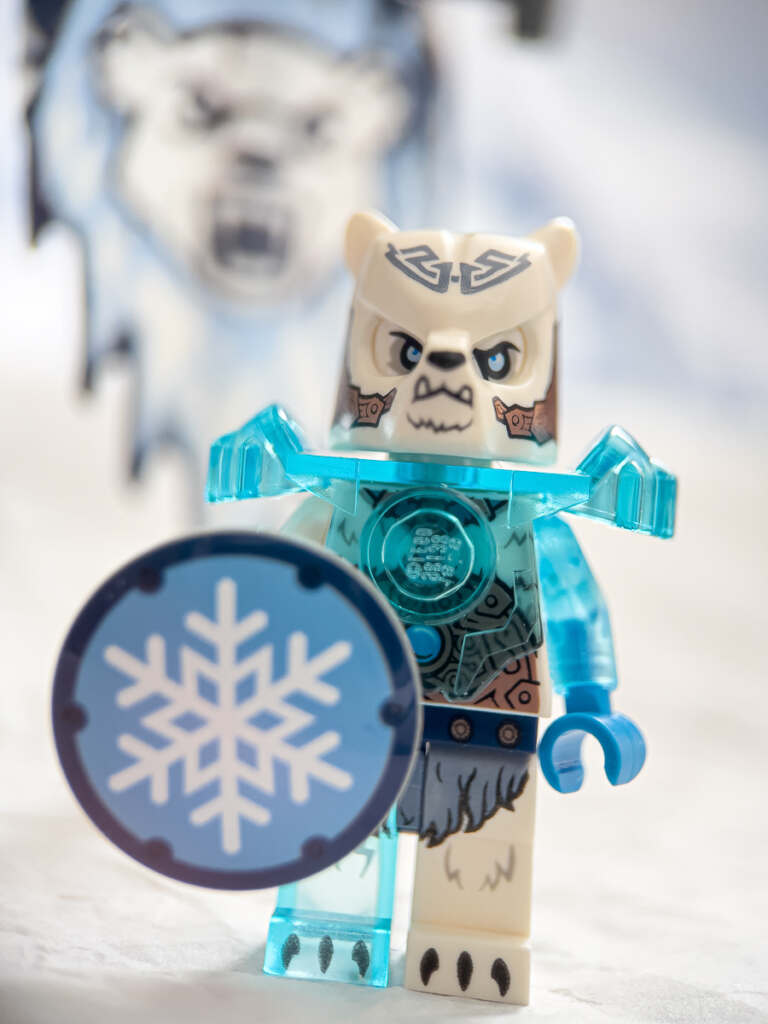
With three small LEGO sets under my belt, I decided to try out a couple other things. Like minifigure portraits …
and smaller subjects …
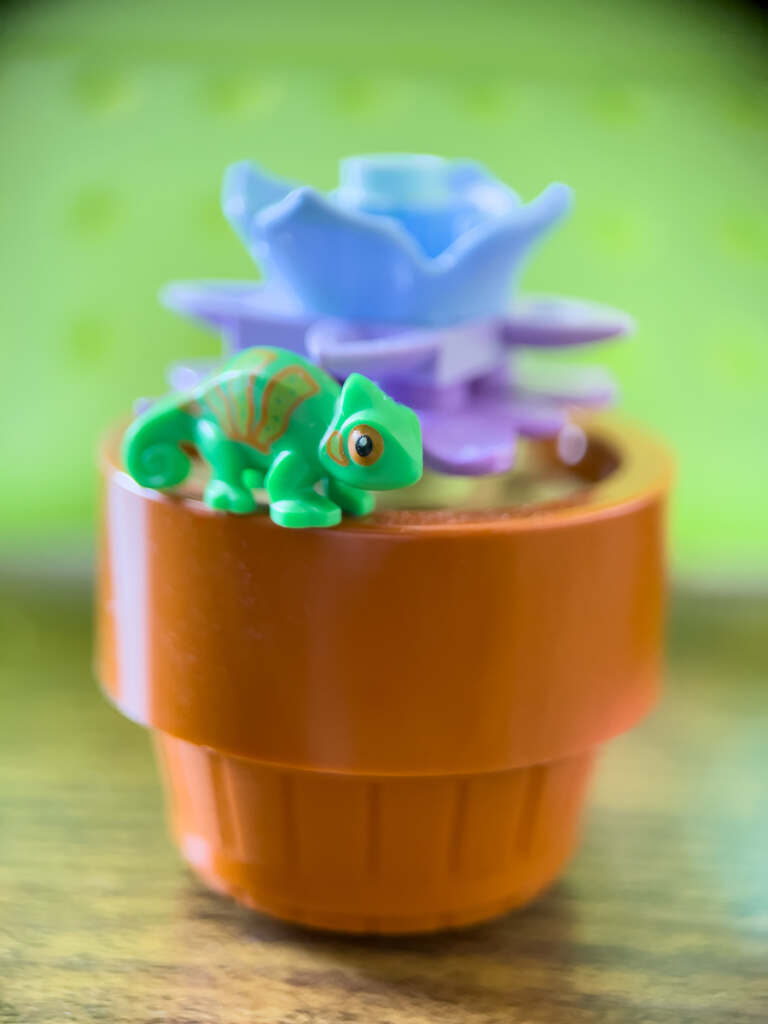

At this point, I probably had enough images for my review. But the more I played with it, the more I really loved this little lens. So here are a few more images:
This is definitely a lens I want in my tool kit. Compared with my 35 mm macro lens and my iPhone’s built-in macro lens, the Apexel 100 mm macro lens is hard to beat when you want to focus on a specific element. And although I often enjoy creating complete setups, I admit it was nice to not to have to overthink backgrounds and scenery. And most importantly, for the price, the image quality (sharpness, color, contrast, etc.) and bokeh are quite good.
Some photographers don’t want add-on phone lenses because it’s another “thing” to carry. But I am using my phone as a camera much more often than I used to, for toy and non-toy photos. If I am going out for a toy photo session, I’m already carrying stuff – toys, supports, bounce cards, and more. The Apexel 100 mm macro lens kit is small and light and is an easily justified addition to my pack. Because I don’t envision using the ring light and prefer the phone holder with the tripod mount port on the same side as the phone lens, I’ll likely be purchasing the HB100CPL kit. I only had time to try out indoor setups but I am looking forward to trying out this awesome little lens outdoors also.
A note on the editing I used for the images in this review – they are all full-frame, uncropped images. I did make some minor adjustments to exposure, white balance, and contrast because I photographed in RAW and used auto exposure settings and existing light. I also had to do some dust removal because the macro lenses reveal all sorts of things LOL. Obviously, editing is personal prevalence and you could easily use the photos taken with the Apexel 100 mm macro lens with no editing at all.
Sabrina Perry
When I first started toy photography I only used my phone to take my toy photos. In the beginning most of my photos were of two minifigures in a specific location posing for the camera. It was a way to re-create my life in LEGO and using my cellphone camera was good enough for me. There were photos and movie scenes I wanted to recreate that just wasn’t possible with my cellphone. I just couldn’t get close enough. You always have to shoot wide. I tried anyway. My reasoning, I truly believe that the best tool for the job is the one you have with you. And, I always have my phone with me. That kind of mentality forces you to be more creative, to think outside of the box. It also forces you to make decisions on what type of photos and stories you can tell.
I could have carried my DSLR around, but it was just too heavy and I was tired of carrying it around after years of sports photography. So, when I started toy photography I didn’t. And I never thought to use it. Years went by and my reason for taking toy photos change. The photos I wanted to take changed. The stories I wanted to tell changed. And the way I took toy photos changed. I remembered, I have an actual DSLR camera. That I left on the shelf because it was just to big and heavy to carry with me all the time for the toy photography.
I thought maybe I should use my Nikon DSLR. Maybe, I should carry it around with me. Instead, I decided to buy a smaller Fujifilm mirrorless camera and a new lighter lens. Crazy, I know switching systems. In order to justify the purchase, I said to myself I will only use this set up for toy photography and since that day I never looked back.
Today, I am happy to report that because of this Apexel 100mm lens I just might choose my cellphone more as the tool I have with me. The tools I normally have with me the Fujifilm XT-20 with a 35mm lens, and often a Meike MK-F AF3 10mm macro extension tube. So, in my portion of the review I compared the Apexel 100mm lens attached to my iPhone for comparison. Like, Chellie I thought to myself what kind of photos would I use a dedicated “macro” lens for. I decided I’d use the Apexel set up with photos I’d decide to add the extension tube for. As a note, I bought an extension tube set because I don’t have enough money to spend on an actual Macro lens.
For me, I often add a macro extension tube for photos where I want to get closer to the subject.Lately, I’ve been trying to make my toy photography feel more like movie stills, or street photography. When I was using this lens, Apexel on my iPhone I was imaging that I was a minifig doing close up street photography or a director wanting to get a close up of the actor. Those kinds of shots feels more intimate. Like, we are getting a close up to the action. Which can be hard using my “smaller” big camera set up. Apexel 100mm lens solves all that.
Like Chellie, I wanted to use small mini sets, as I could never really get that close to the LEGO with my camera and your phone and the Apexel attached certainly will.
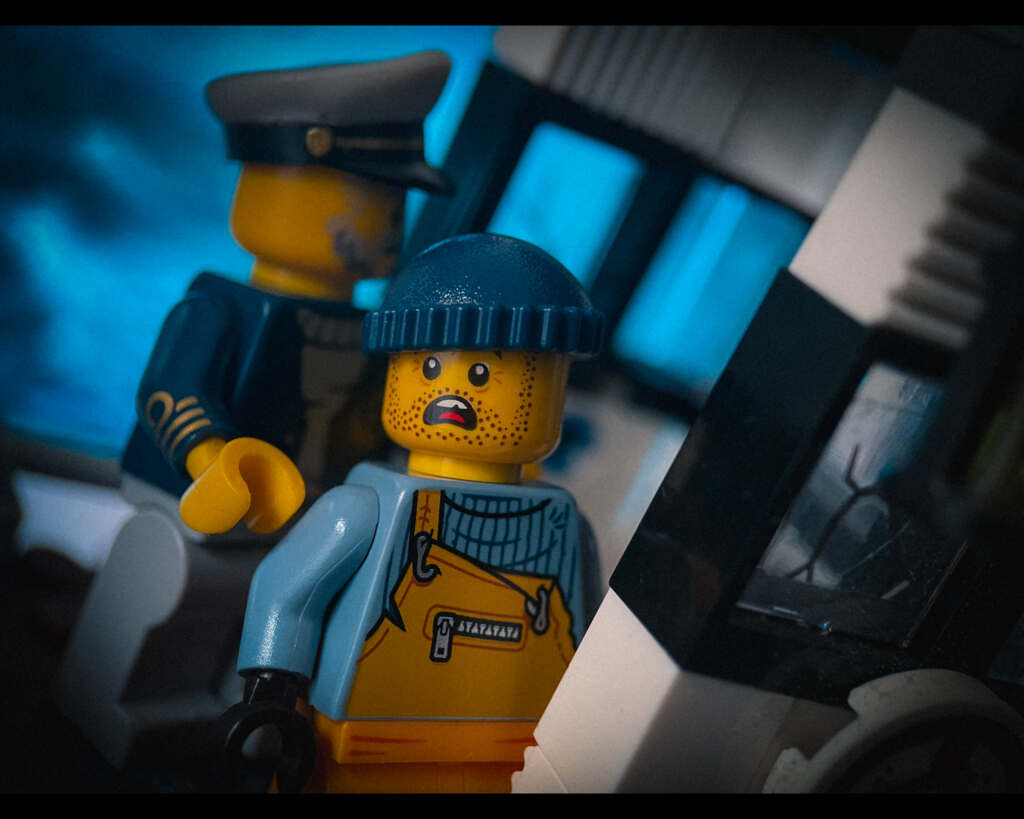
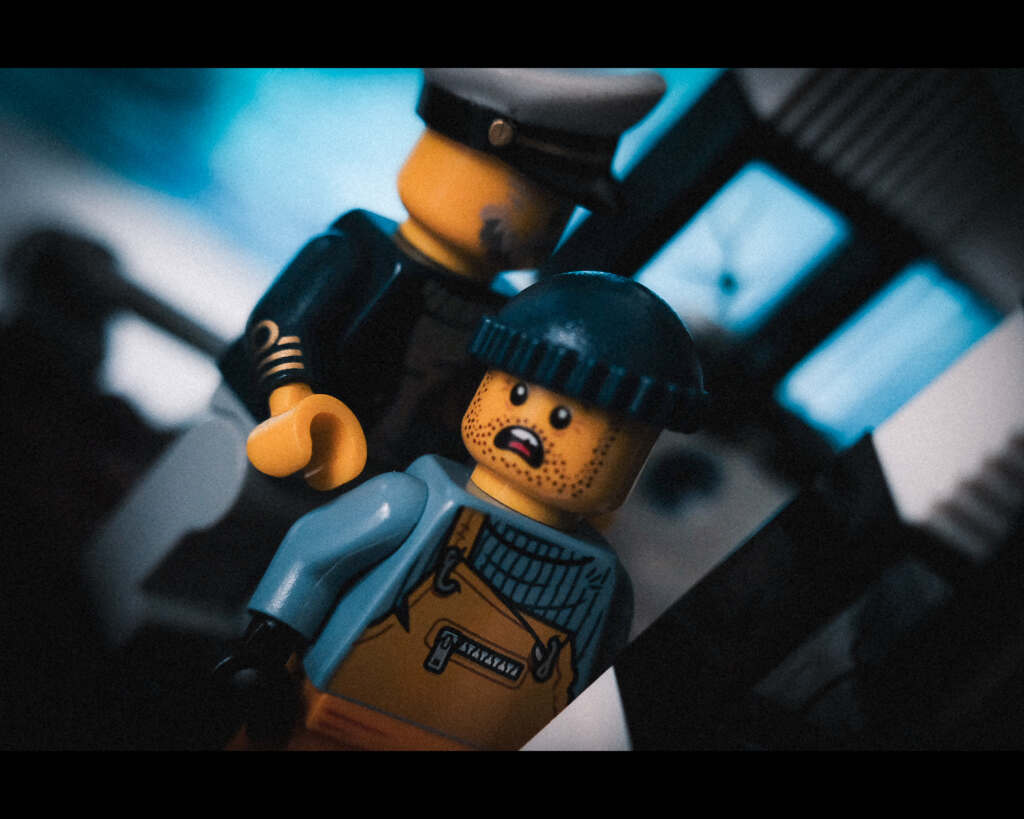
For these two in a storm shots, I wanted to show you how you can take nearly the exact same photo with your iPhone and this lens as you can with a Mirrorless camera. Now, that I have the option to use my iPhone for these types of shots. It feels like I can tell thousands of more stories. Just because my phone can fit into way smaller spaces. And it can even fit in between those small spaces within a LEGO mini build. Now, I did edit both these photos in Lightroom to get the colors to match more for comparison.
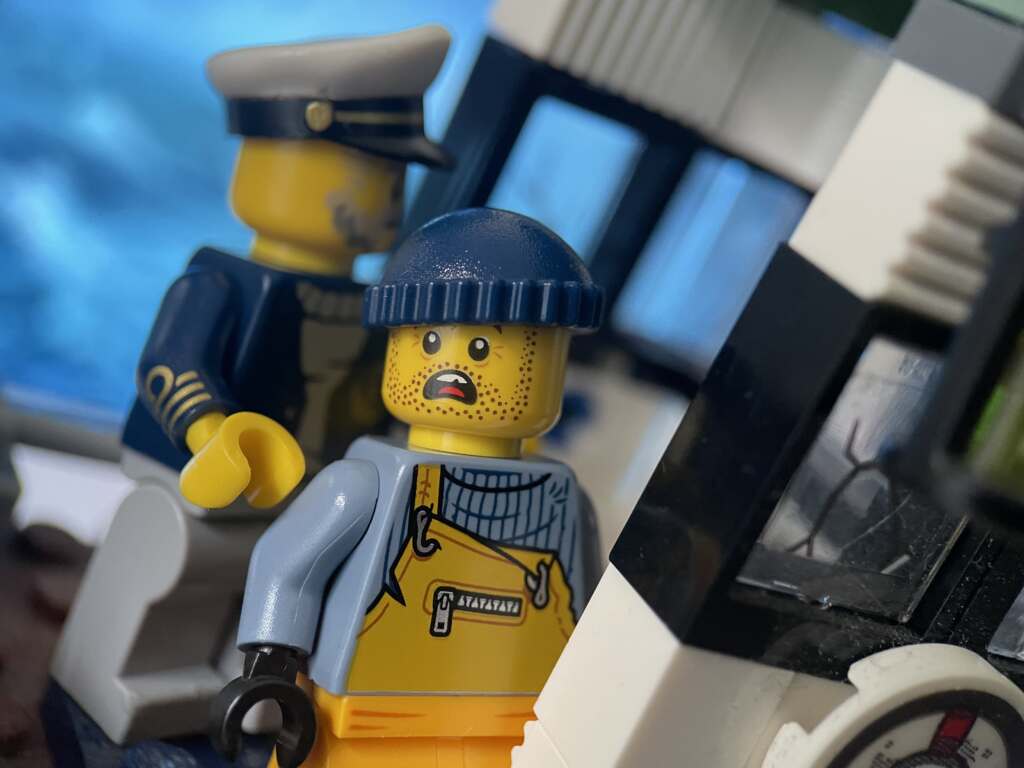
Here’s the photo from the iPhone with no editing at all. I would post this photo on my Instagram no problem. But, I did want to edit the photo as if they were in a storm, and a sea creature was chasing them and for that I thought I should add some dramatic lighting.
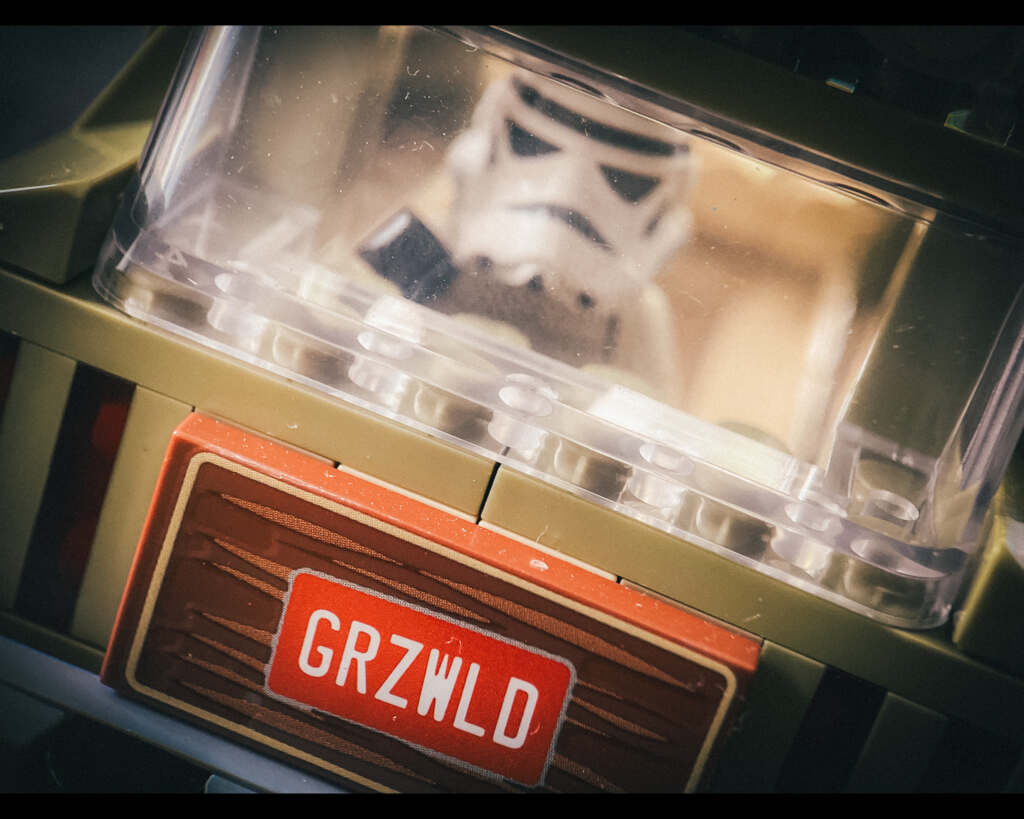
I am a big fan of shooting through windows. I just think that photos like that are so cool. But, shooting through a window always comes with challenges. One of those is glare, and getting the right focus. Here’s a photo of a storm trooper waving goodbye on a family vacation. It’s a white LEGO minifig, a clear plastic LEGO and one light source. In general this is a hard photo to take. Simply, because you just can get so many reflections in all the wrong places. The light bounces everywhere and can throw off the look you are going for. You might even see yourself in the mirror or your own shadow. In order to truly test the APEXEL 100mm lens and my iPhone I thought I’d recreate my Storm Trooper Family Vacation shot I took a week before I got the kit in the mail.
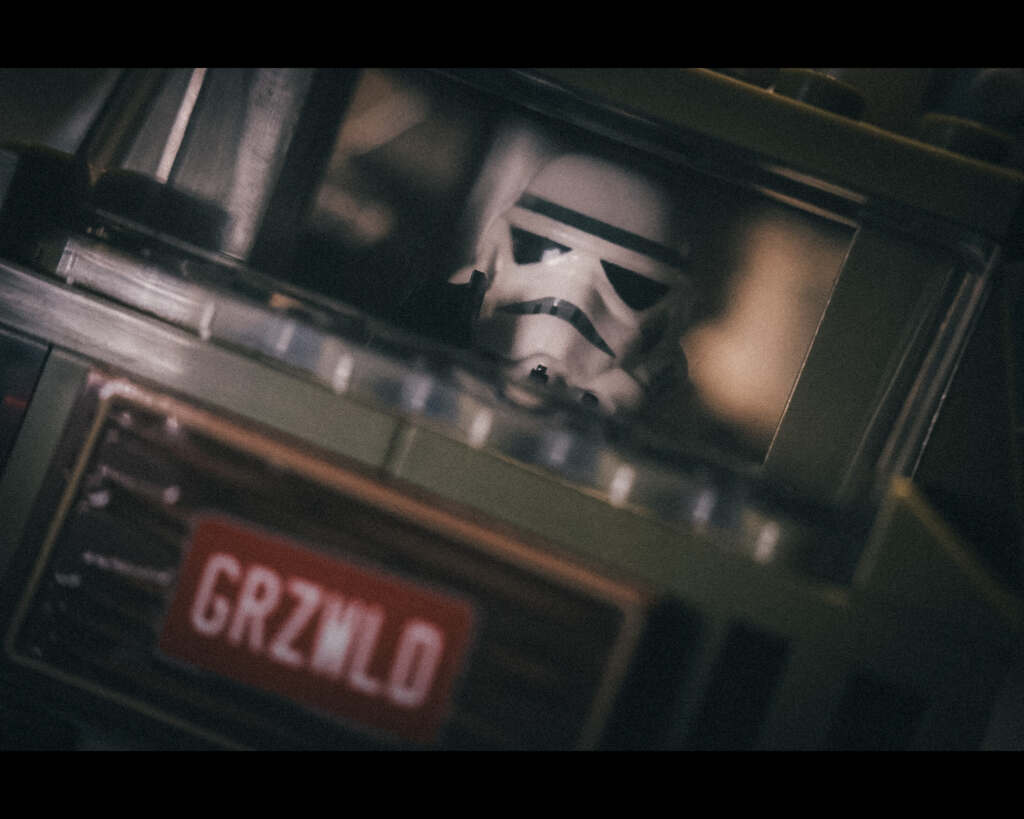
When, I took the original photo with my regular set up, I had so many problems with glare, lighting and reflections. I also had to manually focus on the Storm Trooper inside the car. Which, I don’t typically use as most of my shots I am able to use auto focus on. I thought this would be a good photo to try with the APEXEL 100mm and my iPhone for those reasons. Below is my attempt to do so.
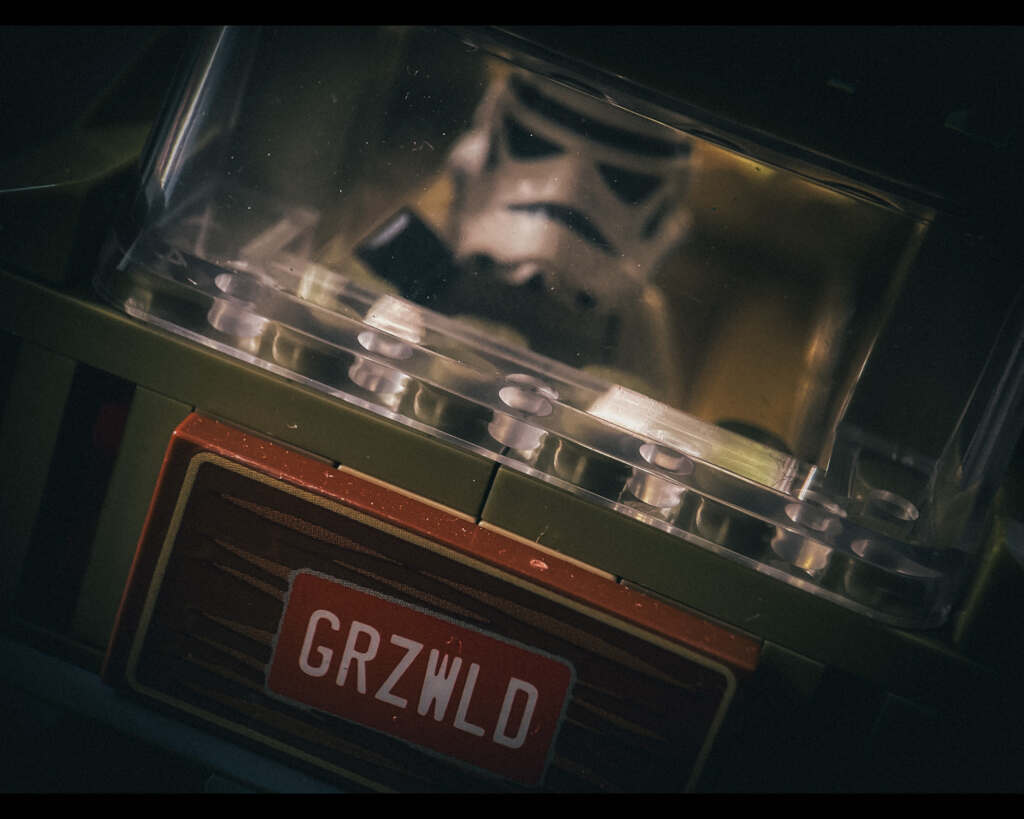
With the APEXEL 100mm lens and my iPhone I was able to get the same angle as the original. But, I had a hard time getting the camera to focus on what I wanted which was the Strom Trooper in the car. However, I do think that focusing on the GRZWLD plate works for this photo also, as it feels like someone in the car behind tried to get a picture of a Storm Trooper missed slightly as the car in front sped away. Unintentional mistakes make great photos to. It’s about perspective and this combo can get you some very interesting perspectives you just can’t achieve with your DSLR/Mirrorless cameras.
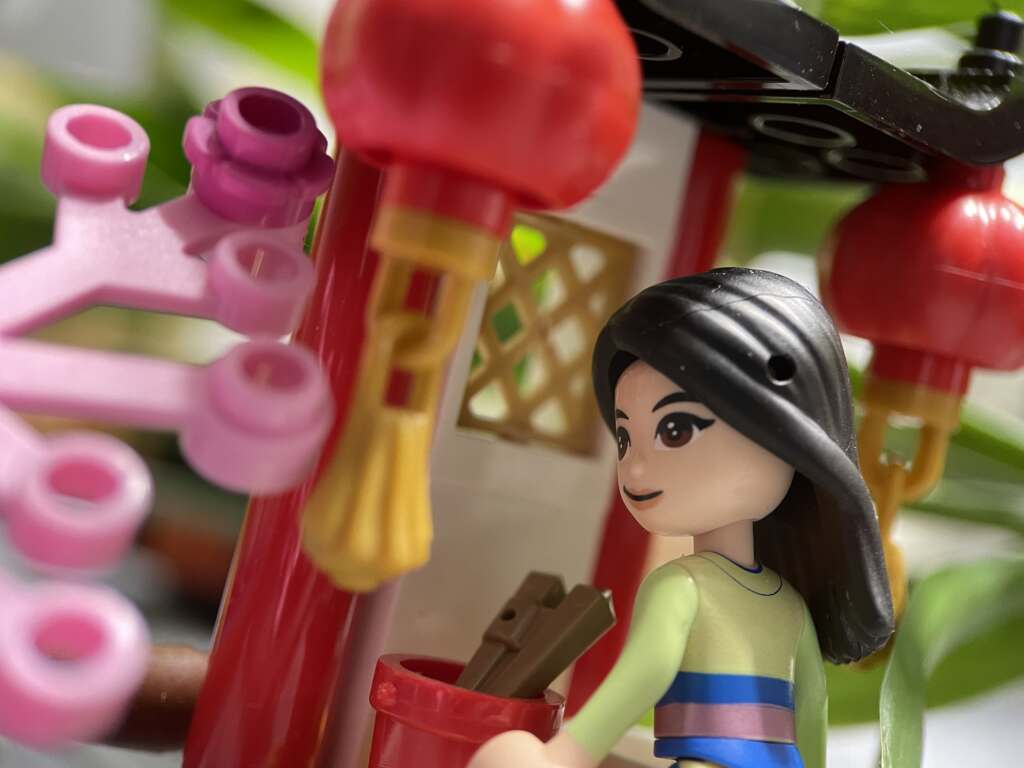
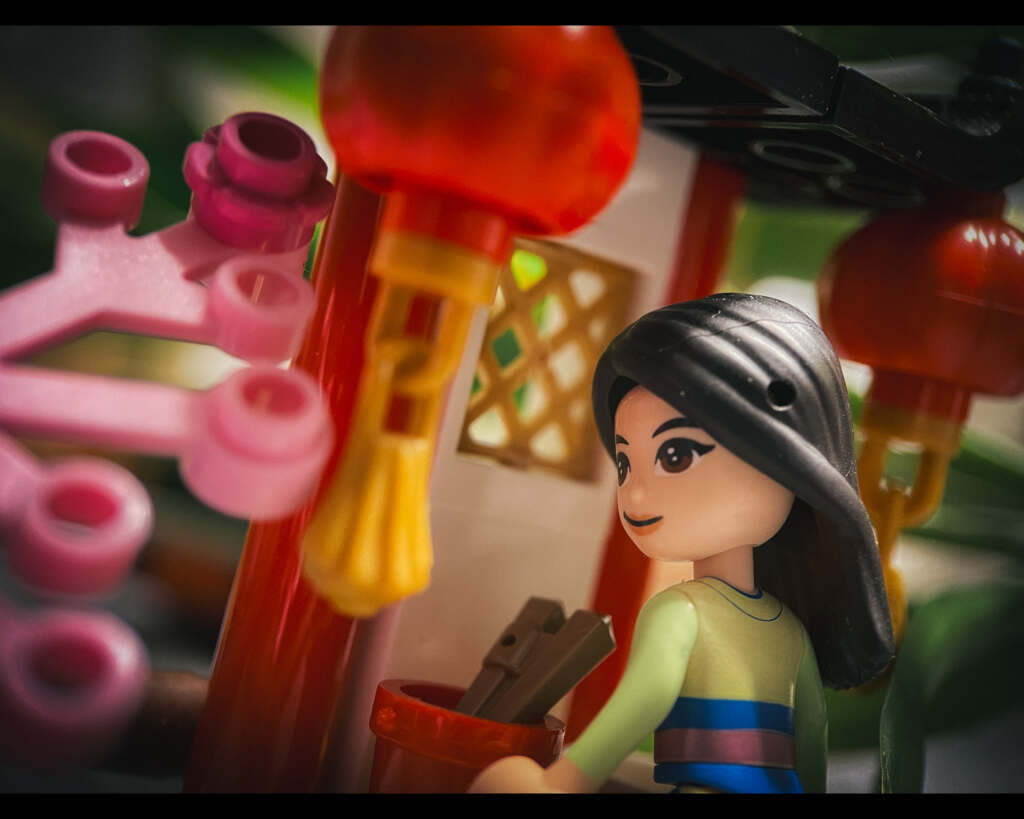
For this next shot, I thought I’d photograph a LEGO Disney Princess set. This is because in the past I had trouble making this mini set look realistic with my normal set up. LEGO sets are small and this is one really small set. I’ve never used it in a photo I’ve posted on Instagram for this reason, the photos I took just never worked. This one I got with the Apexel 100mm lens does. This feels like a tourist taking a photo of a local visiting their family shrine. And, I like it. Finally, I can take photos of this set and get results I want. All from my iPhone and the Apexel lens attachment.
Side note -While I was taking these shots I realized that I really have to dust my toys. Or at least if I am using my phone and the Apexel combo I really need to dust first because it really can see all of your toys flaws. This isn’t a criticism but more like an I am impressed. And now I have to find a better way to clean my LEGO if this is a setup I will use more.
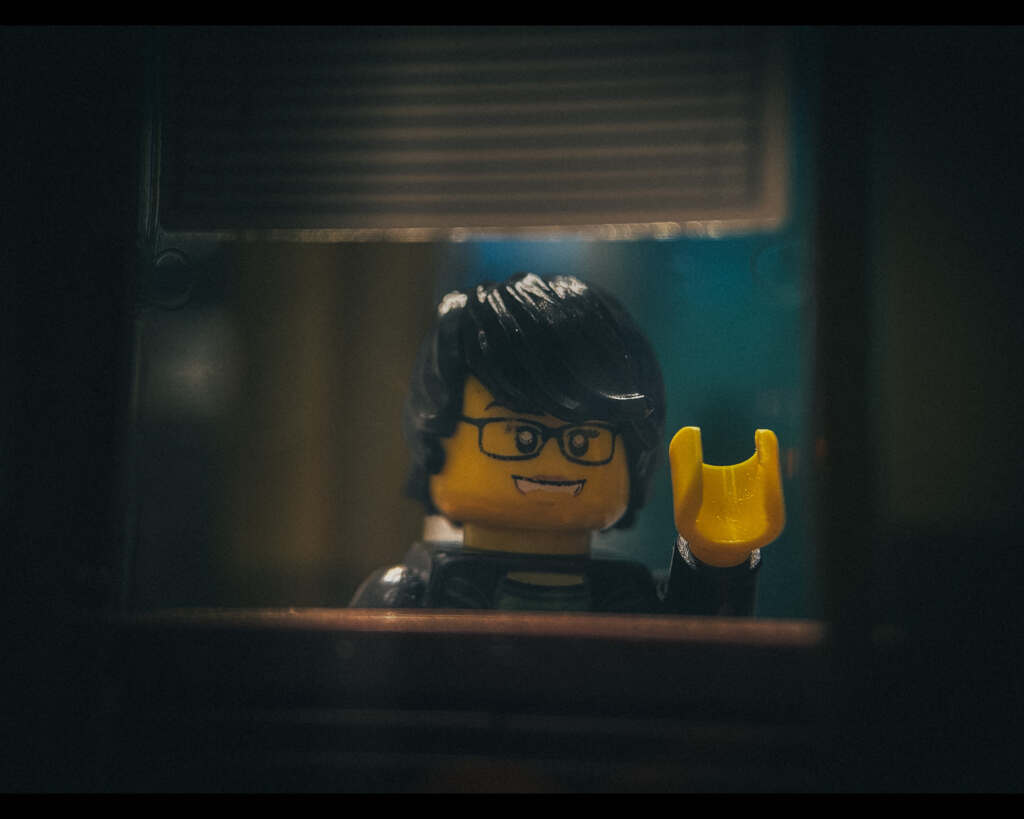
Lastly, I couldn’t properly review this lens camera combo without using this LEGO set and of course my Mini. I use these two items a lot. This window is part of the LEGO FRIENDS TV show set. It’s the small attached hallway. I use it for window shots because it’s one of the only LEGO windows my camera is small enough to get to. I didn’t have a lot of time to try other windows. But, now that I have this set up I will be trying to see if this set up fits in my Hogwarts set, in the LEGO Hospital and many more.
The beat laid plans…
I won’t lie to you, when I got this lens kit and just did not have time to take a lot of photos. It was a case of having more ideas than time. However, my grandma turned 90, I spent a majority of the time I had this lens preparing a slide show for her birthday party that had 500 photos in it. Her party was two days ago. Yesterday, I came home from hanging out with my family from out of town, to sit and write this. After, I finish this I am taking my cousin to the airport. Life happened. The point is while, I didn’t get to take a lot of photos before I wrote this I can already see what I like and don’t like about this set up.
The APEXEL 100mm lens is small, light and once you figure out which lens is the one it’s supposed to cover on your phone it works great. It’s convenient, inexpensive and has a lot to offer. The downside is I have to take my case off when I am using it. The plus side that when the lens case is on it is easy to hold and is quite sturdy. I like the ease of it. While, I do carry my camera everywhere I go I don’t always have it out. When, I reach into my backpack, I might just reach in for this APEXEL 100mm lens kit to attach to my phone instead. This won’t replace my camera lens, and occasionally extension tube set up. But, another go to because every photo I took with it I was incredibly happy with. Now, that I have this in my tool kit more possibilities have opened up. And now, that I have more time I will be able to try them all. To me the Apexel 100mm lens is worth the money especially if you don’t want to spend a lot on a macro lens which is why I use extension tubes.
Shout out to my grandma who let me mail this lens kit to her house. As the first time they tried to send it to me, they couldn’t find my mailbox. Happy 90th Lola (grandma in Filipino) I wouldn’t have been able to do this review without you. Well, I am off to the airport. And then more toy photos of course.
Conclusion
Thank you for reading our review of the Apexel 100mm macro lens. By having two different photographers with different approaches review, I hope that you will have enough information to make an informed choice for your own kit. If you’re interested in adding it to your photography now is a great time. You can receive a 15% discount when ordered from Amazon until July 5th (code = amztoyphoto). Or ordered the lens directly from Apexel and receive 15% discount anytime when you use the code toyphoto15 (Link)
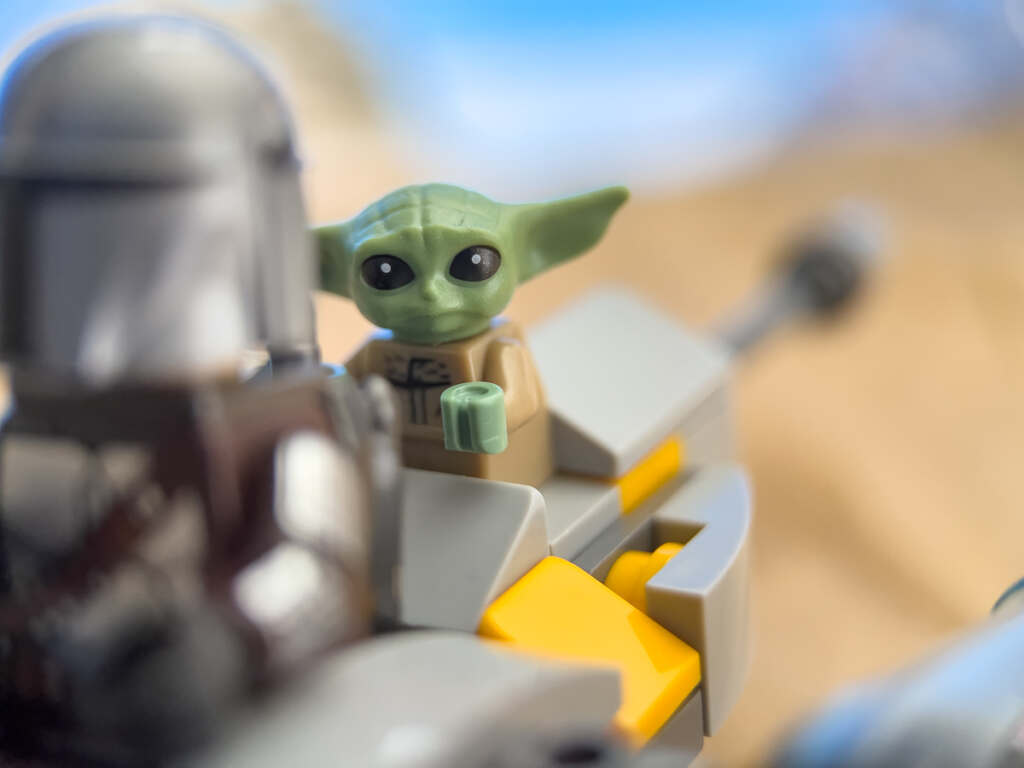
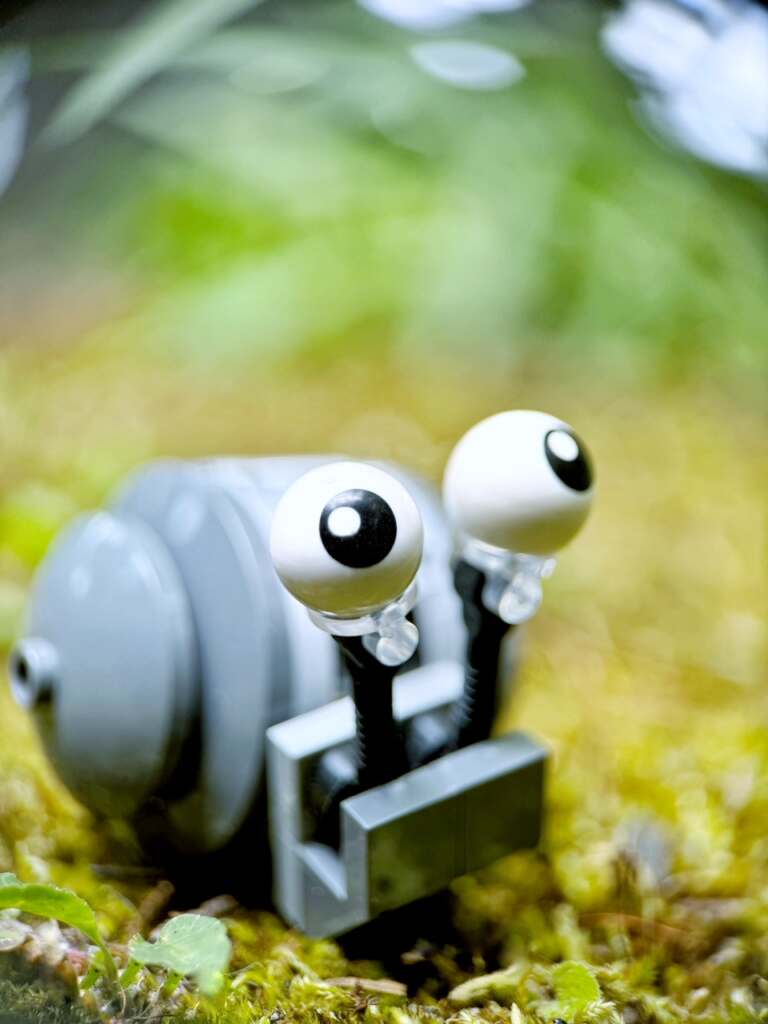
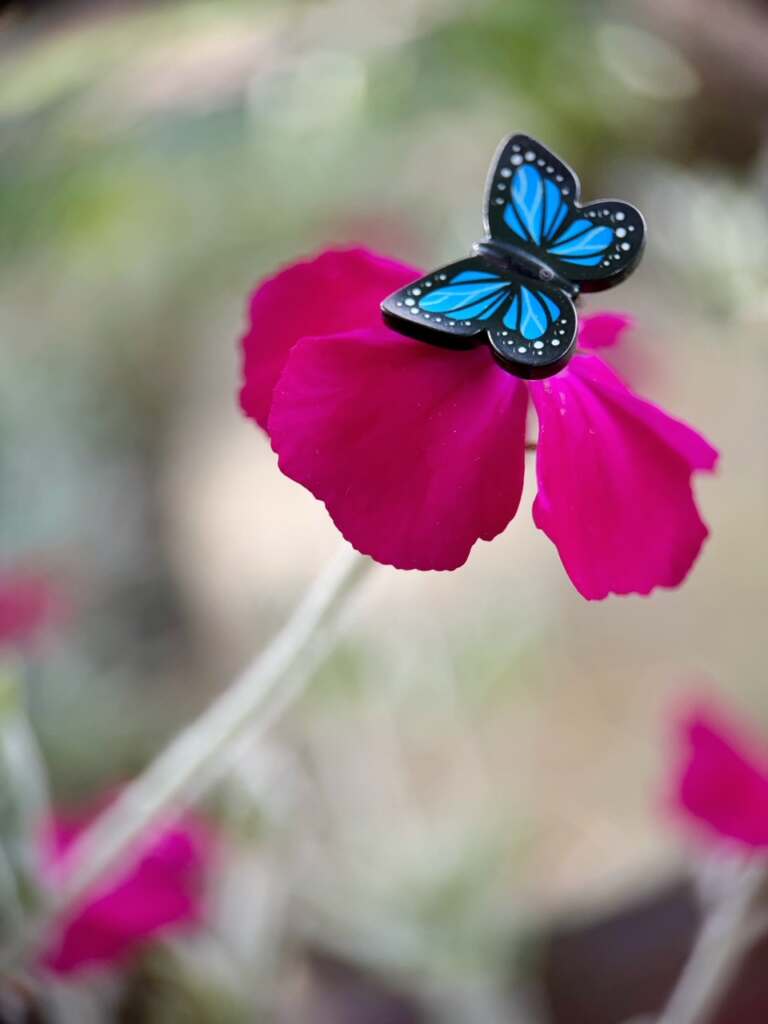
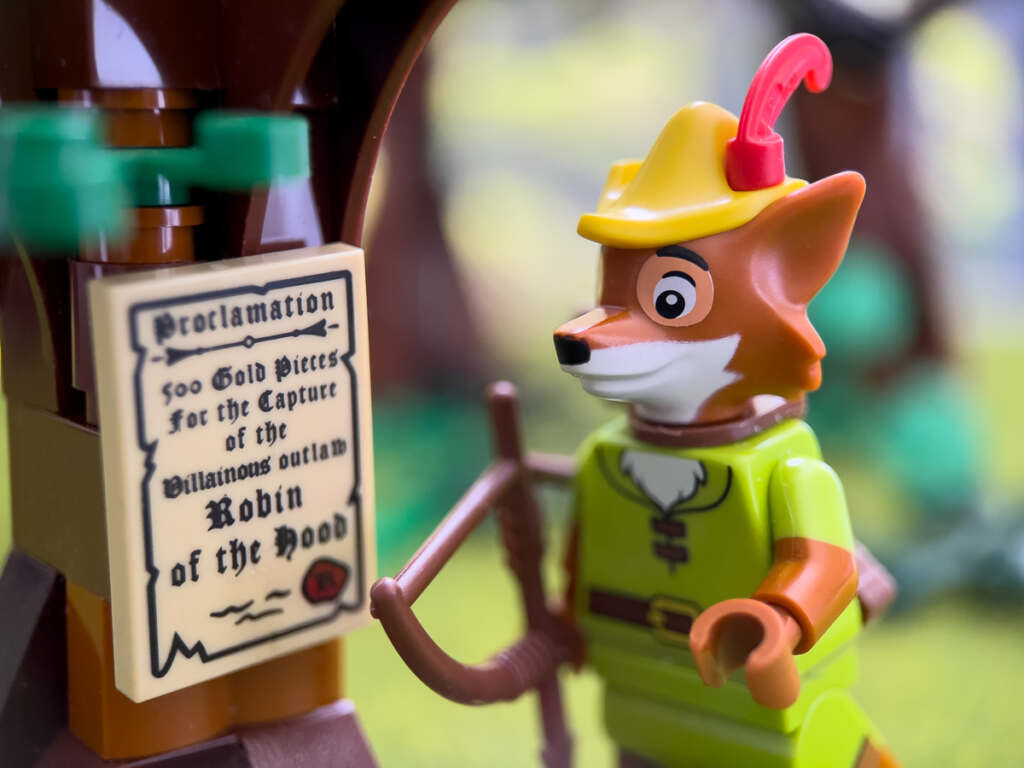
While our intrepid reviewers concentragted on indoor set-ups I had an opportunity to test the lens outdoors.
What do you think? Are you interested in a Apexel 100mm Macro lens for your phone or is it redundant? If you’ve been looking for a lens like this for your phone, what kind of images do you want to capture? Let us know in the comments what you think.
Thank you Apexel Photo for the opportunity to check out your newest product.


Okay, I want one now—I suppose it’s for the iPhone. Thanks, Shelly, Chellie, and Sabrina.
Hi – I had just gotten another macro lens for my phone but the price was cheap enough that the budget said to me to give it a go. I’ve been testing both lenses – the Apexel & the Xenvo Pro – which both work on my Google Pixel 5A! Score one for the world of Android! I like the way the Apexel fits on the phone best. I like the speed with which I can get the Xenvo lens in place, but it is a clip on and I have issue with part of the clip blocking my clear view if the led screen. Probably need to work at it more. The Xenvo also includes an optional wide-angle feature that I need to test out more. I got one shot this morning that I really liked. I’ll post my test shots later in the MeWe group. Thanks for the article – it sent me down a rabbit hole I could enjoy!
So to answer the questions, until this review. No, I was not looking for a lens for my phone. They seem ‘gadgety’ to me. This one, however seems well made – and as Shelly said, the best camera is the camera you have on you. I Love Macro photography and this inexpensive lens really seems to fit the bill. Batman seems to think so too. (I took a photo of Batman with my lens i purchased after reading this review and Mary’s comment that it works with her pixel)