[updated March 2026]
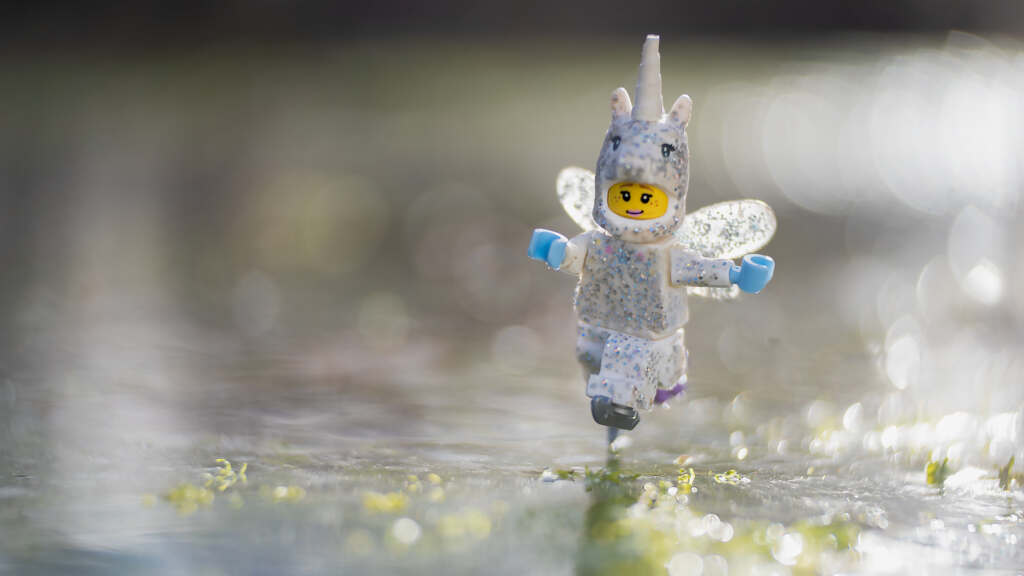
I’ve been taking photos in and around water for as along as I’ve been a photographer. There is something magical about water; the movement, the sound, the reflections. Being in and around water feeds something basic in my soul. Because of this, it’s only natural that water would make it into my toy photography. Some of my favorite toy images have been taken in water.
While water is beautiful to photograph, it’s not easy to work with. It can be unpredictable; water can steal your LEGO and it can leave you soaking wet. But even with these hazards, the final results are worth it.
I prefer to photograph in the great out doors so when I talk about water I’m referring to rivers, lakes, puddles as well as the Puget Sound. I have found that the edges around any body of water is usually rocky, muddy, sandy or even all three. Not exactly an environment that invites getting down on my knees for my typical toy photo. Over the years I’ve learned a few tricks about working in and around water which I want to share with you.
Tips For Water Photography
Lego doesn’t float
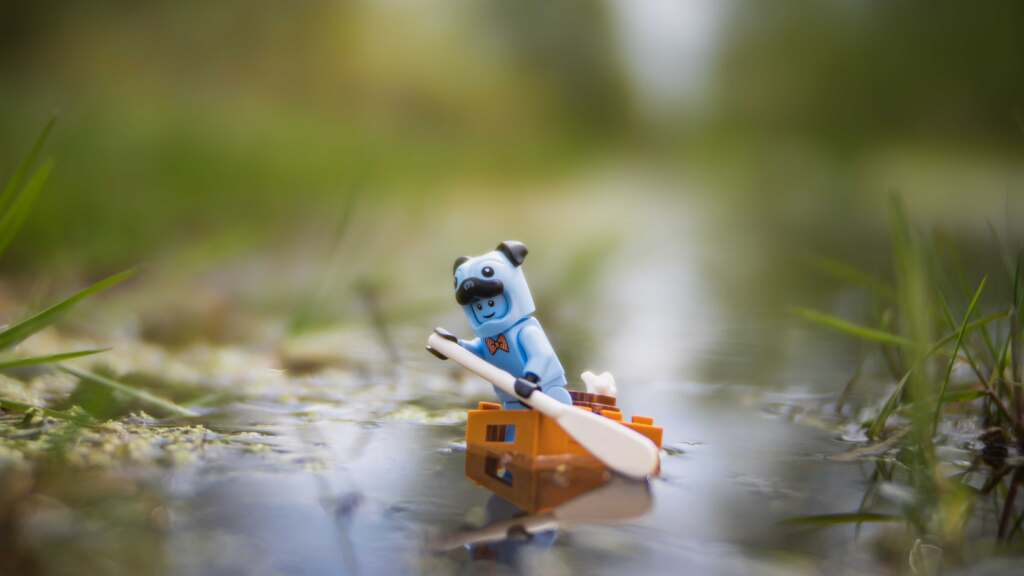
Before you contradict me, from my own experience LEGO doesnt float. Sure the random LEGO piece does float. But boats will capsize once they’re filled with props. And while minifigures may not sink, I need them standing tall rather than floating on the surface.
Plus I need my figures to stay where I put them so I can hit my focus. This doesn’t change if I’m in my studio, on land or playing in my favorite puddle. Which is why I photograph my toys in shallow water such as a puddle where they will stay put in the mud or on concrete.
Often I will need to build up a base made from loose LEGO for my subject to rest on. In a pinch I will use nearby rocks or even water logged wood. Whatever method I choose I make sure to disguise the object or remove any shadows in Photoshop or Lightroom.
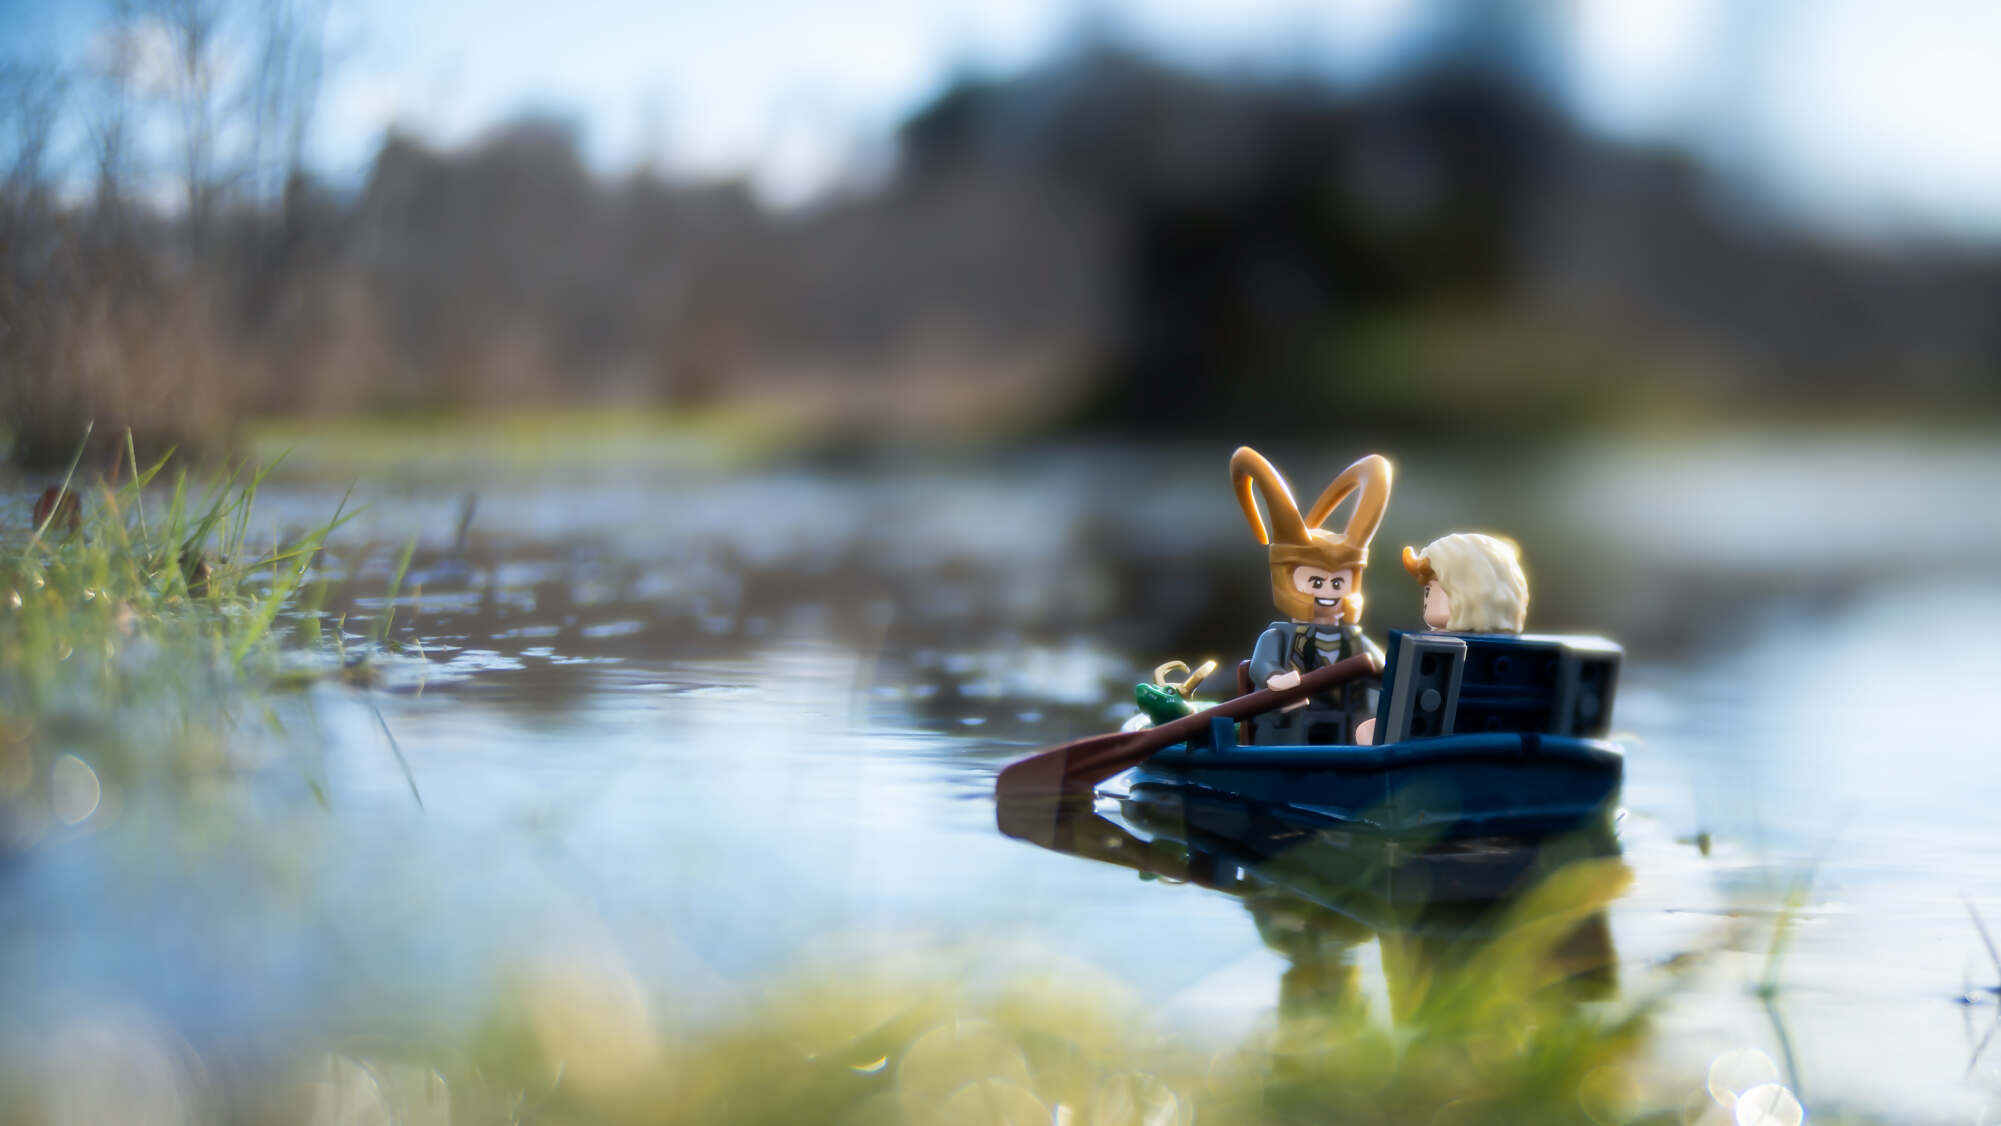
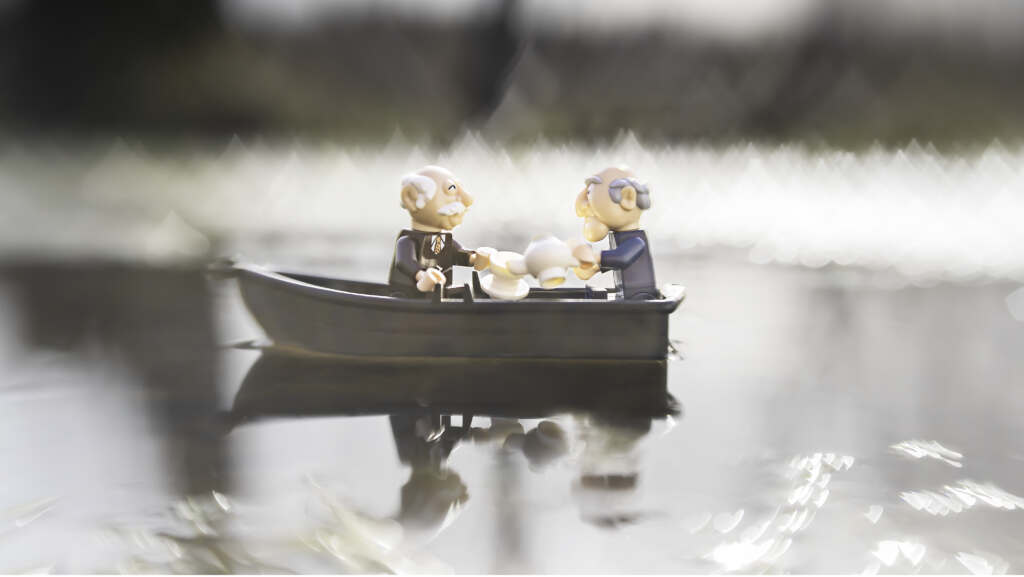
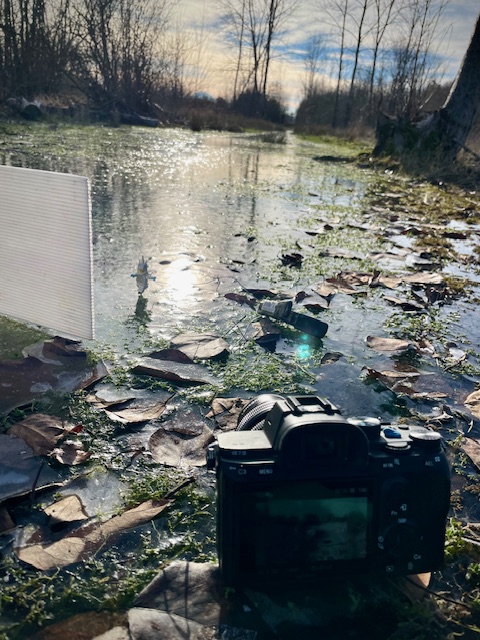
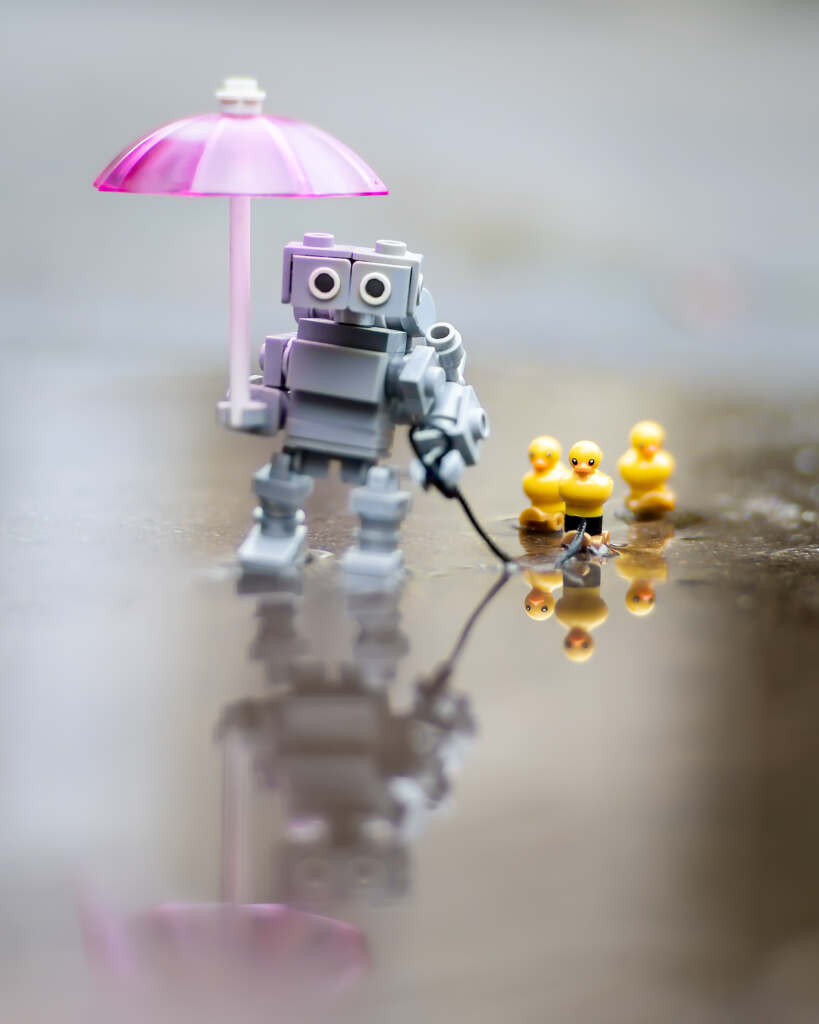
Get low for reflections
If I want to add an awesome reflection to my image I know I have to get low to the ground. This forces me to aim my lens across the water. When the water is still, it acts like a mirror and creates a beautiful reflection. I will often compose for for the reflection rather than the subject.
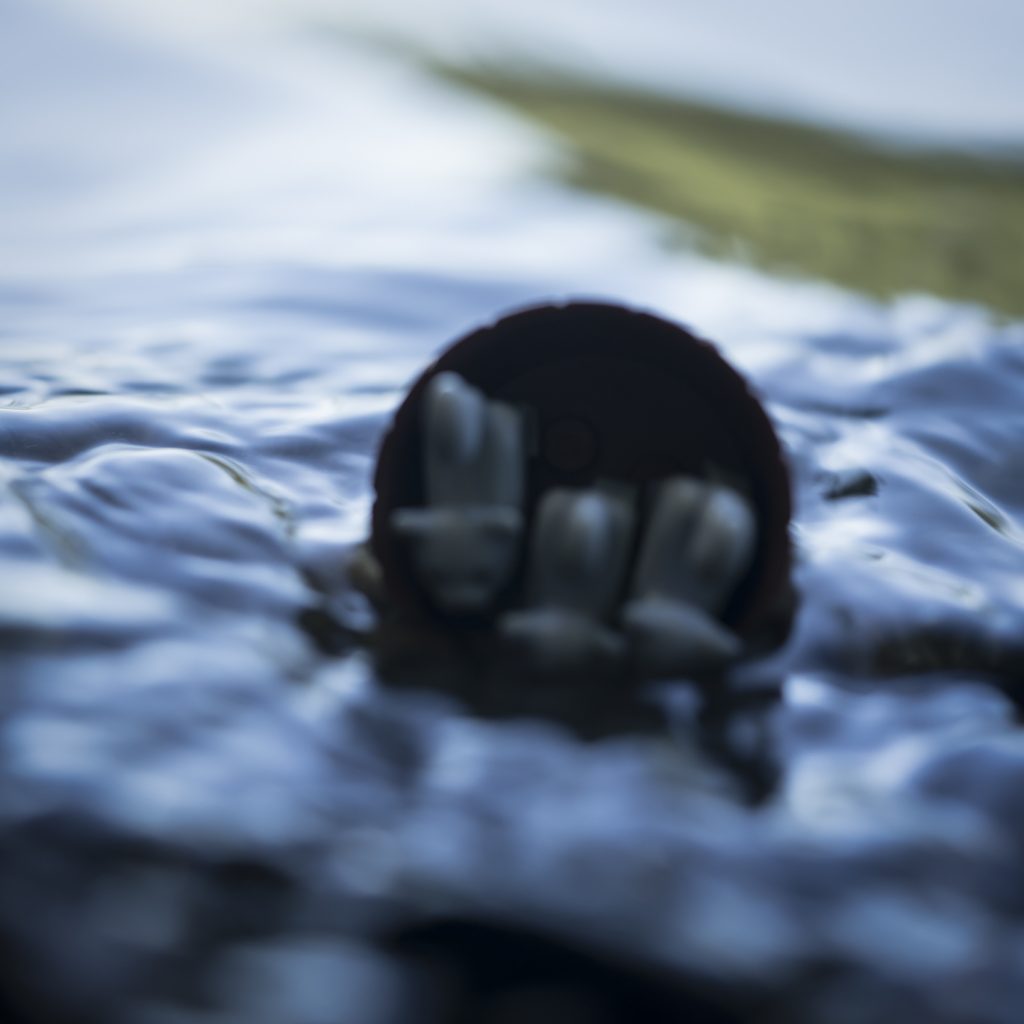
Safety first!
I’ve found that water can be unpredictable. A rogue wave or a fast moving stream can soon send my favorite plastic figure on an unexpected adventure. Which is why I don’t photograph in unprotected streams, waves or bodies of water with tides. A rogue wave can easily whisk my subject out to see or worse, destroy my camera.
I stick to mud puddles, protected streams, parking lot puddles and even my own portable puddle. Otherwise I risk this…
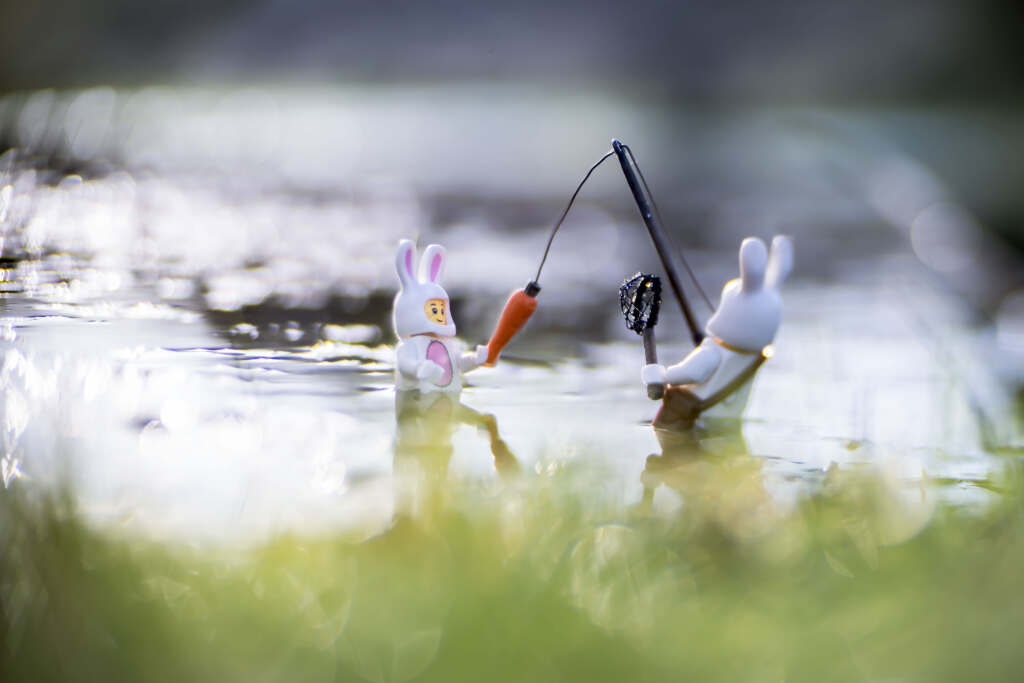
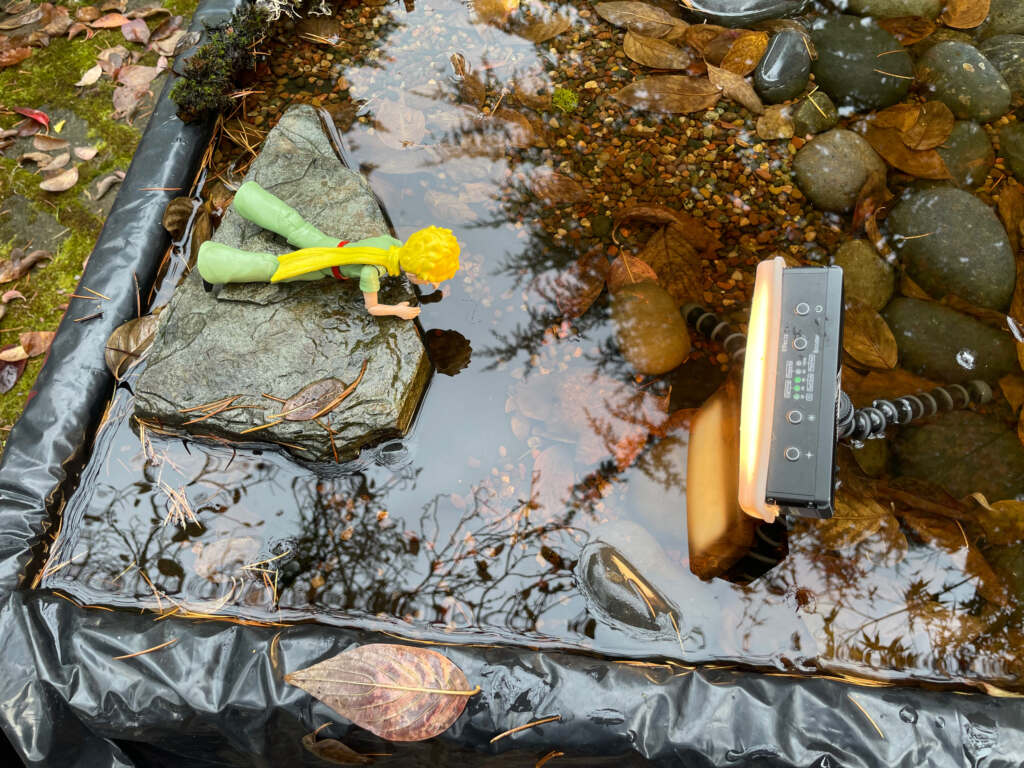
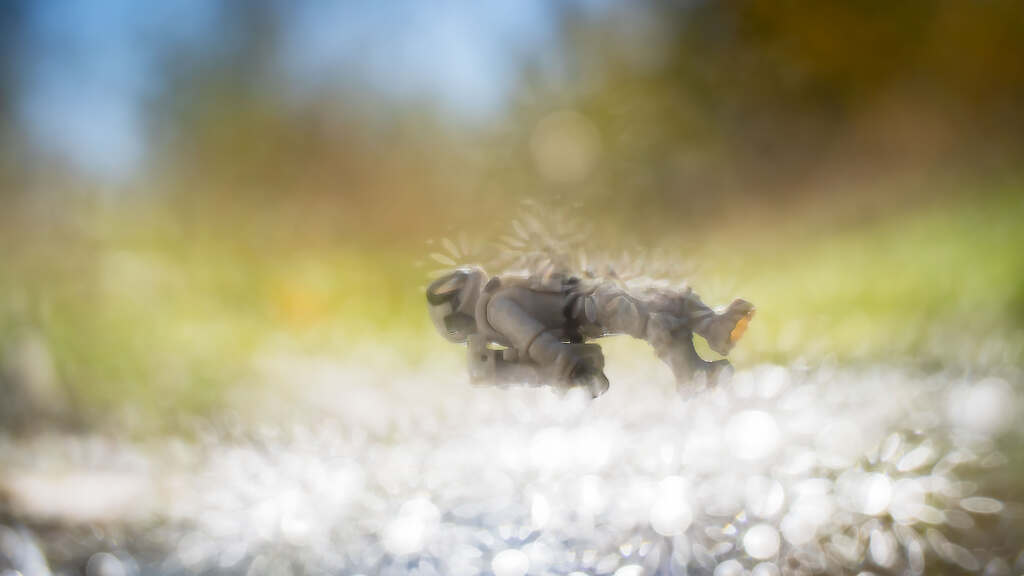
Use a plastic reflector
I love to backlight my figures. By setting up my scenes with the sun behind them, I can maximize creative bokeh as well as capture natural rim lighting. But this also creates deep shadows. Which is why I always carry a plastic reflector and a portable light to fill in the shadows.
By throwing more light into the shadows I will eliminate hours of post production manipulation.
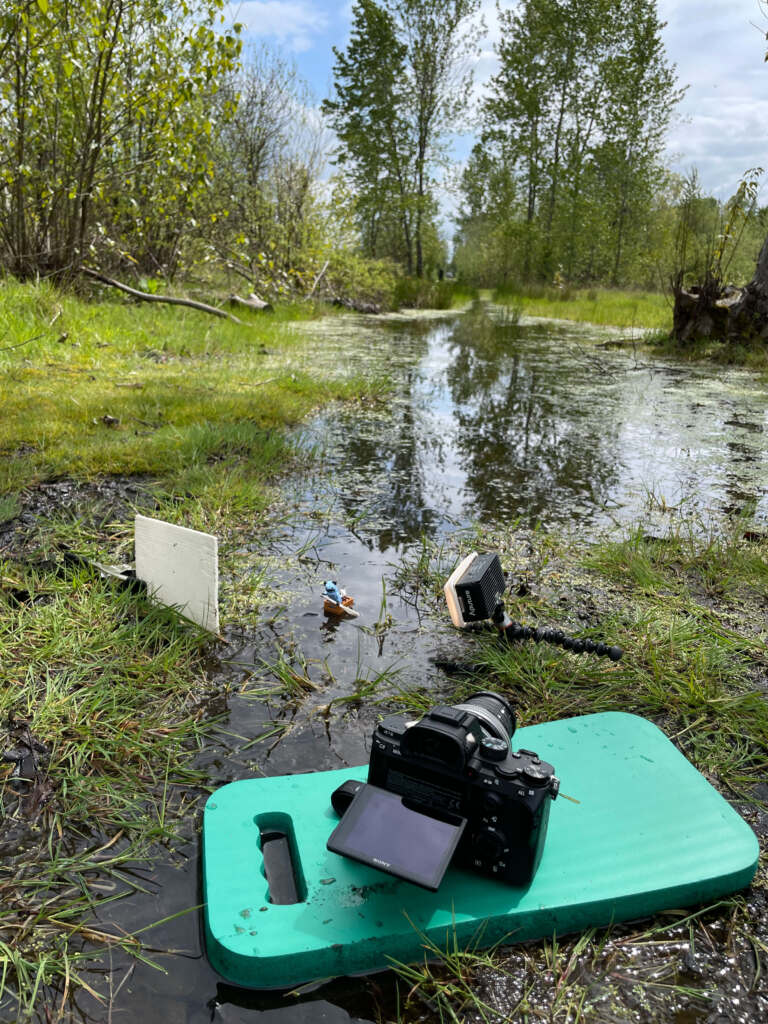
Protect your gear
Water, mud, rocks…photographing around water can be hard on my gear. Which is why I started packing a cheap gardeners knee pad. This bit of foam allows me to kneel on the ground and not get wet or muddy. But also acts aas a refuge for my camera gear when Im setting up a photo.
I also wear water proof shoes. And if the weather is particularly wet, I will wear a pair of old rain pants. Nothing like this extra layer of protection to keep me dry in the rather wet locations I often find myself.
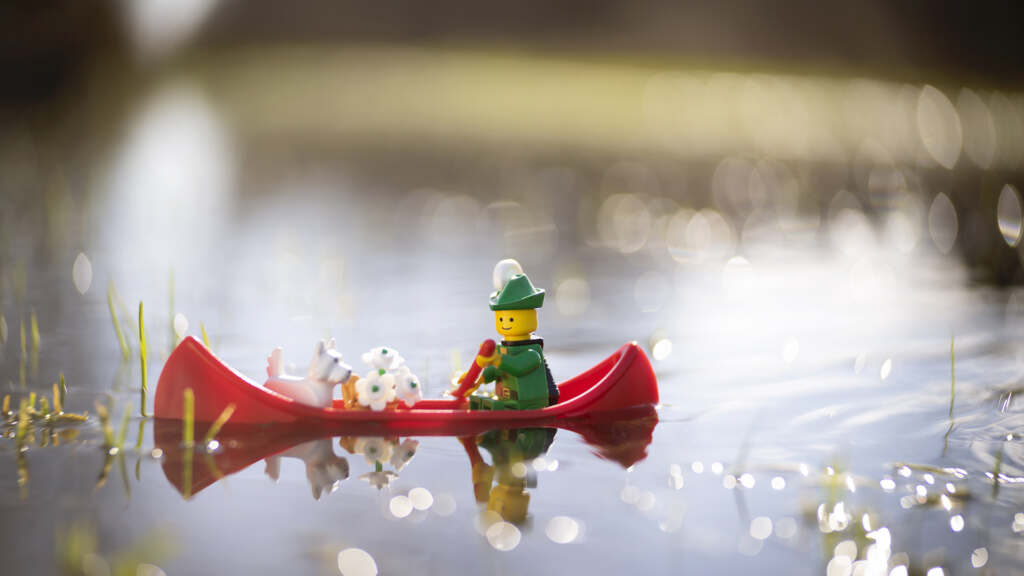
Sell the motion
Often the water I’m using for my toy photography isnt moving. Which is why I often look for a short stick to help create the illusion of movement. I will set my ISO to 50 to slow down my shutter speed to about 1/30 of a second. This helps me maintain focus in a hand held situation, while still giving the illusion that the boat is moving through water.
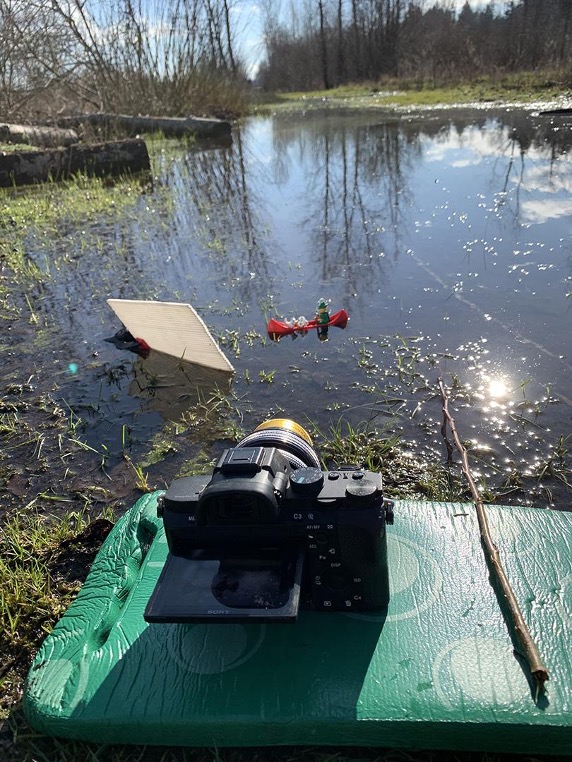
Ice is also water
Don’t be afraid of winter water photos. Photographing in the winter creates some unexpected bonuses. While water freezes in the cold, so does mud. This makes it much easier to kneel on the ground. I love photographing on a frozen pond in the sun. The bokeh is always stunning! I’ve created some of my favorite photos in temperatures that are near or below freezing.
Make your own pond
It’s not always convenient to travel to the woods or a nearby park for water photos. Which is why I created a temp pond in my side yard. With some plywood, 2 x 4’s and a heavy duty black plastic bag, I can create water photos whenever I want.
The biggest draw back of this technique disguising the edges of the square pond. I’ve used plastic plants, moses from the yard and misc rocks to help break up the hard line. A shallow depth of field is also useful to disguise my man made pond.

As I get older, I appreciate my temporary pond all the more. While its more trouble to set up and I don’t get the large vistas I can capture at my favorite puddle – I don’t have to kneel on the ground. A true win!
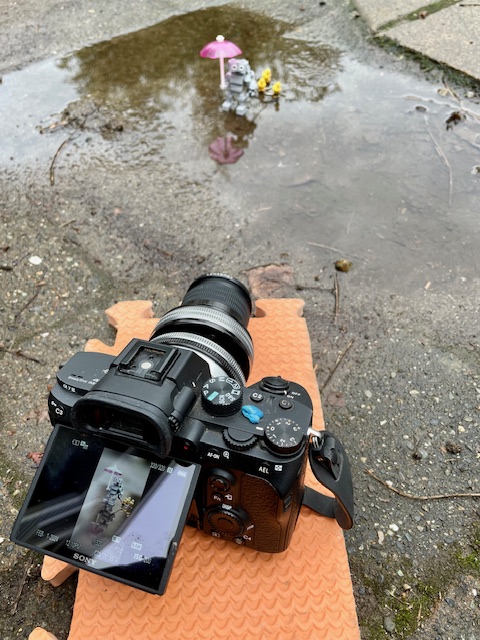
Cement puddles
I’ve learned to never judge a photo until Ive looked through the viewfinder. More than once a completely unassuming location will result in a photo that tickles my funny bone. I spotted the following ‘puddle’ outside my studio. This is nothing more than a little bit of rain water caught in a depression in my driveway. In fact a couple of hours after I took this photo, the standing water was gone.
In conclusion
Photographing in and around water is a ton of fun. Not only is it a chance to connect with nature, but the effects are almost always magical. Between the reflections, sparkly bokeh and reflected colors I’m always happy with what I capture.
Experimentation is the key. Find a location that works for you. Try different lenses, shutter speeds and depth of fields to find a combination that creates the magical feel you’re looking for. When I’m out in nature I know that I will not be able to recreate wherever I end up photographing. So I always try a variety of lenses and shutter speeds to cover my bases. The last thing I want to do is arrive home and think… if only.
While photographing in water will take a little more preparation, the results are always well worth it.
Shelly
Do you have any tips you would like to share about working in and around water?


Hi Shelly! I loved this piece and each of the photos included. I’ve had the chance to shoot along with you in/at the water, so you already know I love the magic of it, too. Thanks for sharing the fun and some tips. Your water pics are stunning!
There’s a cemetery behind our home which has some amazing water features. I love playing with times of day there, too. Winter is coming…
Doug, yes we did share a magical moment around water at the Albany Bulb! I have two awesome pictures to remind me!
I’m glad you have access to a nearby water feature. I look forward to seeing what you can create there or at this home when winter finally arrives.
Cheers and thanks for the comment!
I really enjoyed your post, Shelly! It’s evident that you are on good terms with hydrosphere :))) and can get the most out of water in your photography! Thank you for sharing your wonderful experience and beautiful shots, this is a very useful post. 🙂
Enjoy your weekends!
Kind Regards,
Ann.
Thanks Ann! I’m glad you enjoyed my post and images. I wonder want you could create in your studio with some frozen water?? Happy week to you!!
Very nice write up Shelly – I enjoy all your images in the examples. Lots of great tips and tricks I plan to use.??
Thanks Joe, I’m glad you found it to be useful! If you come up with your own tips for working with water I hope you will share them with us too! ??
Love this! I’m surprised you hadn’t posted a Water Basics article sooner than this as it’s such a huge part of what you do! 🙂 I love all your water images, they’re so magical! I’ll have to experiment with Tip #9 and see if I can get that painterly effect with shutter speed. Super inspiring.
Leila, Thanks for your kind comments. I think I can tell you exactly why I haven’t shared this before – I was selfish. I’ve worked hard to capture the images that I’ve created in the past and I didn’t want to see a bunch of copy cats in the world of social media. But Ive realized that that is a stupid attitude. Im here to help and share my knowledge – so why not start with what Im good at.
I hope you have fun with number 9. You will need a good in camera stabilization once you drop below 1/60 of second. I try to put myself in the classic human tripod stance. But you can also get a soft bag to place on the ground (sort of like a bag of rice) to act as a stable platform for your camera. I love to capture the swirling water, I find it to be patly and a beautiful effect.
I look forward to seeing what you come up with!
Gorgeous images and some great tips! Thanks for this Shelly.
Thank you Jennifer. Much appreciated my friend. 😀
Is there a way to recreate the effect of reflection off the water inside the home if there are no bodies of water readily available? I have a really beautiful shot planned but of course i dont want to sacrifice the figure to a medium that is better reflctive.
Hey Chris have you tried a mirror/glass? If you don’t want to work with water try a mirror / glass (blue paper underneath maybe?) with plastic wrap over the top to simulate the surface. Or you can use a piece of shower glass. I would use a short depth of field to create a blur to enhance the effect. You can also use a large pan, cookie sheet, oil pan etc to create a body of water. You would need to get clever about the edges though. Rock and moss can help to create a faux outdoors look. Let me know if you found this to be helpful. 🙂
Love these images and thanks for the article!
Thanks for reading Beth! Im always happy to share the lessons Ive learned over the years. I hope you will take a dip in the waters (so to speak) 🙂
Water photography is fun – thanks for the reminder, Shelly!
Happy to help Mary – Have fun out there! 🙂
Taking notes!
You already know I am a big fan of your puddle – water shots so it’s no surprise to me that I love this article. Thanks for sharing details behind that magic that is your water themed photos.
Thanks Sabrina! I hope Ive inspired you to give it a try. Its messy, but rewarding! 😀