
Depth of field is an important choice in a photo’s compositional design. Most of the time, the depth of field is a function of your lens aperture. Want a narrow field? Open that aperture. Want a wide field? Crank it down. With toy photography, it is often not possible to get the field wide enough to encompass the entire figure. To overcome this, we can use a post-processing technique called focus stacking.
But before I cover the technique, let’s see why toy photography can be problematic for getting a wide enough depth of field.
Note: I also put all of this into a video, linked at the bottom of this post, for those who prefer video over text for tutorials.
Laying down some focal science adjacent facts in 3… 2… 1…
Depth of field is controlled by two things, the size of the lens aperture, and the distance from the lens to the subject. Regardless of aperture, the closer the subject is to the lens, the narrower the depth of field. Conversely, the farther away the subject from the lens, the wider the depth of field. For more on this, check out my recent post on the topic, Using Depth of Field to Tell Different Toy Photo Stories.
With toy photography, we often want to get nice and close to our subjects, which leads us to dealing with the narrow end of the depth of field.
To demonstrate, I placed a ruler on front of my camera lens, so the 0 mark was at the lens, and it extended out 30cm from there. I then took some photos at various distances and focal lengths to illustrate the difference. The first photo uses f/2.8, which is the largest aperture my lens allows, at a distance of 1cm:
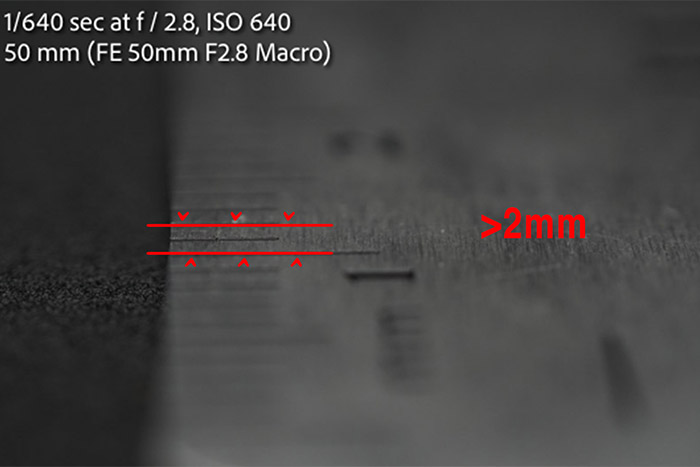
As expected, this gives a really narrow depth of field, of less than 2mm. Next, I set the aperture to f/16, which is the maximum my lens allows.
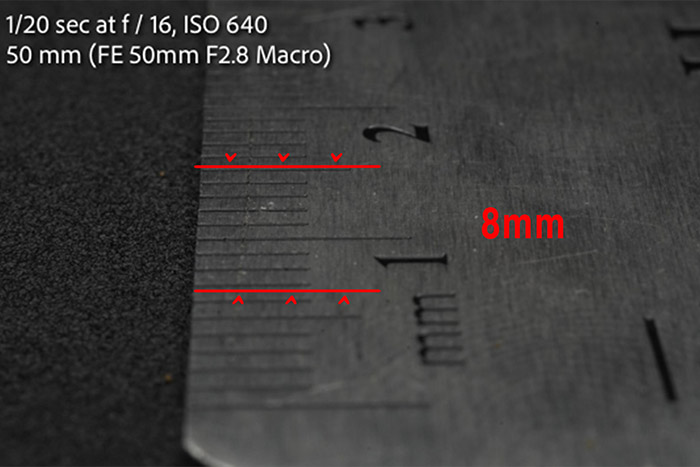
This gave a larger, but still tiny, 8mm aperture. I then repeated the same test but aimed farther down the ruler. First is f/2.8:
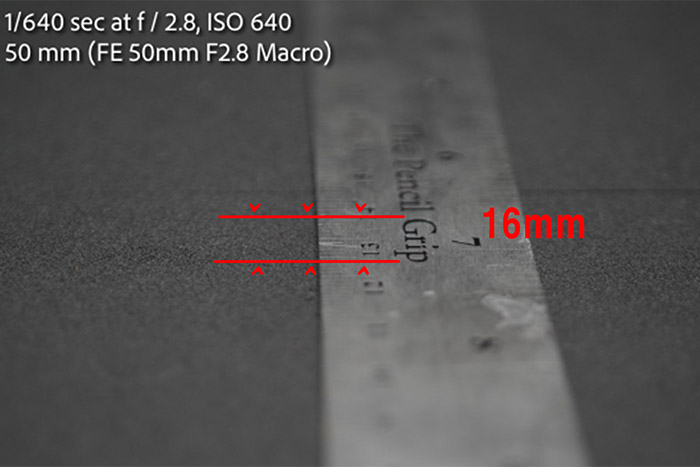
At f/2.8 and approx 13 cm, the depth of field has gone from >2mm to 16mm. Now let’s try the best case scenario of f/16.
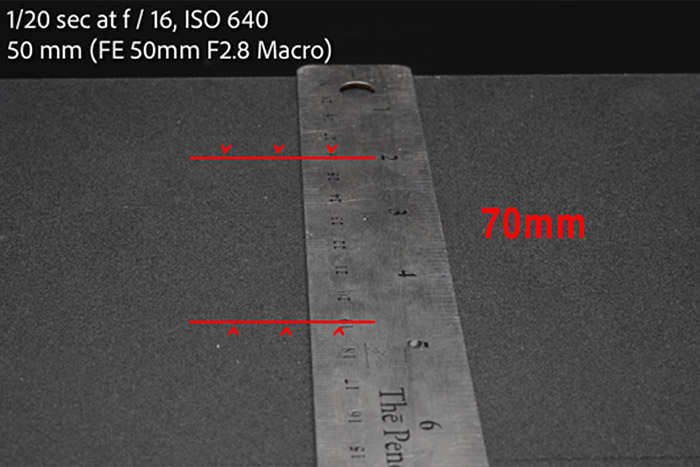
So at f/16 we get a much more useable 70mm. This is enough for almost any 6″ figure, and depending on the pose, even larger ones. However that requires us to have our subject farther back from the camera. What if I want to be nice and close and still get the whole scene in focus?
This is where focus stacking comes in.
Focus stacking starts in the camera
Focus stacking is a simple but powerful technique to expand the depth of field beyond what the camera can cover in one frame.
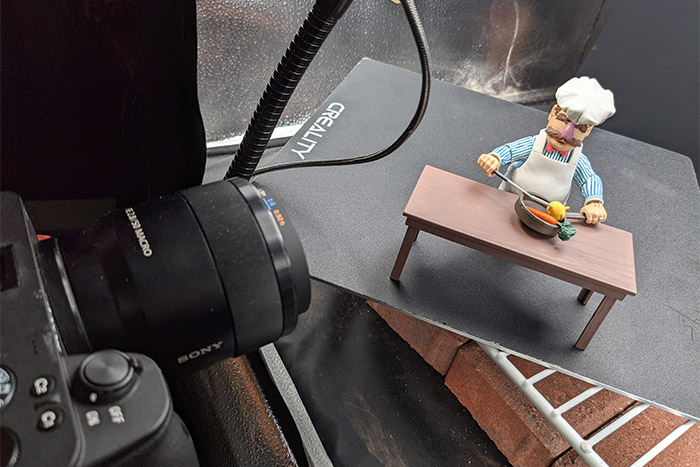
For demonstration purposes I set up the following scene of the Swedish Chef cooking a delicious meal. I wanted a nice, close and intimate vibe so the camera is nice and close to the figures.
I tried to get all of this scene in focus. I will spare you the details, but rest assured, regardless of my camera settings or where I placed my focus point, I could not get the entire scene in focus with one shot. This is the best I could do:

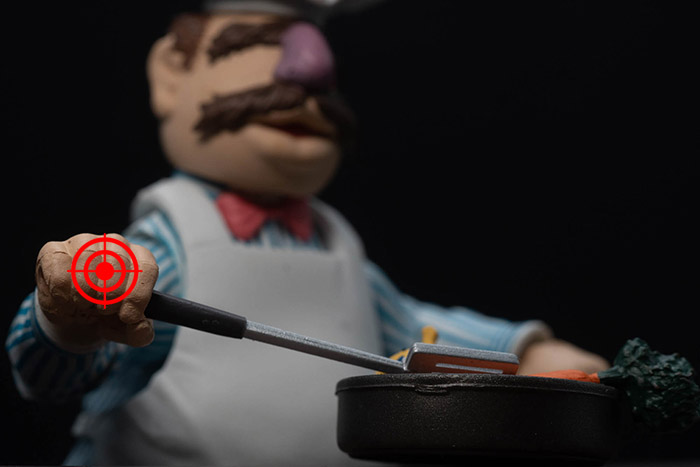
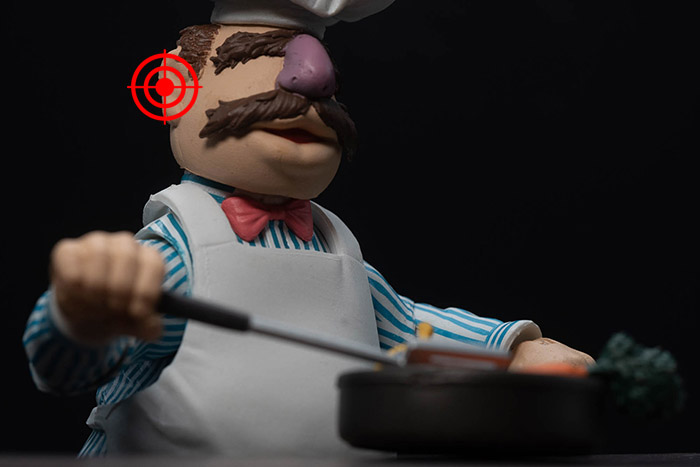
So to overcome this, I will use focus stacking. This technique involves taking multiple images of a scene with the focus point in different areas. I typically start at the part of the subject that is closest to the lens, and move my way back, ensuring that the depths of field overlap with each step. So, for this shot I took five frames, starting at the pan, then the fingers, wrist, nose and finally the ear. The target is where I placed my focus point.


If you pay close attention, you may notice that the composition changes within each shot. I did not move the camera or the subject, but clearly something changed. The first shot is closer to the edge of the frame (look at the right elbow) than the latter. This is because the lens components move back and forth inside the lens barrel to set focus. This subtly changes the composition. As a result, I tend to compose my shots by focusing on the closest part of the subject to the lens. This way I am assured that things will not sneak out of frame when the focus point changes.
Now that we have our frames in camera, import them into your computer and jump to the next step.
Focus stacking post processing
The post processing phase of this is actually very easy. It really only involves the following steps:
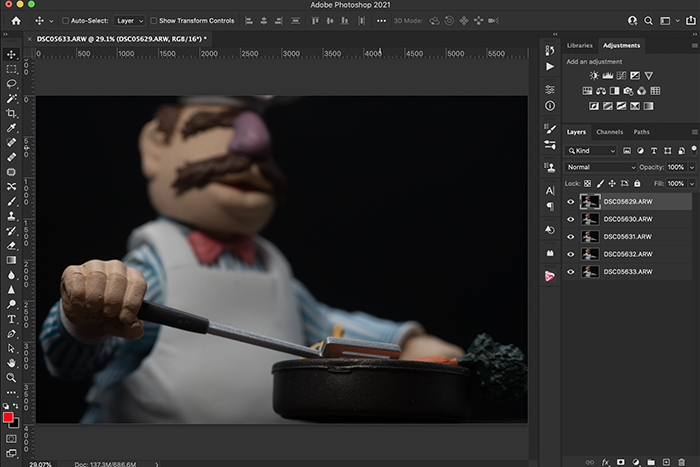
- Load the frames as layers into Photoshop
- Auto-align the layers
- Auto-blend the layers
- ….
- profit.
Note that while I do use Photoshop for this, it is only because that is my primary editing tool of choice. There are a lot of different tools out there for editing photos and I am sure at least some of them also does focus stacking. So if you are not a Photoshop user, please do your own research, and treat the rest of this post as what to look for in features for those other tools.
For the purposes of this post, to keep things shorter, I am going to assume some familiarity of how to load images as layers in Photoshop, however to help newer folks along, the two most common ways are:
- Import your images into Lightroom, select the desired frames. Right click and select Edit In -> Open as Layers in Photoshop…
- In Photoshop go to File -> Scripts -> Load Files Into Stacks. Then select your files and click on OK.
Regardless of how you import them, you should end up with something resembling the following:
From here, select all the layers by clicking on the top one, holding down shift, then clicking on the bottom one. Then go to the Edit -> Auto Align Layers… menu.
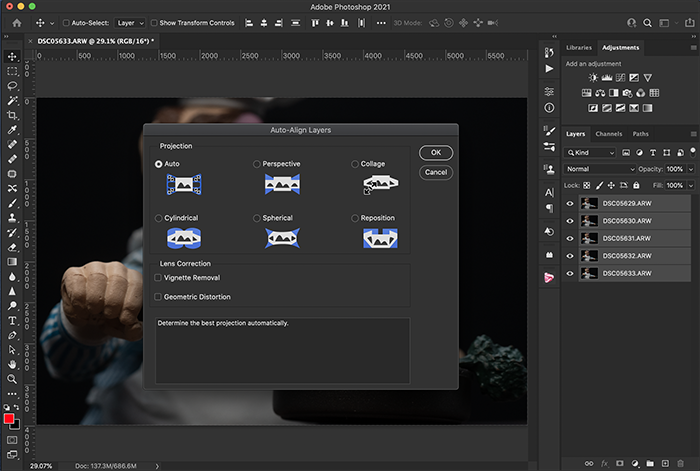
From the Auto Align Layers dialog box pick Auto and then OK. This will look at each of the images in the stack and align them together. It will account for any camera shake or subtle changes to the setup that happened between shutter clicks. Odds are not a lot will change when you do this.
Next go to the Edit-> Auto Blend Layers… menu.
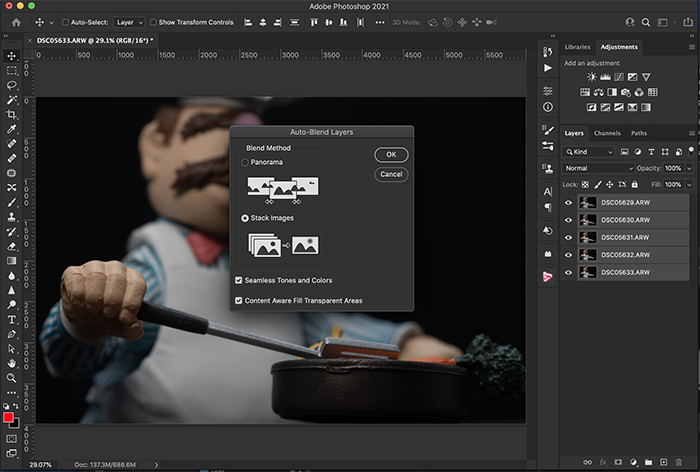
From the Auto Blend Layers dialog box select Stack Images, and then click on OK. This will kick off a process that on my computer took 2-3 minutes to complete with this set of images. What it is doing is examining every single image, finding just the parts that are in focus, and smooshing them together (technical term!) into one image. If I did my job right at the camera capture stage and have enough covering depth of fields, I should end up with a brand new layer that is in focus entirely front to back.
Indeed that is what I got:

The promised video…
If you prefer video, here ya go!
[dave]


Really great article Dave. I have yet to focus stack, but I do think some of my photos I’ve taken could have benefited from this technique for sure. The video is also very well done.
Very well explained Dave. I’ve been using more of focus stacking recently since I started doing edits on my desktop. I use Affinity Photo and it has a feature called Focus Merge which is a one step process to focus stack. Thereafter, I can selective choose specific areas of each layer if I wanted to.
A very handy tool for macro photography and certainly for toy photography too.