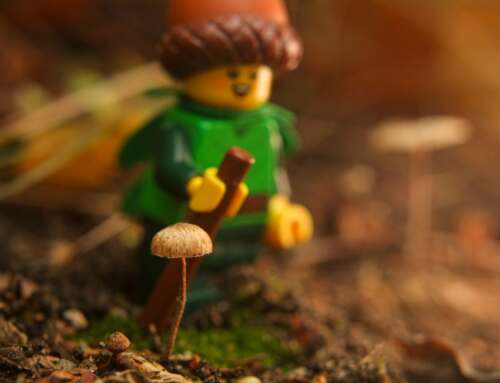
As toy photographers we make lots of artistic decisions when we make our images. What story do we want to tell? Which figures to use? Where should we place them? What accessories, poses, lighting should be used? Finally, what camera settings should we choose? So many decisions. This post covers one of them: controlling depth of field in the camera. Let’s jump in!
What is depth of field?
So, first things first—let’s define depth of field, just to make sure we’re all on the same page. The depth of field (or DoF) in an image is the amount of the image, front to back, that is in focus. This is best demonstrated by showing a few example images, which were all taken with the exact same setup. Only the aperture and exposure settings are changed (for reasons that will be discussed later.).
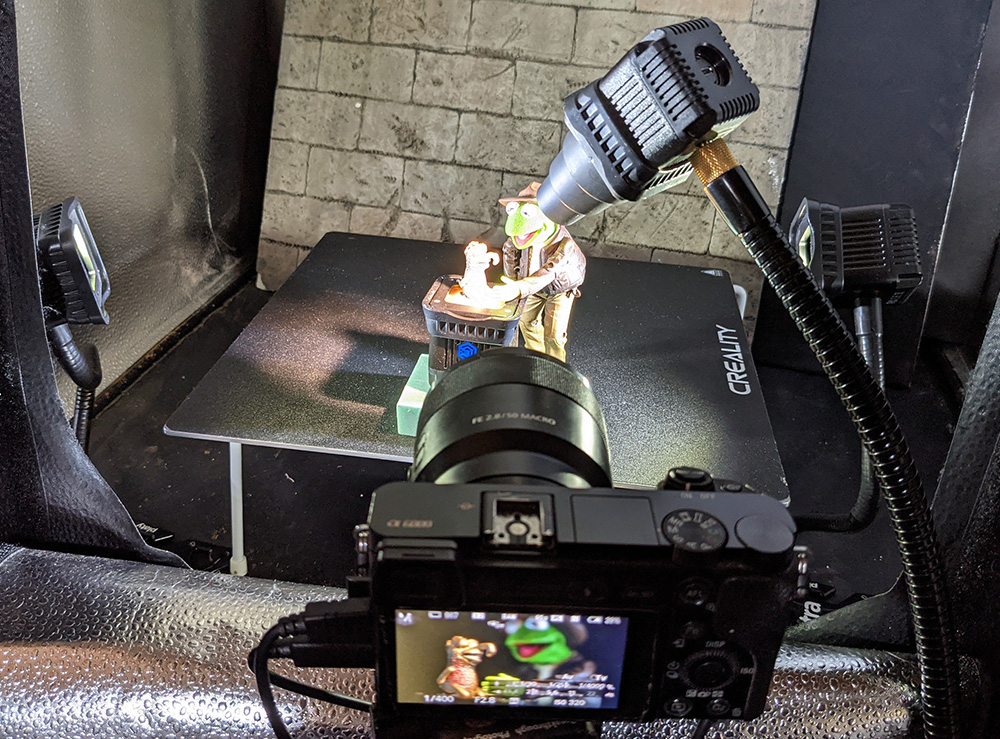
For reference, the setup looks like this, and is meant to quickly recreate the scene from Raiders of the Lost Ark where Indiana Jones is about to take the idol from the cave… but done with Kermit the Frog from the Muppets.
An image, like this one, that has everything in focus as a wide depth of field:
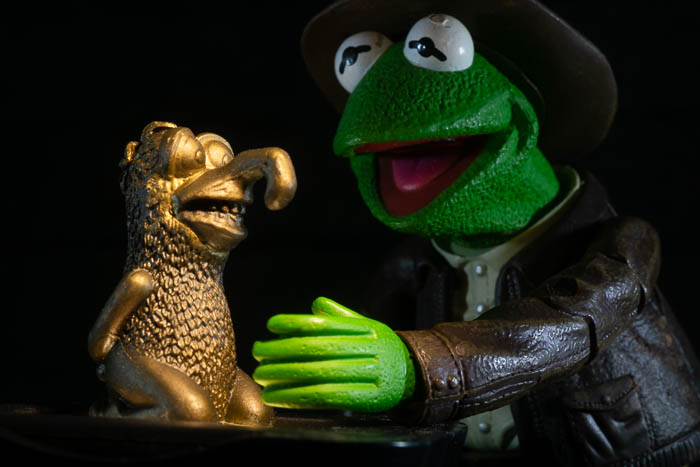
Everything in the above image, from the closet element to the lens – the idol – all the way to the back of Kermit, is in focus. Contrast that to the next image, which has a narrow depth of field.
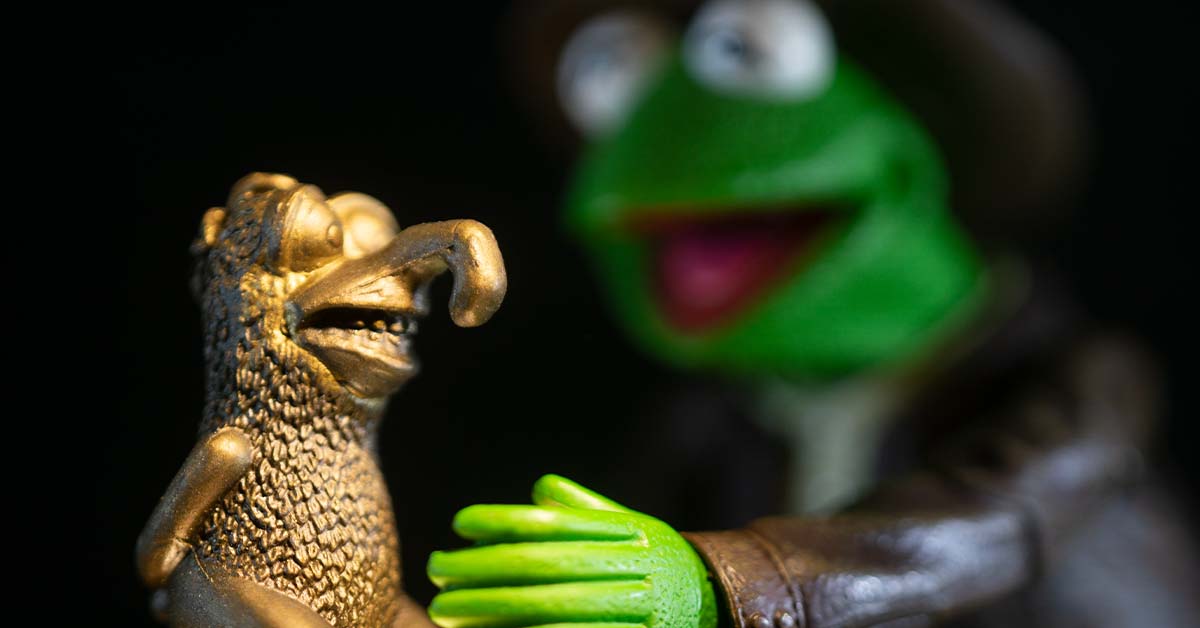
Now the image only has the idol in focus, leaving Kermit blurry in the background.
Notice that changing the depth of field has two effects on the viewer. The first is that the eye is drawn to different places. In the top image with the wide depth of field, my eye dances between Kermit and the idol. It doesn’t really know where to rest. In the second image, my eye locks onto the idol. The human eye is attracted to several physical properties of photos: the point of largest contrast, the lightest point, and (the one that matters in terms of depth of field) the sharpest points of a photo. I am not 100% sure why this is, but it is true. And because it is true, we can take advantage of it to control the effect our images have on the viewer.
This leads us to the second way depth of field affects the viewer: The focus of the story also changes. In the first image where both the idol and Kermit are in focus, the story is more about the interaction between Kermit and the idol. In the second image, the story is about the idol itself. The focus of the viewer is literally following the focus of the image.
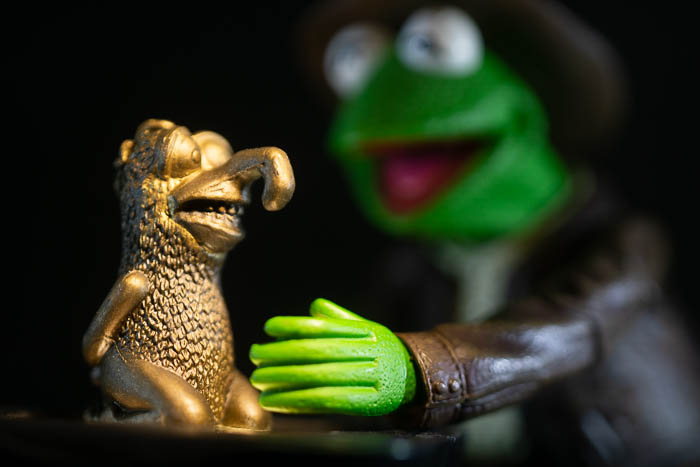
We can control that focus by shifting the shallow depth of field farther back so Kermit is in focus:
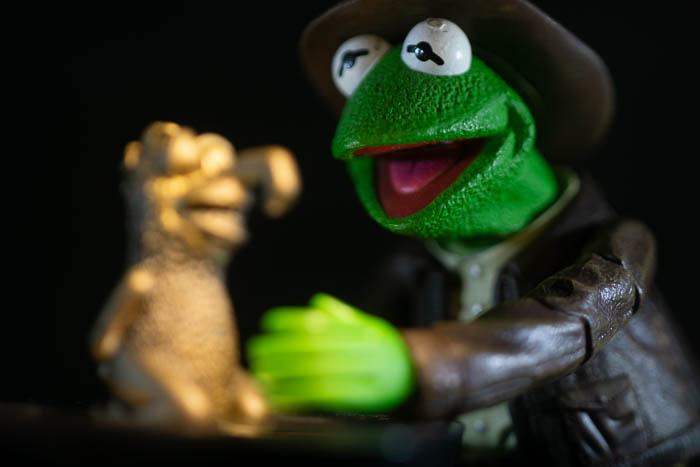
With the focus set on Kermit, the story becomes all about Kermit. The same depth of field is used, but depending on where it is placed in the frame, it changes the effect it has on the image.
So, one image but three potential stories to tell—all by simply controlling the depth of field.
How does one control depth of field?
Let’s pause to cover some camera basics. In every camera lens is an iris that controls how much light passes through the lens and gets to the camera’s sensor. This works exactly like the iris, in your eye. The iris is the coloured part of the eye, and it opens and contracts the hole in the middle, called the pupil. The wider the pupil, the more light enters the eye. This is why the iris makes the pupil wider when it is dark, and smaller when there is a lot of light.
In the camera world, the pupil is called the aperture. The size of the aperture affects a couple things. One is the amount of light that reaches the camera sensor (which is why I needed to control the exposure for the images above). The other is the depth of field. The wider the aperture, the narrower the depth of field.
The aperture is controlled by setting the f-stop on the camera. That is represented by those cryptic looking f/8, f/22 or f/2.8 numbers. How to set your cameras f-stop depends on your camera model, but most have aperture priority mode, or manual mode, which both allow for controlling the aperture. Check your camera manual if you don’t already know how to control it.
If the above explanation doesn’t make sense, don’t worry. All you have to remember is the smaller the f-stop number, the smaller the depth of field, i.e. f/2.8 has a smaller depth of field than f/16
Another example
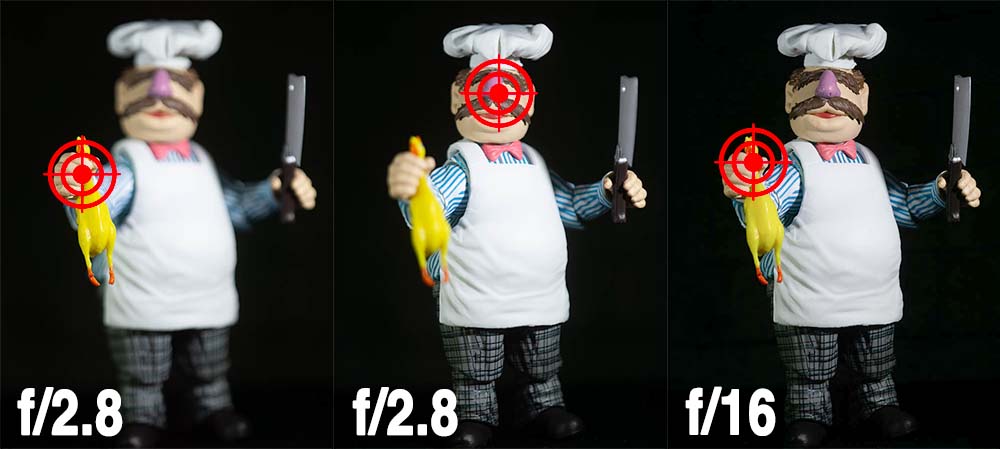
Just to review, the following images of the Swedish Chef (bork bork bork) use the same set of f-stop and focus points that the Kermit photos use. However they also show exactly what aperture setting I chose, and where my focus point was, to get each image.

Lets talk about depth of field on realistic faces
So far we’ve covered how to use depth of field to control the effects of our images on the viewer using Muppets characters. However let’s talk a bit about human faces, as proper focus is important to get right. As far as I know, all toy photographers are humans, and as such we have a special relationship with the human face. We naturally, I presume for evolutionary reasons, pay very close attention to the face, especially the eyes.
As the expression goes, the eyes are the window to the soul. There is a reason for that. Eyes play an incredibly important part of non-verbal human communication. As such, getting focus correct is vital—absolutely vital—to having good-looking images.
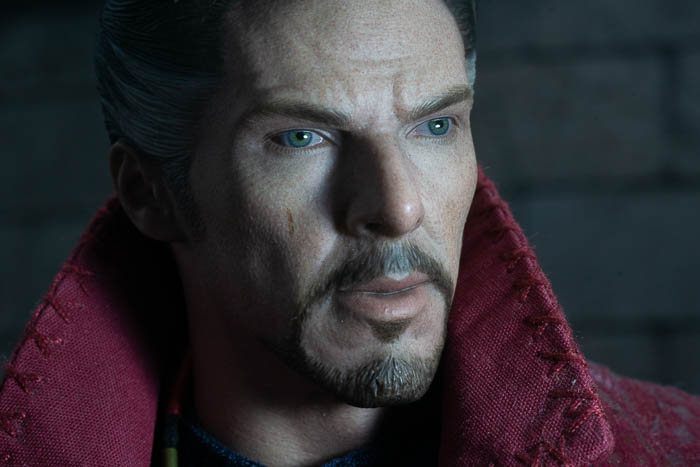
If you will, consider this image of the Hot Toys Doctor Strange head. I used a narrow aperture for this, which by now you should understand means a wider depth of field. As a result, the background isn’t in focus, but it is good enough to see it is a brick wall.
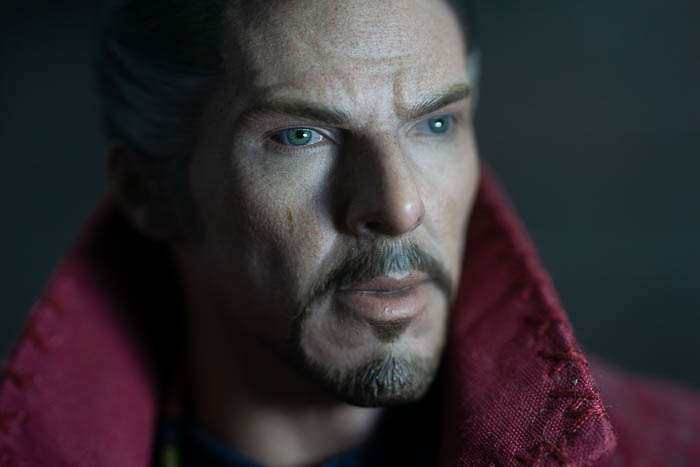
In this next image, I used a narrower depth of field, with the focus on the right eye. This completely blurs out the background so it’s almost impossible to see the brick wall. Since we have no reference to know where Strange is located, we have no choice but to simply focus on Strange himself. This means the image is a little more intimate. Since the only part in focus is his right eye, the viewer pays more attention to it, drawing them a little closer to him. It is very subtle but highly effective.
So far so good. Now let’s see what happens if the eyes are not in focus, but other parts of the face are. Like, say, the focus was on his nose.

The depth of field is the same between the last two images, but the second one looks off. His nose is in focus, but his eyes are not. This looks unnatural for humans. Remember, we are evolutionarily focused (pun!) on eyes. So not having it in focus makes the image look weird. Viewers may not be able to identify why, but they will sense that something is off, which ruins any positive effect of the image.
So my last bit of advice before wrapping up this post is this: If you are taking photos where the depth of field is not wide enough to encompass the entire face, make sure at least one of the eyes is in focus. You don’t need both, just one is enough, but you need the one.
I hope you enjoyed my lesson here on controlling depth of fields, and will think about ways controlling depth of field in your own images may enhance your own photography.
[dave]


Good Article and very informative. Always thought about depth of field around focus, but not as a story telling element. Thanks.
Thanks Austin! Glad you enjoyed it.
Love this so much Dave! Your images really drive home the points you’re making. Well done my friend!!