Halloween, the classic holiday where sugar-fueled kids cosplay for candy, and the spooky factor is maximized, is upon us. Scary stories abound, and many of them are set in cemeteries. As such, tombstones are a common prop for toy photographers. This post covers one way to make your own tombstone props.
Note: This post covers the basics of making a 6-inch sized (or 1:12 scale) tombstone. But I’ve added links to three videos below that I made to covers in detail how to create tombstones for both 6-inch scale and LEGO scale—and I’ve shared a tutorial for adding text to these stones using Photoshop.
Let’s dig in!
The basic shape
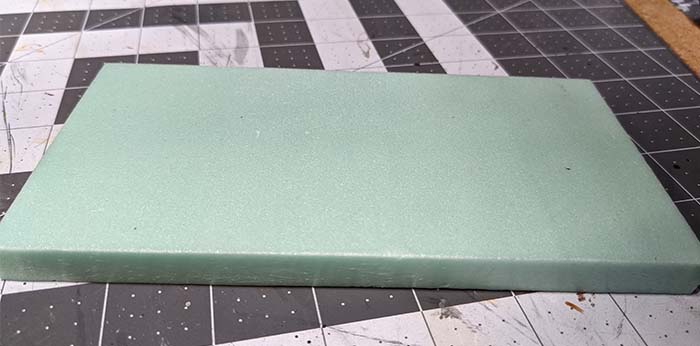
The material being used for this build is XPS foam. This is the type of foam used as insulation for construction projects, and normally comes in 4×8-foot sheets. However, due to the popularity of this foam as crafting material, some hardware stores sell it in 2×2-foot sheets.
Note that not all foam is made the same. The leftover packing material from your latest purchase is likely not the right stuff. If it has little balls of foam pressed together, it is not what you need. XPS (or extruded polystyrene) has a smooth consistency, and in the US comes in green, blue or pink, depending on the store you buy it from.
It can be purchased from Amazon as well (not a sponsorship nor an affiliate link).
You only need a fairly small, 2×4-inch piece, so you can also use any foam you may find discarded from a local construction site. I am using 1/2-inch thick foam, but there is no standard for the size of tombstones, so you can use a thicker piece if you want. This also means any other measurements I give in this tutorial are merely the ones I decided to use. You can use whatever measurements you like for your stone. No standards means any size will work, so it is entirely up to your own artistic judgement. When it comes to tombstone sizes, the world is your oyster.
Preparing the foam
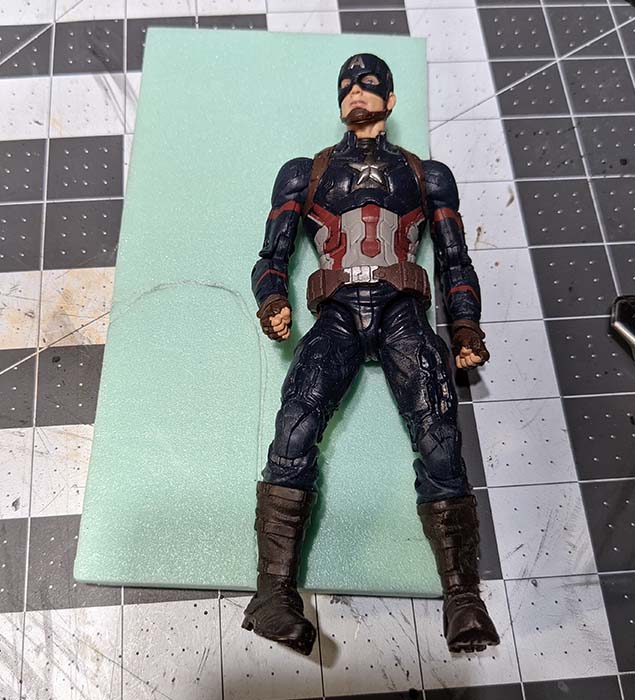
To get an idea of what size you want to make your tombstone, grab a 6-inch figure and place it onto or next to the foam. Then eyeball the size of the stone. I used a Marvel Legends Captain America. My eyeballs told me the appropriate sized tombstone is 4 inches tall, 2. inches wide, with a nice round top. Your size will likely differ.
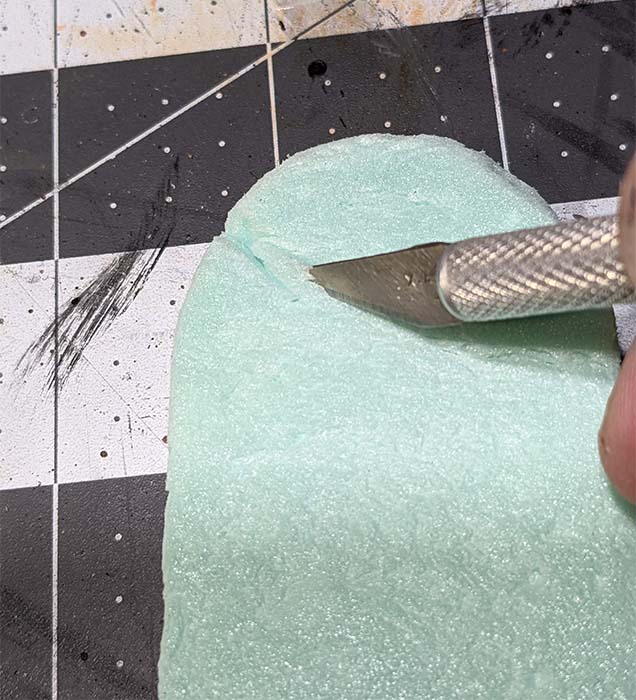
Note: If you are a minor, please get parental approval and supervision for this next step!
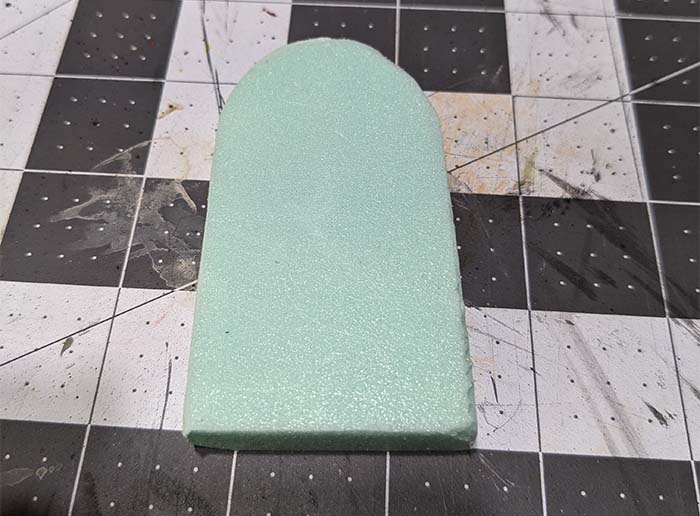
Cut out the stone with a sharp utility knife, and clean up the edges so they are nice and smooth. Those edges are going to be roughed up in the next step, but it’s best to start with clean lines and work from there. If one is not careful cutting the foam, it can develop some unsightly rough edges along the entire stone line, so ensure all of those are removed.
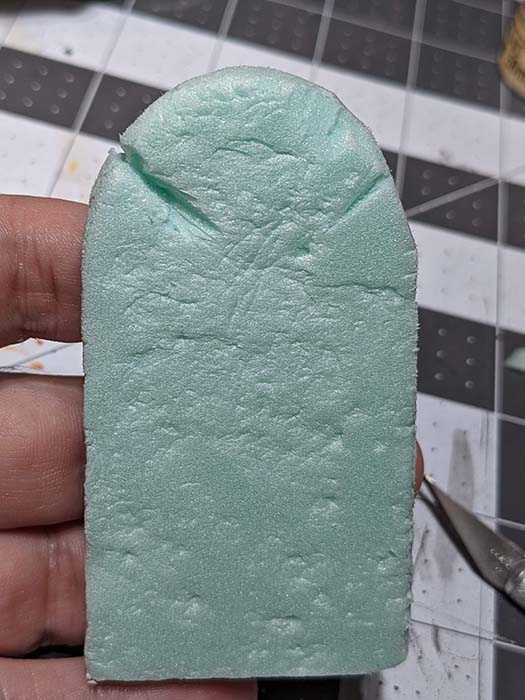
When done, you should have a piece of foam that looks like this:
Texturizing the foam
Most tombstones are made of stone, which has a rough texture. This is especially true if the stone in question has been sitting in a cemetery for hundreds of years. The foam we’re using is smooth. Smooth is not rough (fact!), so we must add some roughness to give it that authentic stone feel.
How do we do that? By beating it up!
Take some aluminum foil, say 12-inches, from a roll, and then scrunch it up into a ball. When completed, you will have a lumpy, useless piece of aluminum foil. However, you also have the perfect foam texturizer. Take the foil ball and press it firmly into the foam over and over until the entire thing is covered in dents and divots. Be sure to include the sides and the edges.

The tombstone in my head is very old and has developed some cracks. To make cracks, take an X-Acto knife and carve out small slits in the foam, starting at the edges. A little goes a long way, and you only need a few of them. There is no correct place to add a crack, so use your artistic eye to decide where to place them, or just mimic what I’ve done.
When you are finished, your stone will look something like this.
Painting the tombstone
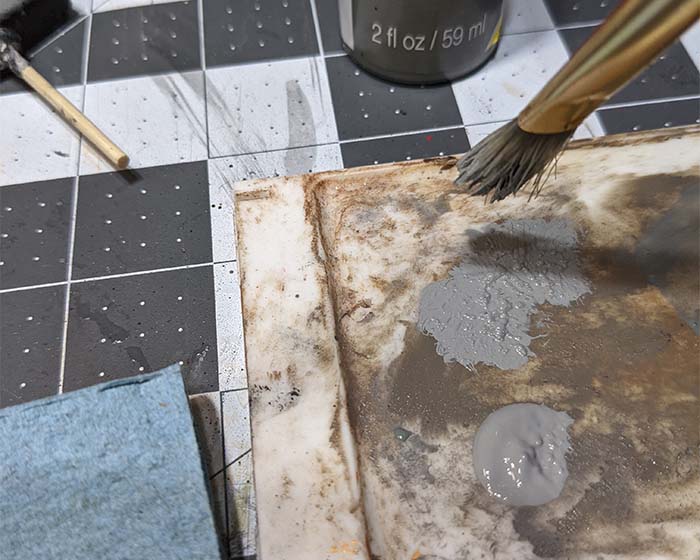
Painting the tombstone involves a four-layer process. A sealing layer of black, then a dark grey layer for the base colour. Then two lighter layers of grey and off-white to add some highlights and bring out the texture.
The first step is the black sealing layer. So far, the tombstone is raw green foam. Foam is a bit soft, and green is an unnatural colour for stone. The first layer will take care of both of these issues.
Mix up Mod Podge and black craft paint in a 50/50 ratio, then use a paint brush to give it a nice even layer over the entire tombstone. The Mod Podge is a glue and a sealer which, when dry, will add some toughness to the foam. The black serves as a base coat, and if any spots are missed with the other layers, the dark colour will look like a shadow in the texture instead of a mistake.
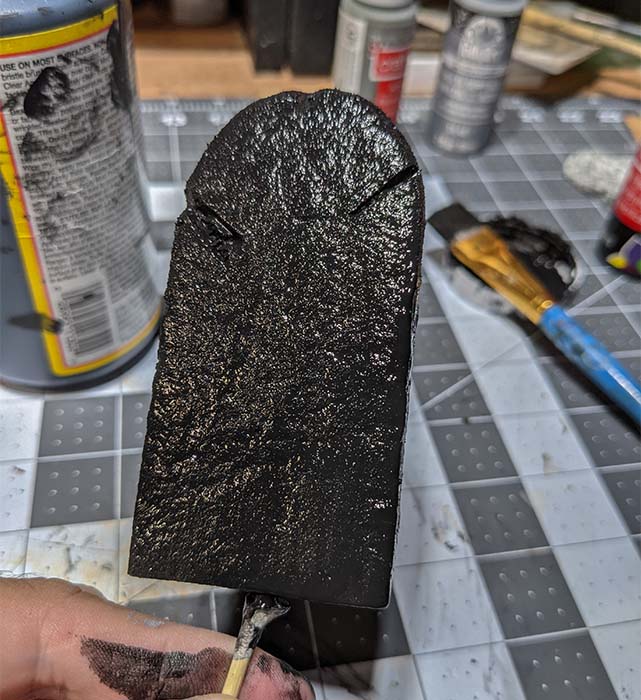
Be sure to remove any paint that pools in the cracks and crevices of the tombstone. The smoother the paint job now, the better the final result will look.
Once the base layer is dry, repeat the process with a dark grey craft paint.
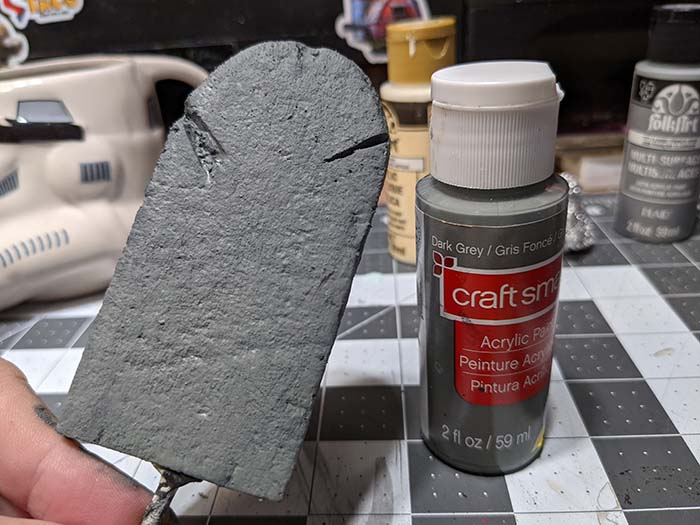
Again, be sure not to let any of the paint pool in the cracks and crevices. Let it dry completely.
The next two layers will use a technique called dry brushing. Dry brushing is useful for adding highlights to a piece. It’s a simple process, which I explain here.
Take a paint brush, preferably one that is older or has rough bristles. Do not dip the brush in water. Then load up the brush with paint. Once loaded, dab most of the paint off onto a piece of paper towel, until very little is left in the bristles.
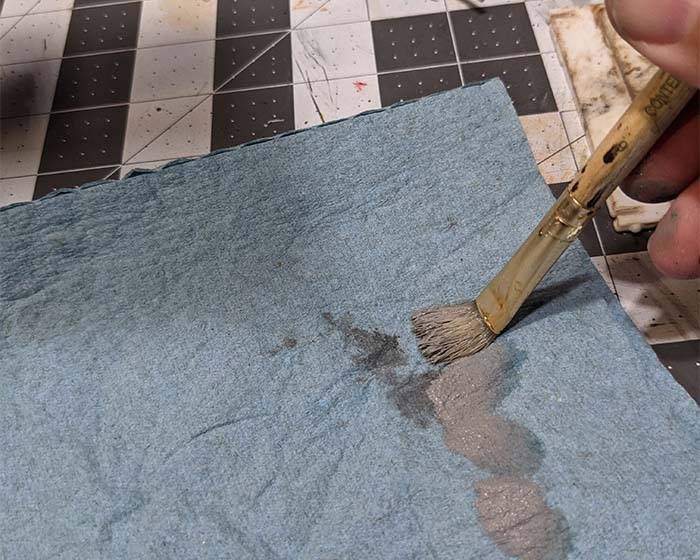
Then very lightly brush the paint onto the tombstone, just letting the ends of the bristles graze the surface. You will find a small bit of paint is left on the tombstone.
Do two layers. The first in a medium grey, and cover about 50% of the stone. Then add a second layer in a light, off-white colour that covers about 20% of the stone.
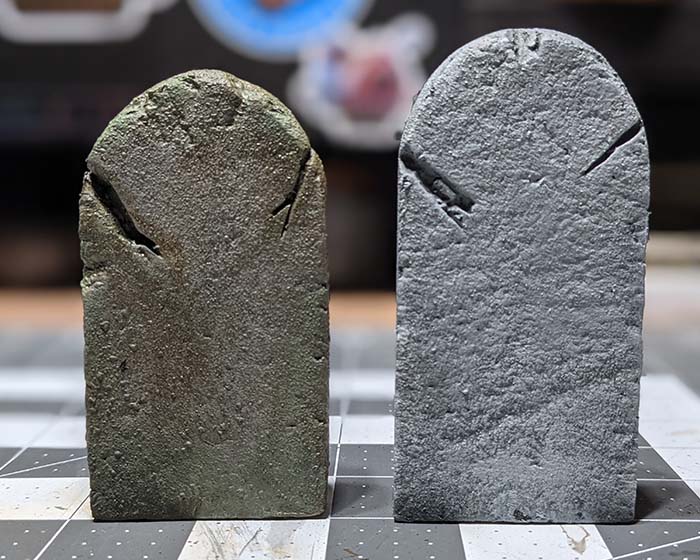
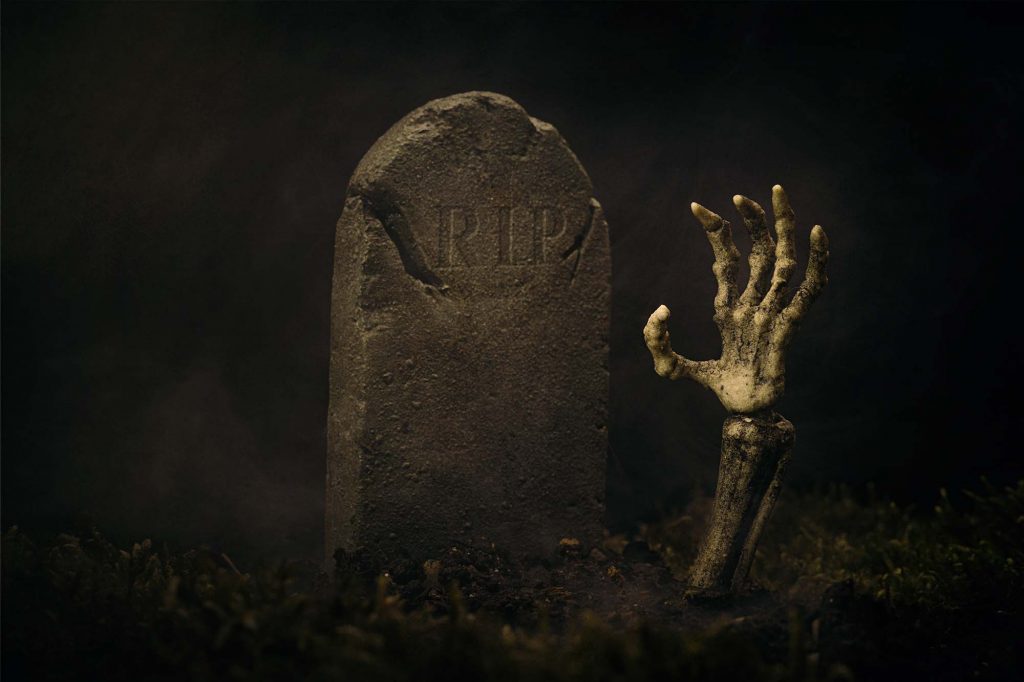
Final product
All of the details covered above are also covered in the videos below. I also cover a more advanced technique of using washes that really add some age and character to the stone. The final stones I made look like this:
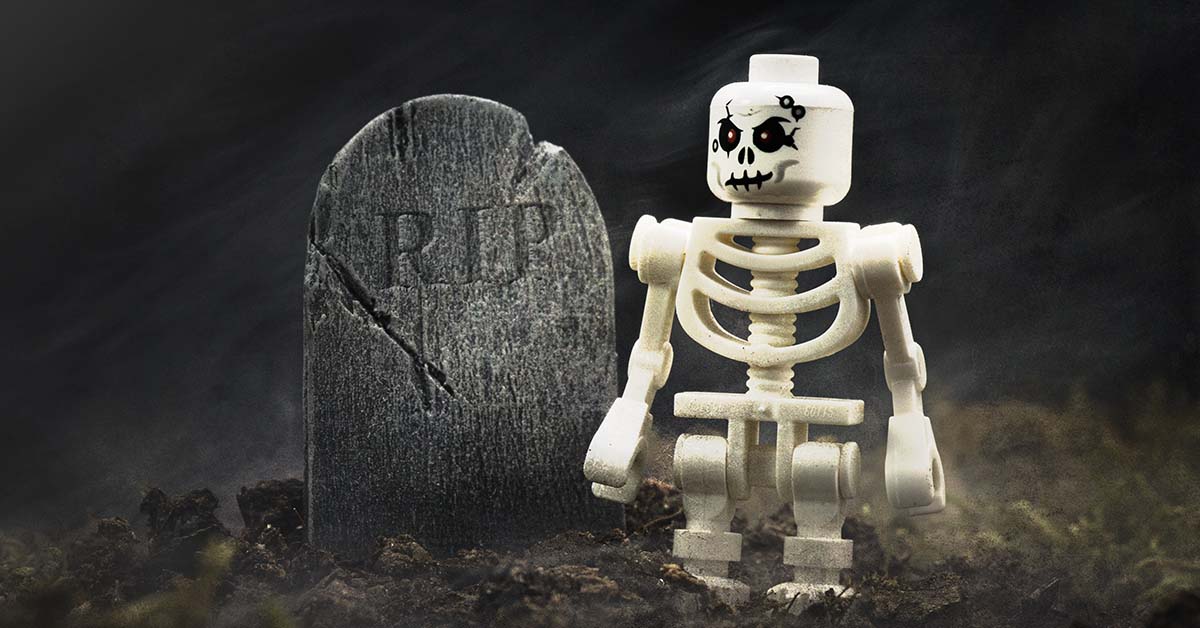
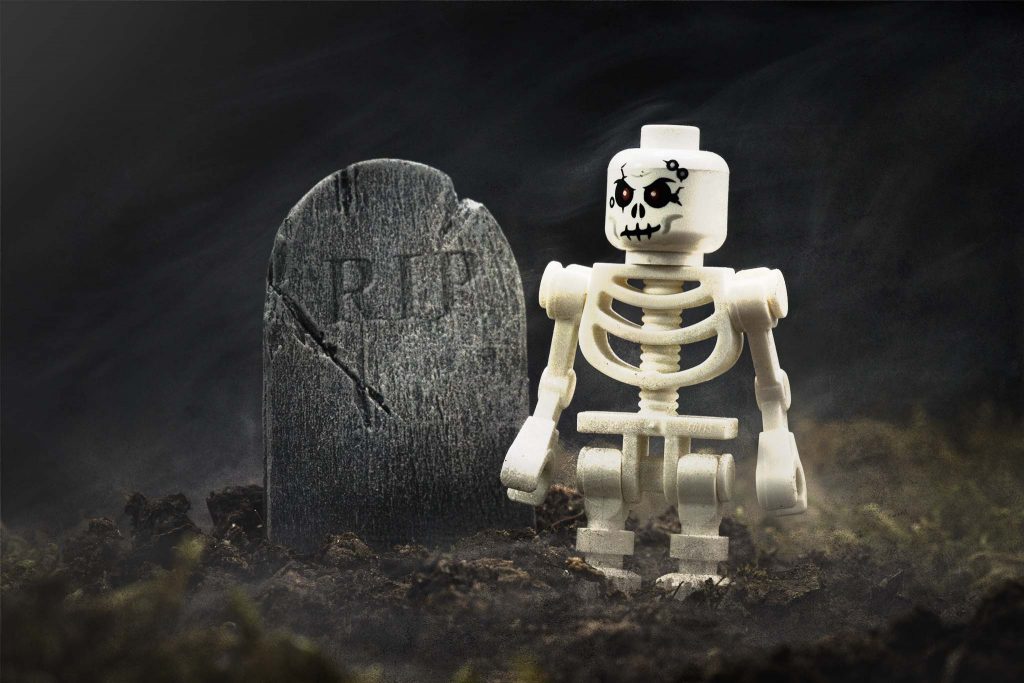
Check out the images I was able to make with the stones. First the LEGO version:
And the 6-inch scale (1:12) version:
Helpful how-to videos
The 6-inch build is covered in more detail here:
I have also included a video that covers a LEGO-scale version:
And here’s a Photoshop tutorial for adding lettering to tombstones.
[dave]


Cool demo, Dave! Thanks!
Thanks!
The prop looks great, and yet it’s so easy to make. Thanks for this guide, Dave! I’ve got all kinds of ideas now for foam-based additions to dioramas. We have some extra sitting around the house from when we purchased and used it for table-top battle terrain (Warhammer gaming). Didn’t really think about all the ways it could be used for LEGO or 6″ dios but you’ve got my creative juices flowing now!
Yeah, it is pretty easy.
Watching videos for making table-top battle terrain (even tho I never play those games, tho I want to try someday), is what got me inspired to make action figure scaled terrain bits.