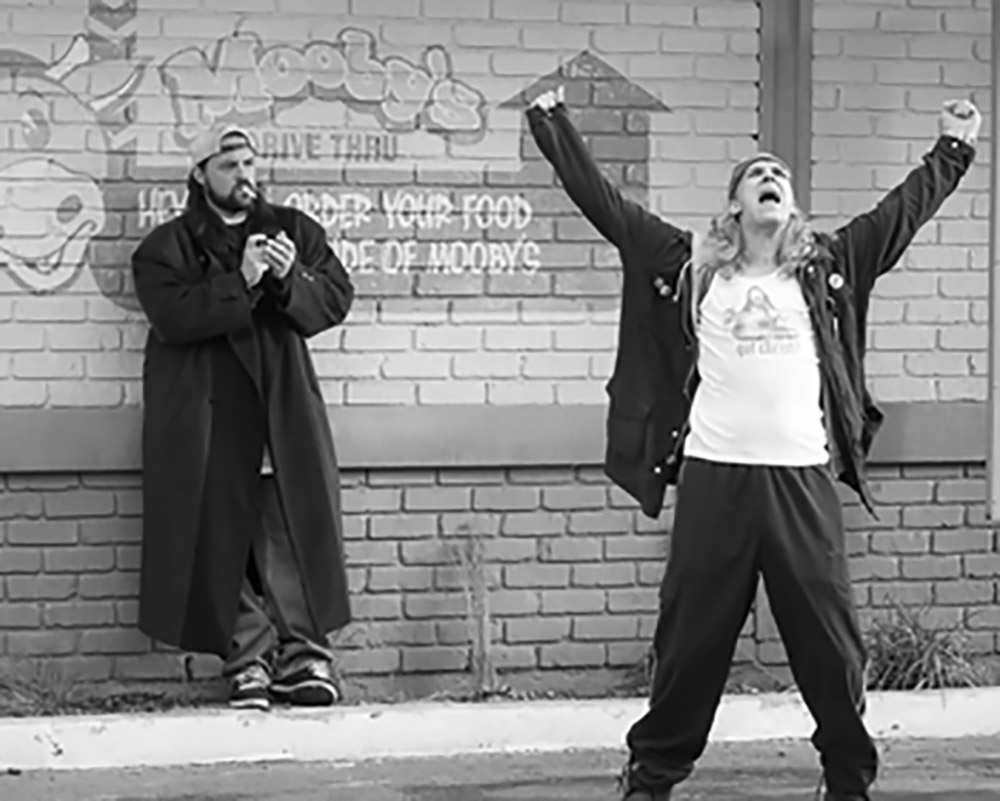
This is the last of a four-post series that explains how to make a simple diorama for your toy photography. The goal is to create a brick wall so the Silent Bob action figure I recently acquired can stand in front of it. I’m basing the wall on this Clerks movie still:
In the first post I covered the concept and scaling, the tools and materials required, and I started the first steps of building a rough brick wall.
The second post covered painting the wall and adding a horizontal bar as a decorative element.
The third post covered adding an asphalt parking lot as a ground element.
This post is going to add some nice finishing details, and put the completed diorama in front of the camera.
Weathering a diorama
Often when making dioramas we do so in nice clean houses at nice clean crafting tables, using nice clean paints. As a result, we come up with nice clean dioramas.
Real life is never nice and clean. Through the passage of time, wind and rain age and dirty things that are outside, and they eventually get covered in grime.
So to add some realism to our diorama, I am going to add some weathering to my wall for an authentic, old look.
Weathering is one of those things that can take ages to do, and can require real artistic ability. However there is a simple technique that anyone can do to add a bit of realistic wear and grit to an image: Add a wash.
A wash is simply paint that is highly diluted by water. I made my wash by mixing a few drops of black paint, and a smidge of burnt umber paint, with a dollop of water (forgive the highly scientific measurements here—I didn’t put a lot of thought into the ratios and, really, neither should you). Basically I created a wet, muddy mess.

I then brushed the wash all over the wall, from top to bottom.

This wash simulates the dirt that builds up over time. So I also thought about where dirt builds up. I used a lot of down strokes, so the wash would build up on the top of bricks. I also made sure to add extra at the top of the horizontal bar, and where the wall meets the asphalt.
If you put a little too much on, you can dab off the excess with a paper towel. Then leave it all to dry.
Adding more dirt
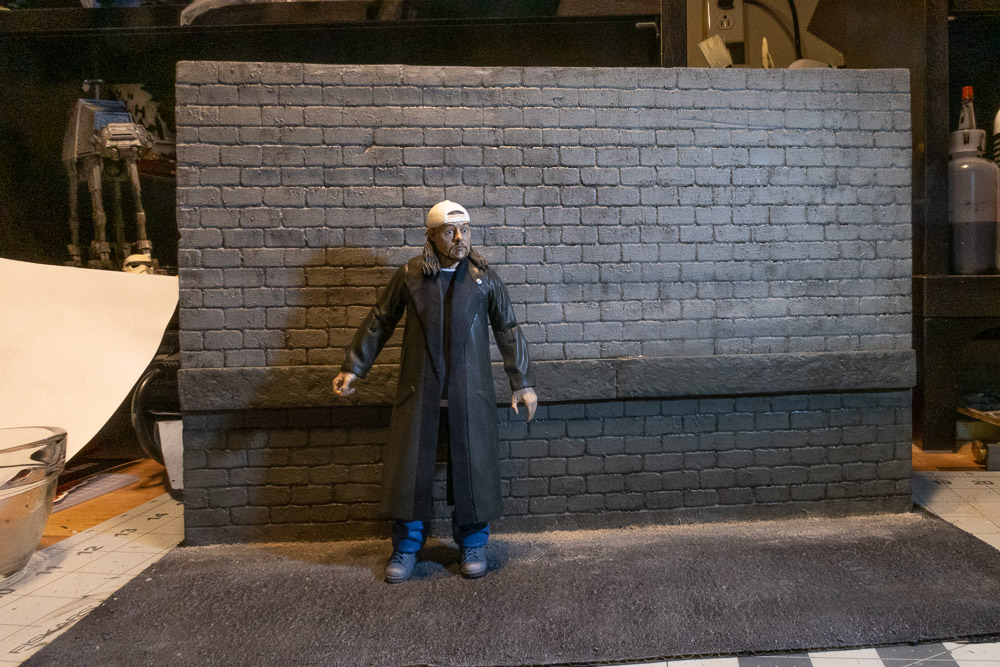
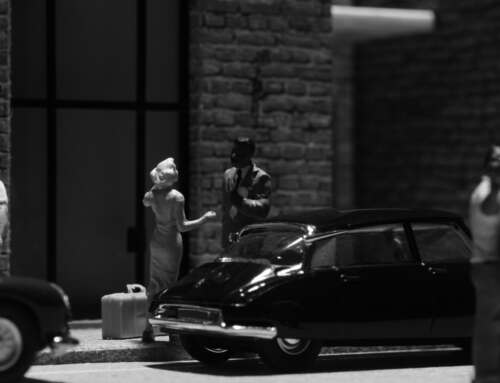
At this point I put Silent Bob in front of the diorama to see how it looks.
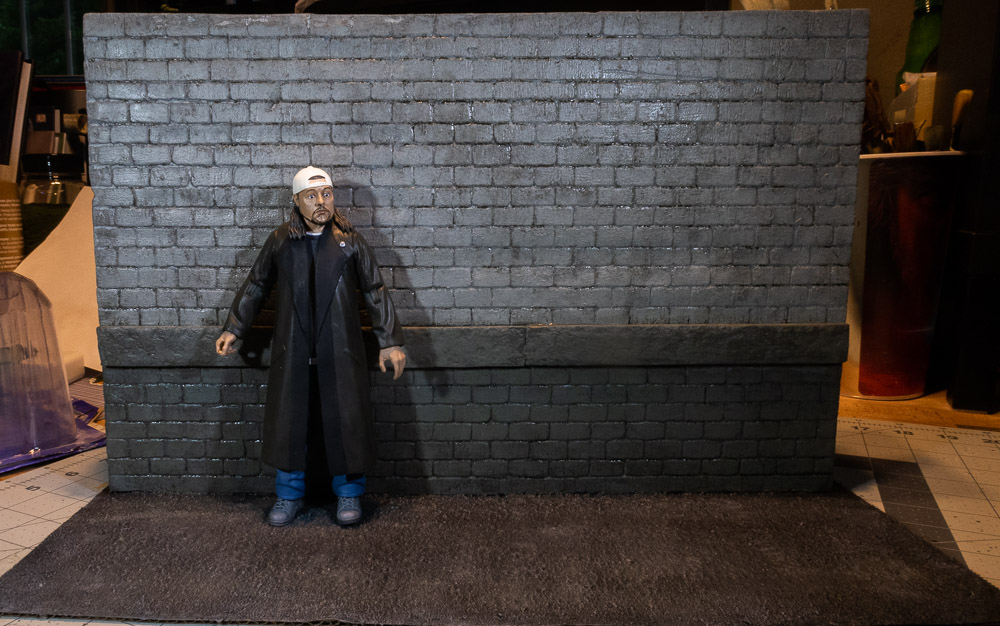
Weathering adds a lot of character to the wall. It is really looking like something that’s existed outside for decades.
The ground is still a little clean. Over time, dust and sand would have blown in, and built up along the base of the wall. So let’s add some.
I took some sand, and some other dust bits I’d been saving, and simply sprinkled it at the base of the wall. I used a brush to even some things out, and made sure it got into all the cracks and crevices.
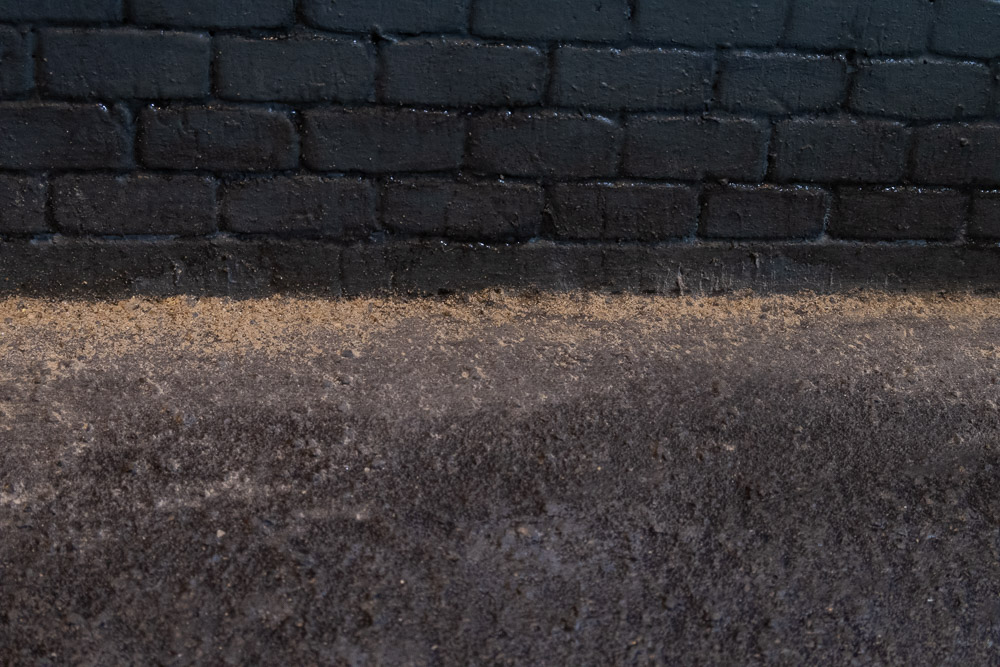
It is a little detail, but one that is both harder to do in Photoshop, and adds a lot to the realism of the scene.
Putting the diorama in front of the camera
There may be some additional touches to add, but for now this diorama is ready to be shown off in front of the camera.
I prefer to shoot inside a light box if I can, so I moved the diorama over to the light box and set up Silent Bob and the camera.
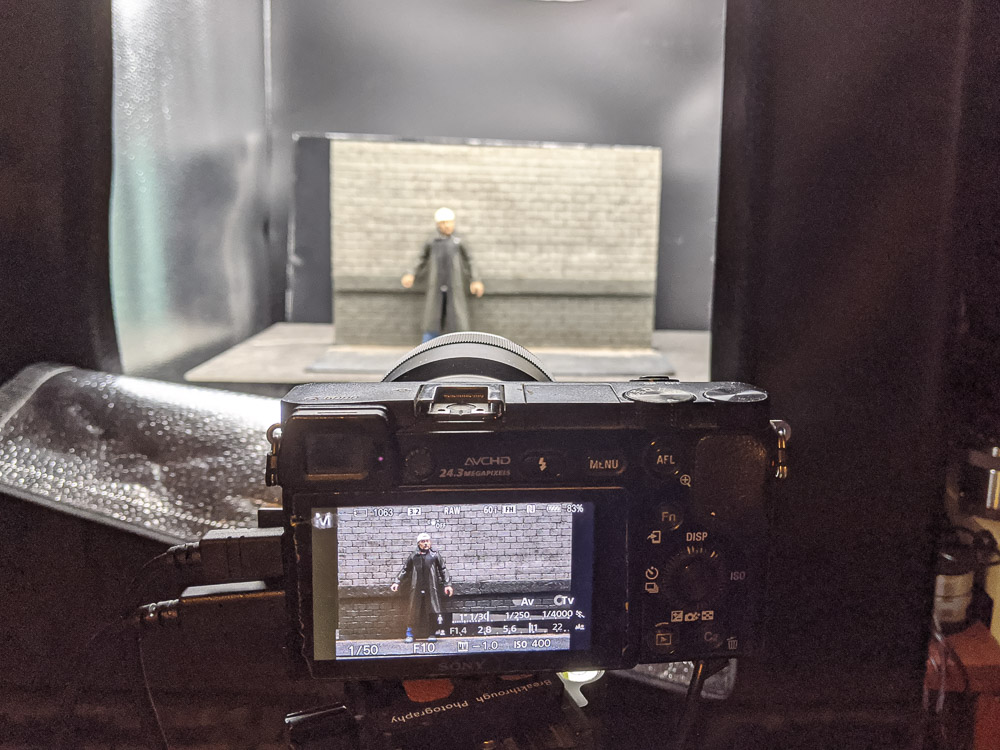
This is the image that came straight from the camera
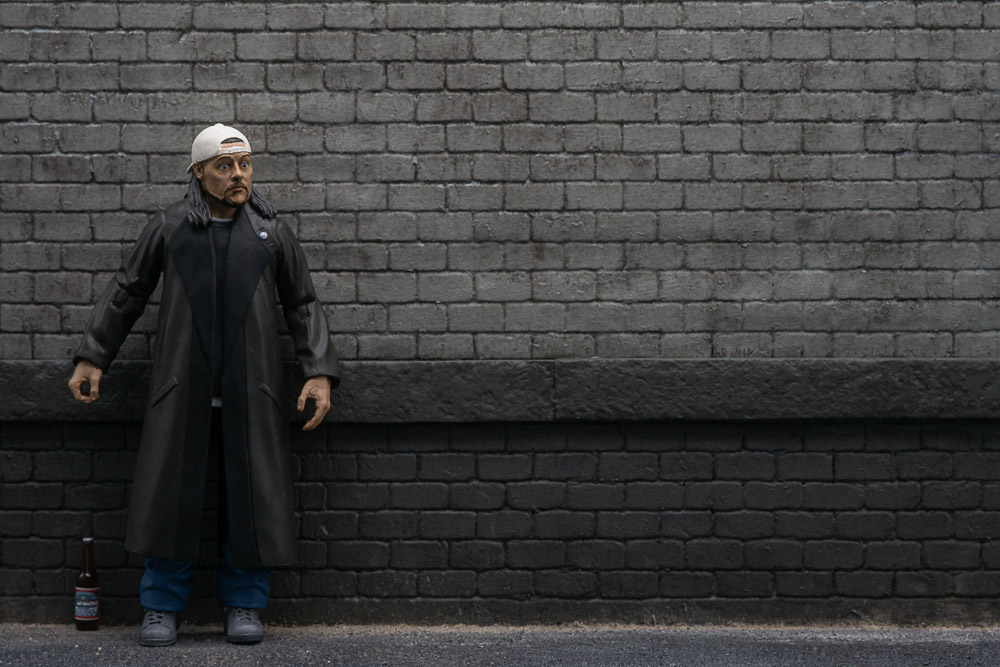
Finishing it off
If you recall, I made some design decisions early on. One of those decisions was to add the graphics in Photoshop. The reasons were twofold. First, by leaving it off, the is diorama useable for other shots in the future. Second, I don’t have the artistic ability to do it with a brush, and it is super easy in Photoshop anyway.
The graffiti Photoshop technique is a bit out of scope here, but a good tutorial to learn it yourself is here: How To Create Graffiti In Adobe Photoshop.
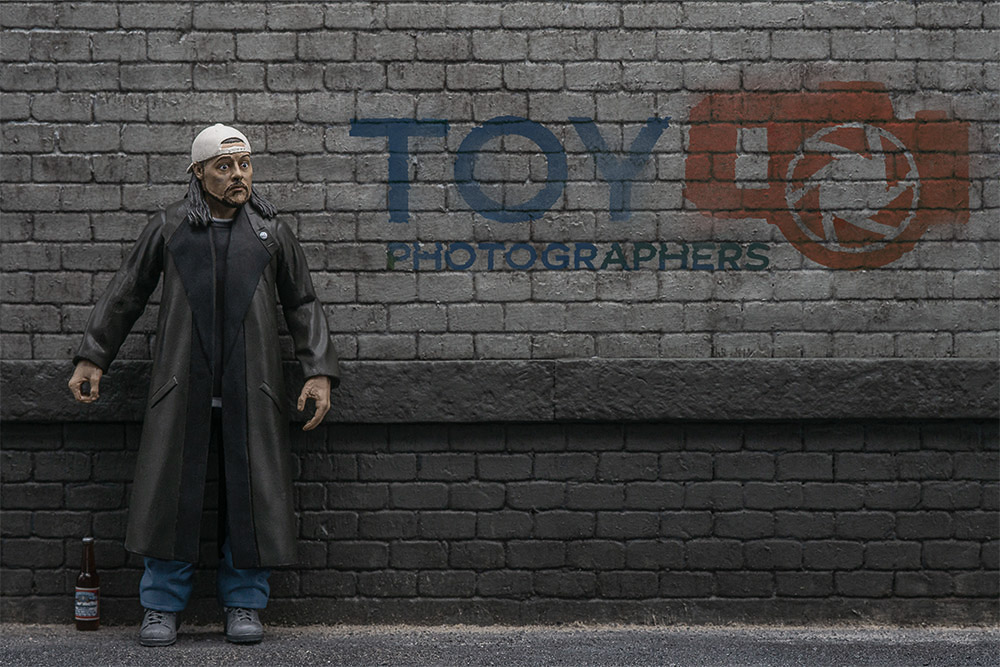
So I added my own graffiti, made a few edits to enhance the details, and came up with this final result:
Conclusion
So that’s the finished diorama. I’m sure you will agree that making simple dioramas is not nearly as intimidating as it first seems, and the time it takes is worth it. In fact, I would hazard a guess that building this diorama took less time than going to shoot a background and compositing in Silent Bob using Photoshop.
I sincerely hope this inspires some of the folks reading this to try your hand and making dioramas. It is a wonderful complementary activity to toy photography, and a nice, socially-distanced hobby in these global pandemic times in which we find ourselves.
If you want to learn more about making your own dioramas, there are a ton of resources on YouTube, but I highly recommend starting with Black Magic Craft. Jeremy makes his dioramas for the Dungeons & Dragons games he runs, but the vast majority of the techniques I’ve learned have been from him. You just need to remember to scale it up to your action figure size of choice.
If you do decide to make your own diorama, please let me know about it. Until then, happy diorama making!
[dave]
Want more toy photography goodness? Subscribe to our weekly email round up so that you never miss a post. You can also listen to episodes of the podcast!

Hey Dave,
the links to the previous posts seem to be broken (punctuation spawned and messed up the URL).
Thanks Balise. They should be fixed now.