Inspired by James Gibbs‘ “Toying with Bright Ideas – Playing with FIRE!“, I wanted to put together a post for those, like myself, who are a bit more timid when it comes to mixing fire and toys. Real fire is extremely dangerous to work with, not to mention the hazard it poses for our little plastic friends. If you are looking to avoid any unintentional meltdowns, here are some alternative ways to safely play with fire.
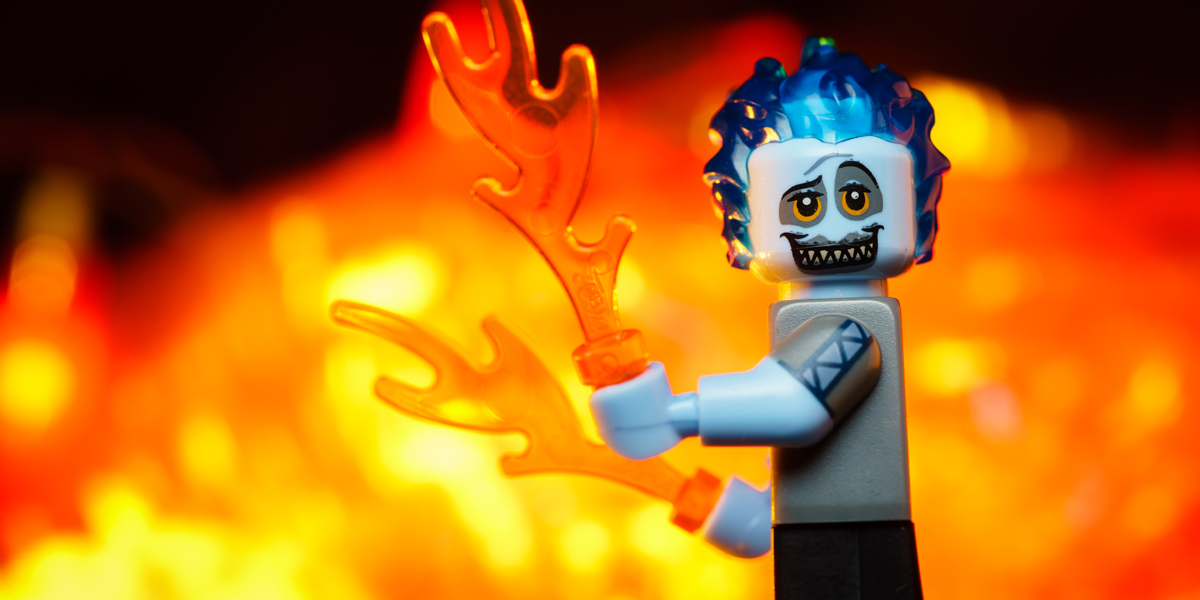
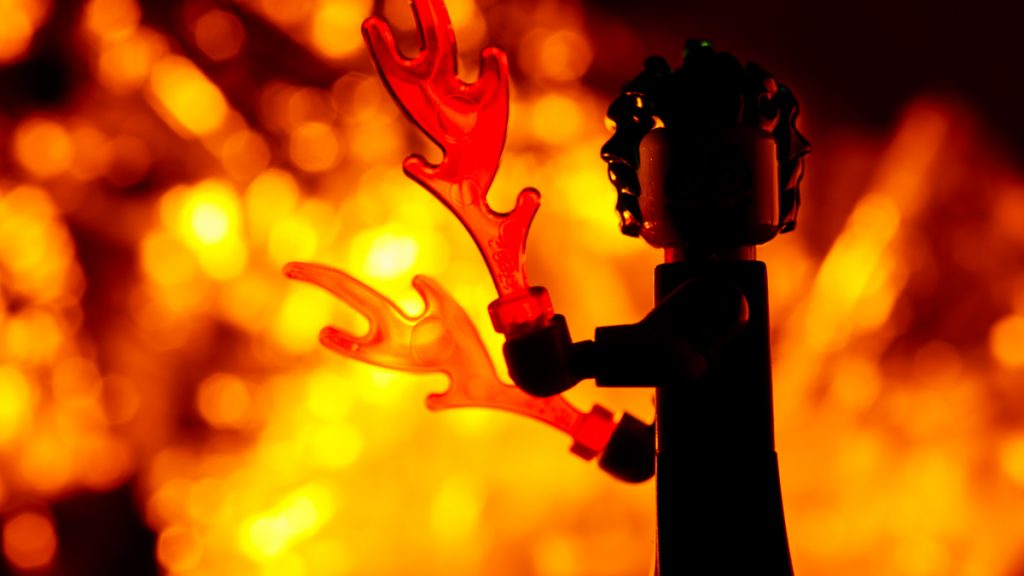
Method 1 – Red Hot Chili Peppers
As a gag for my birthday, one of my brothers gave me a string of Red Hot Chili Pepper lights. I couldn’t tell you his reasoning for why, but I ended up getting a ton of mileage out of these lights thanks to toy photography. They are extremely easy to use when you want to add a bit of combustion to your scenes.
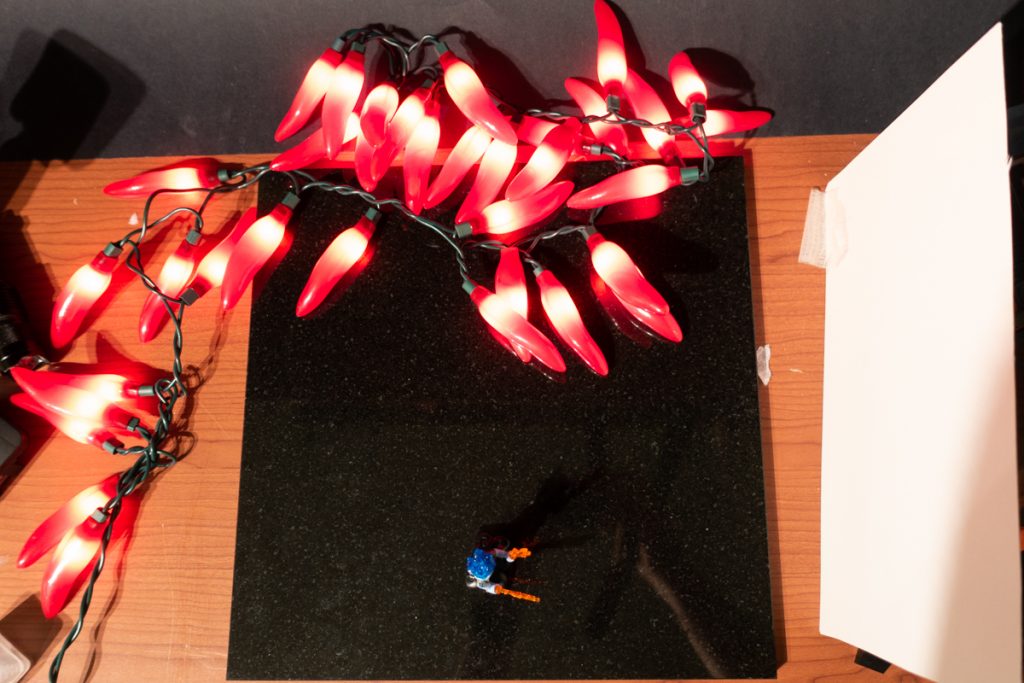
Simply drape the lights behind your subject and arrange in a way where the peppers point up as much as possible. Take care when positioning to try and keep the lights in front of the wires.
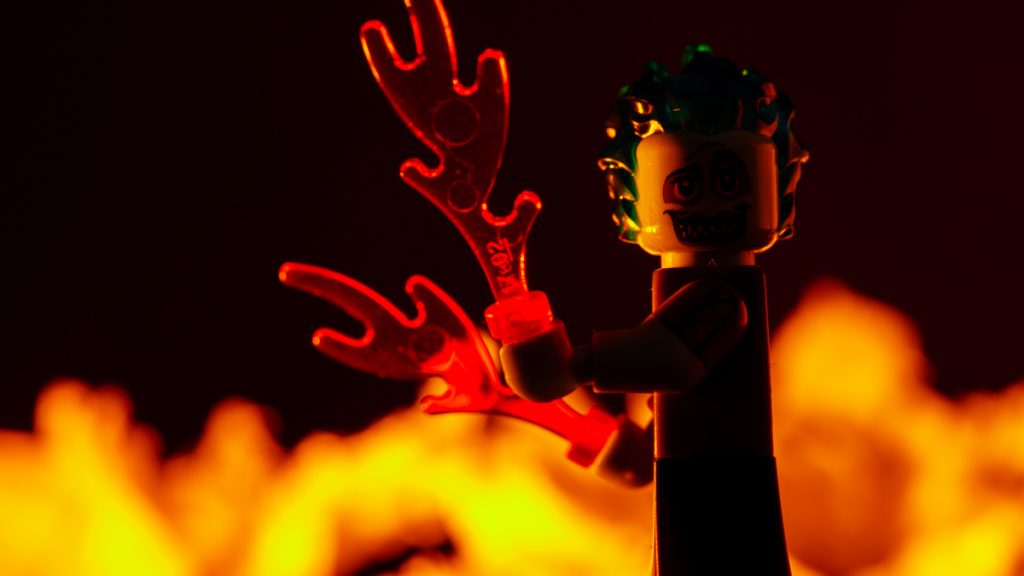
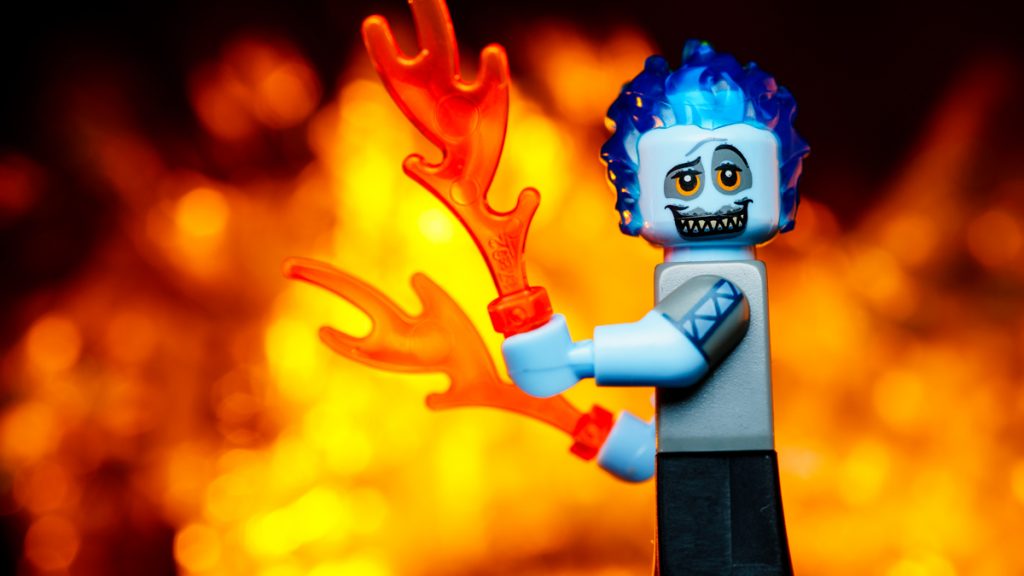
2.0 sec at f/6.3, ISO 100 50mm (FE 50mm F2.8 Macro)
Once in place, turn off all other ambient lighting and set your exposure for your your flames. Your shutter speed is going to be key, as that will determine the intensity of your flames. The slower the speed, the more light from the peppers will burn in to your exposure. The faster the speed, the less intense they will appear.

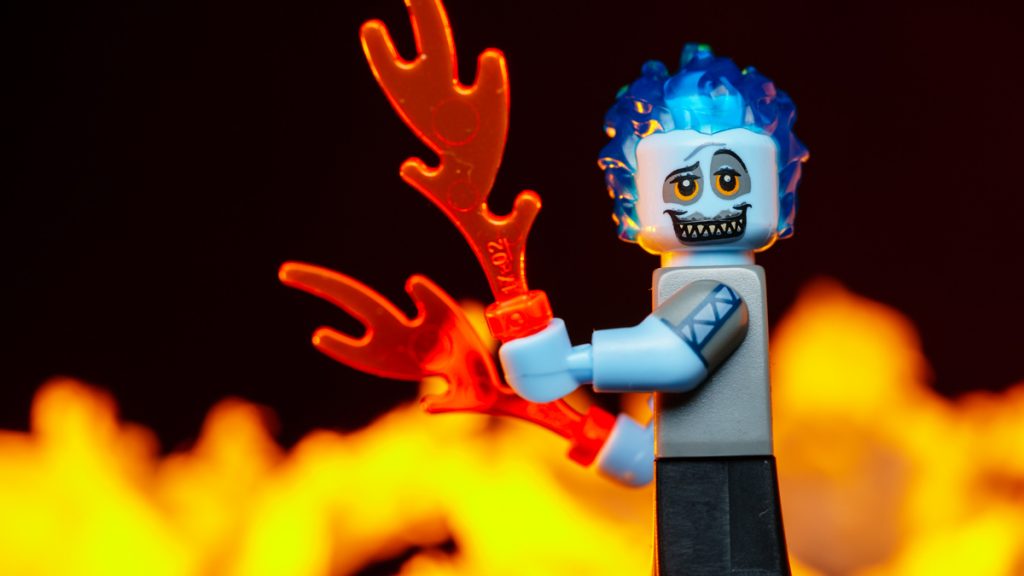
2.0 sec at f/6.3, ISO 100 50mm (FE 50mm F2.8 Macro) + Fill Flash
Once you have dialed in your exposure set for your flames, add in any additional lighting you need for your scene. In my case, I’m using an overhead flash with a small softbox to expose Hades. When adding additional lights, be cautious of any spill you may have on your flames as that could ruin the effect.
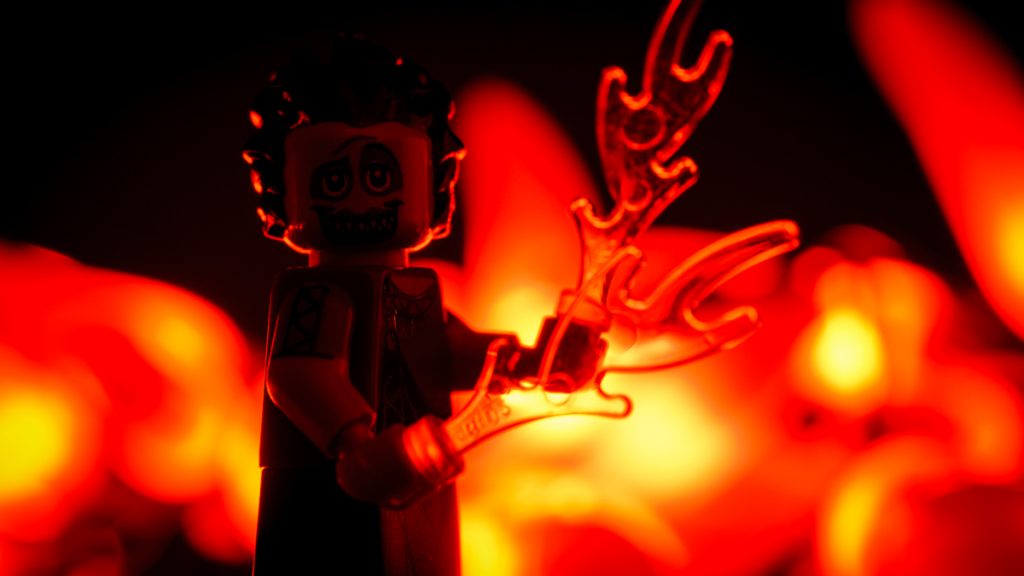
Method 2 – Tissues
If you don’t have a brother who likes to get you odd gifts for your birthday, you may want to give this method a go. You won’t be needing any chili pepper lights, but you will need a light source to fuel your fire. You’ll want a light source that is easy to direct, such as a small flashlight. In my example I’m using a Manfrotto Lumimuse 3 which is an excellent & inexpensive light source for toy photography.
First step, is to modify the color of your light source to something that more closely resembles a fire. I’ve had more luck with oranges versus reds, but your mileage here may vary.
The easiest things to use to modify your light source are photography gels available in varying shapes and sizes from Amazon and B&H. If you don’t have a set of gels handy dig around your house to see what else you can use as a substitute. I’ve tried everything from translucent LEGO bricks to plastic drinking cups in order to modify my lights.
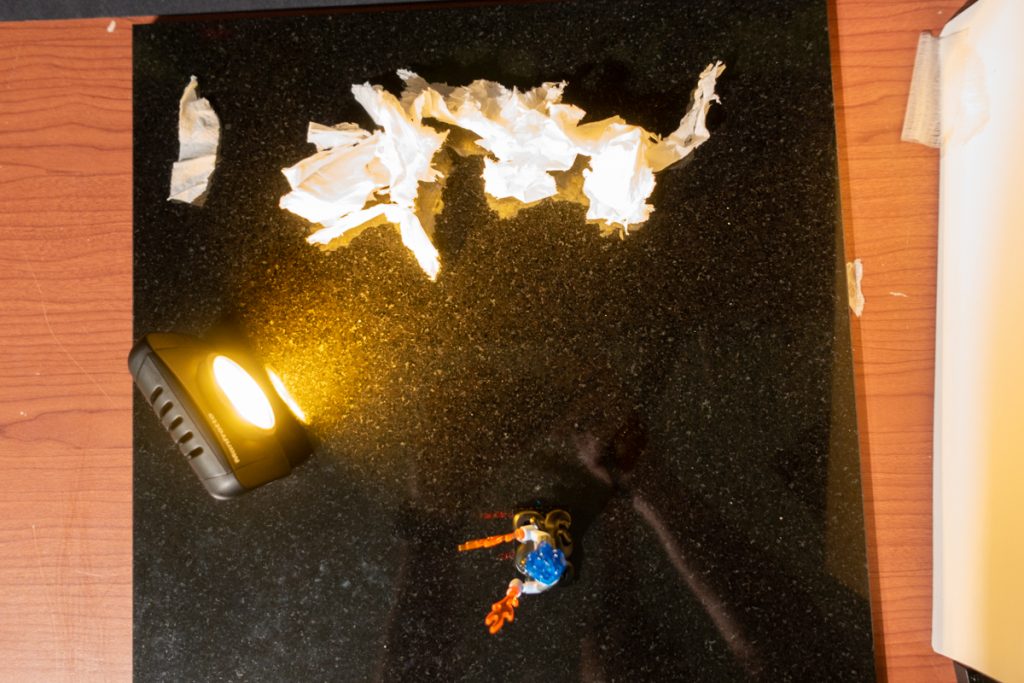
With your modified light source ready to heat things up, grab a tissue or two and start shredding them up into pieces. Drop the ripped and crumpled pieces into your background and position your light directly at them.
To add randomness to your flames, position your ripped pieces at varying distances behind your subject. You’ll also want to pile some pieces up in areas where you want to flames to be taller.
0.6 sec at f/6.3, ISO 100, 50mm (FE 50mm F2.8 Macro)
Lock in your focus, then just as in the first method, kill any ambient lights and set your exposure for the flames.
0.6 sec at f/6.3, ISO 100, 50mm (FE 50mm F2.8 Macro)
To create additional motion and blur, try gently blowing on the tissue pieces during your exposure.
Method 3 – Plastic Wrap
This is very similar to method 2, however we are replacing the tissue paper with plastic wrap. In my case, I’m actually re-using a plastic bag from my dry cleaning.
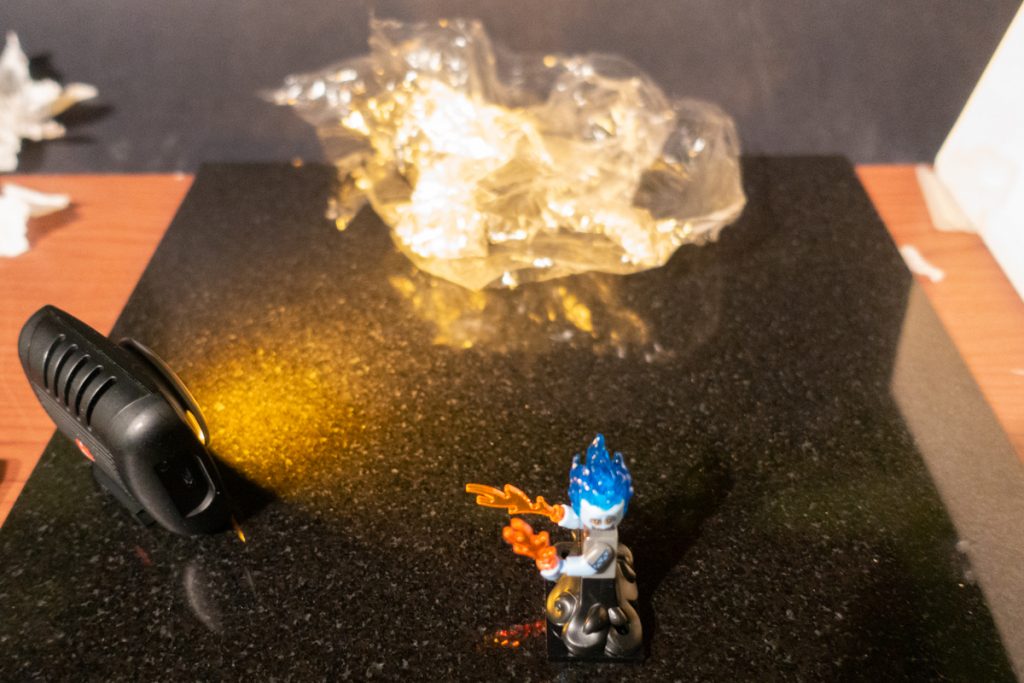
Similar to method 2, you’ll want to cut and crumple the plastic before placing it into your scene. What I like to do is smoosh the plastic down as much as possible prior to shooting, then, allowing it to slowly expand during the exposure. Like blowing on the tissues, this can simulate the movement of real flames.
0.6 sec at f/6.3, ISO 100, 50mm (FE 50mm F2.8 Macro)
0.6 sec at f/6.3, ISO 100, 50mm (FE 50mm F2.8 Macro)
Trial & Error
These techniques require a good deal of trial and error, so don’t be dismayed if your fire fizzles at the start. Trying experimenting with your exposure using longer and shorter shutter speeds to change up the feel of your flames. Experiment with different speeds and ranges of motion for your flames while your shutter is open. Try different positions for your light source, as well as try different materials beyond the ones I mentioned above. You’re bound to get a look you’re happy with, without being burned in the process.
This is great, Alan! Right in line with your idea of upcycling household objects for photography!
I’ll try this soon!
Thanks, Anna! I think about that upcycling idea all the time.
We really need to do a fun challenge on the forums to see what everyone can come up with. I’ve been stockpiling take out containers in anticipation.
That will be fun! I was just thinking about a friendly challenge…
Very cool techniques and yes, much preferable to real fire, I feel like I’d likely burn my place down if I tried the real-fire technique. Definitely going to give this a try. Hades is a great choice of fig to use, might give it a go with Ghost Rider.
Thanks for sharing.
Great idea and thanks for sharing! Going to share this too with others on my facebook group!