I offered a promise in a post quite a while ago to talk about my use of filters. Well I’m pulling my finger out of my ass and fulfilling that promise.

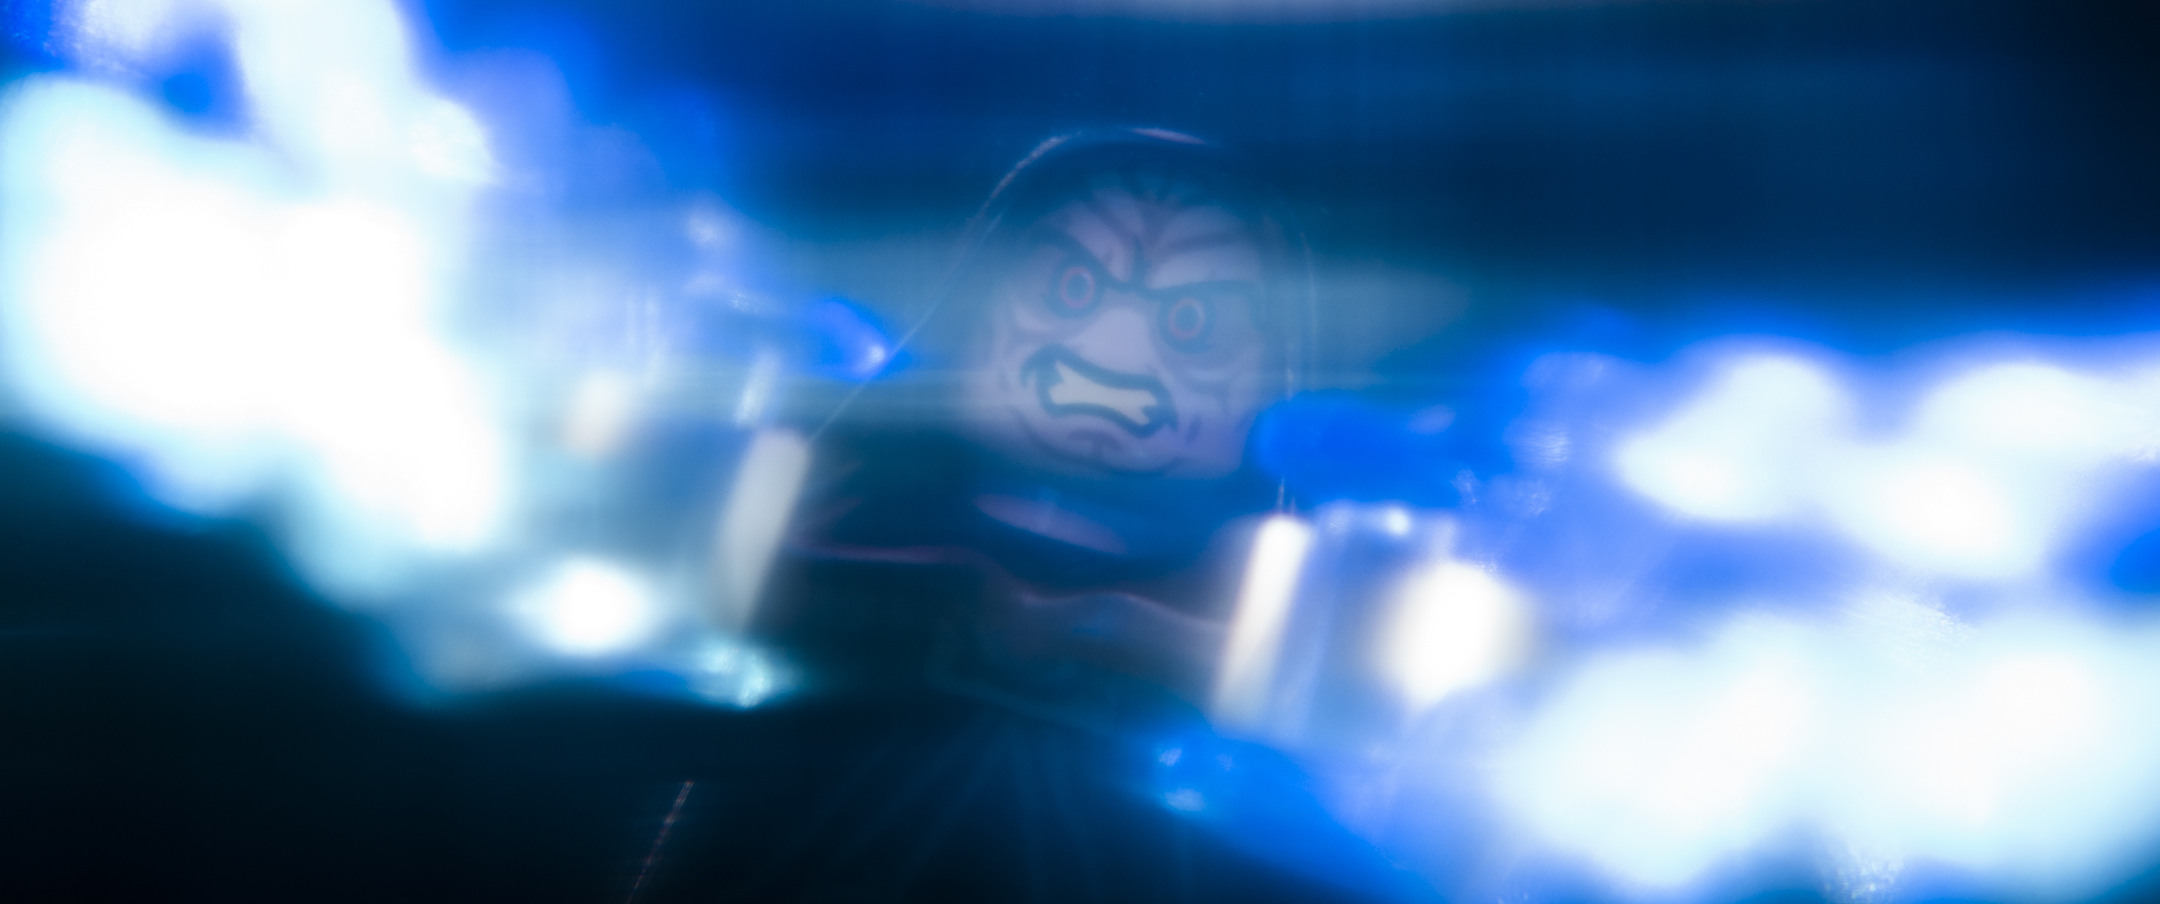
Unlimited Power
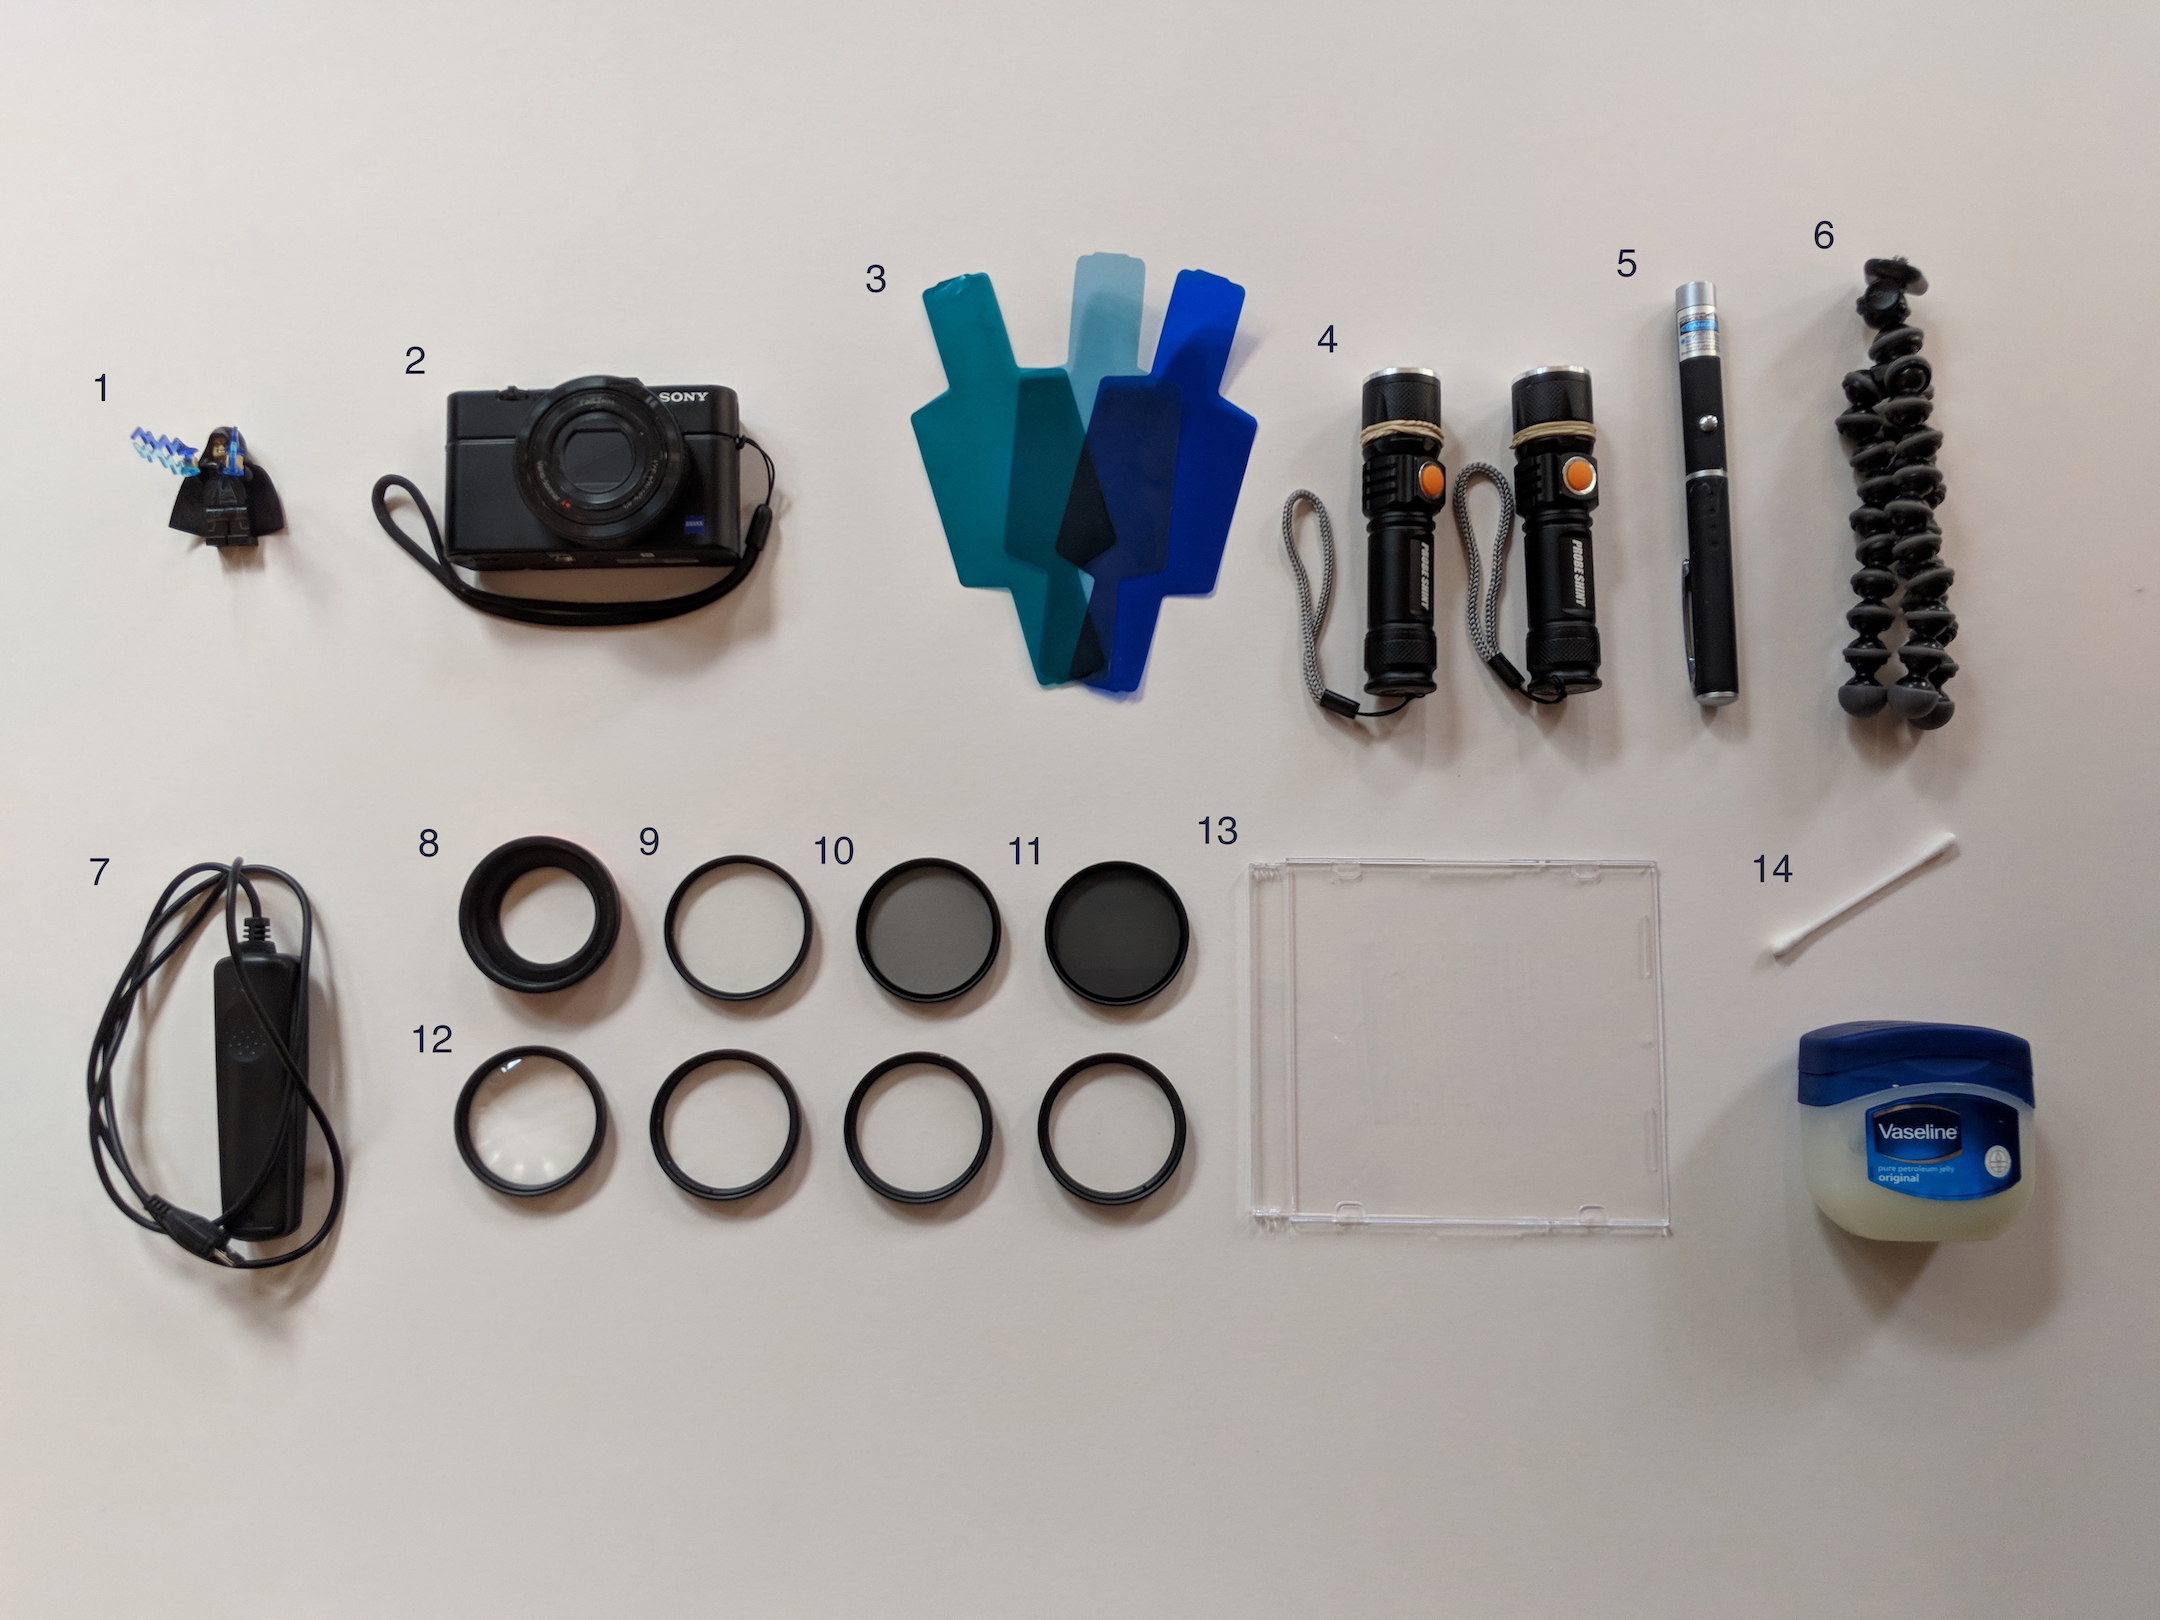
I’ve included an equipment list below to show how many bits and pieces are required to take a simple close up shot like this.
What you need
1.Unlimited Power
2. Sony RX100 II
3. Lighting Filters
4. Mini LED Torches
5. Blue Laser Pointer
6. Mini Gorilla Pod
7. Micro USB Remote Trigger
8. Magfilter Adapter + Stepdown Ring
9. Hoya Diffuser Filter
10. Hoya ND (Neutral-density) x2 Filter
11. Hoya ND (Neutral-density) x4 Filter
12. Vivitar Close Up Lens Set (+1, +2, +4, +10)
13. Sanded CD Case
14. Cotton Bud and Vaseline
The Process
To start with, the camera, minifig, tripod and remote trigger speak for themselves as a setup. But where my camera is concerned I’ve adapted it to fit the magnetic filter adapter (8.). I do this by adding the accompanying steel ring to the front of my camera lens so the adapter will magnetically attach. This combined with a step down ring, takes my thread from 52mm to 49mm.
The first filter I use is a diffuser (9.), this gives a softer cinematic like quality while still allowing focus to be retained.
The second use of filters is from the ND filters (10. + 11.), I have two varieties to allow for a variety of lighting solutions. But most of the time I find myself using both filters at the same time to allow for my brightest of lighting setups. By using the ND filters, I can retain lighting solutions and highlight torches for longer without bleaching out the shots I take. This is ideal for lightsabers or in this case force lightning.
The next set of filters I use are the close up lenses (12.) I used to use Raynox clip on lenses but switched to the threaded Vivitar varieties after Shelly suggested them in a previous post. I made the switch due to the weight on the front of lens itself and the magnetic connection failing. I usually use a combination of these lenses as my photographs tend to stretch from close ups to mid shots.
Lens flare
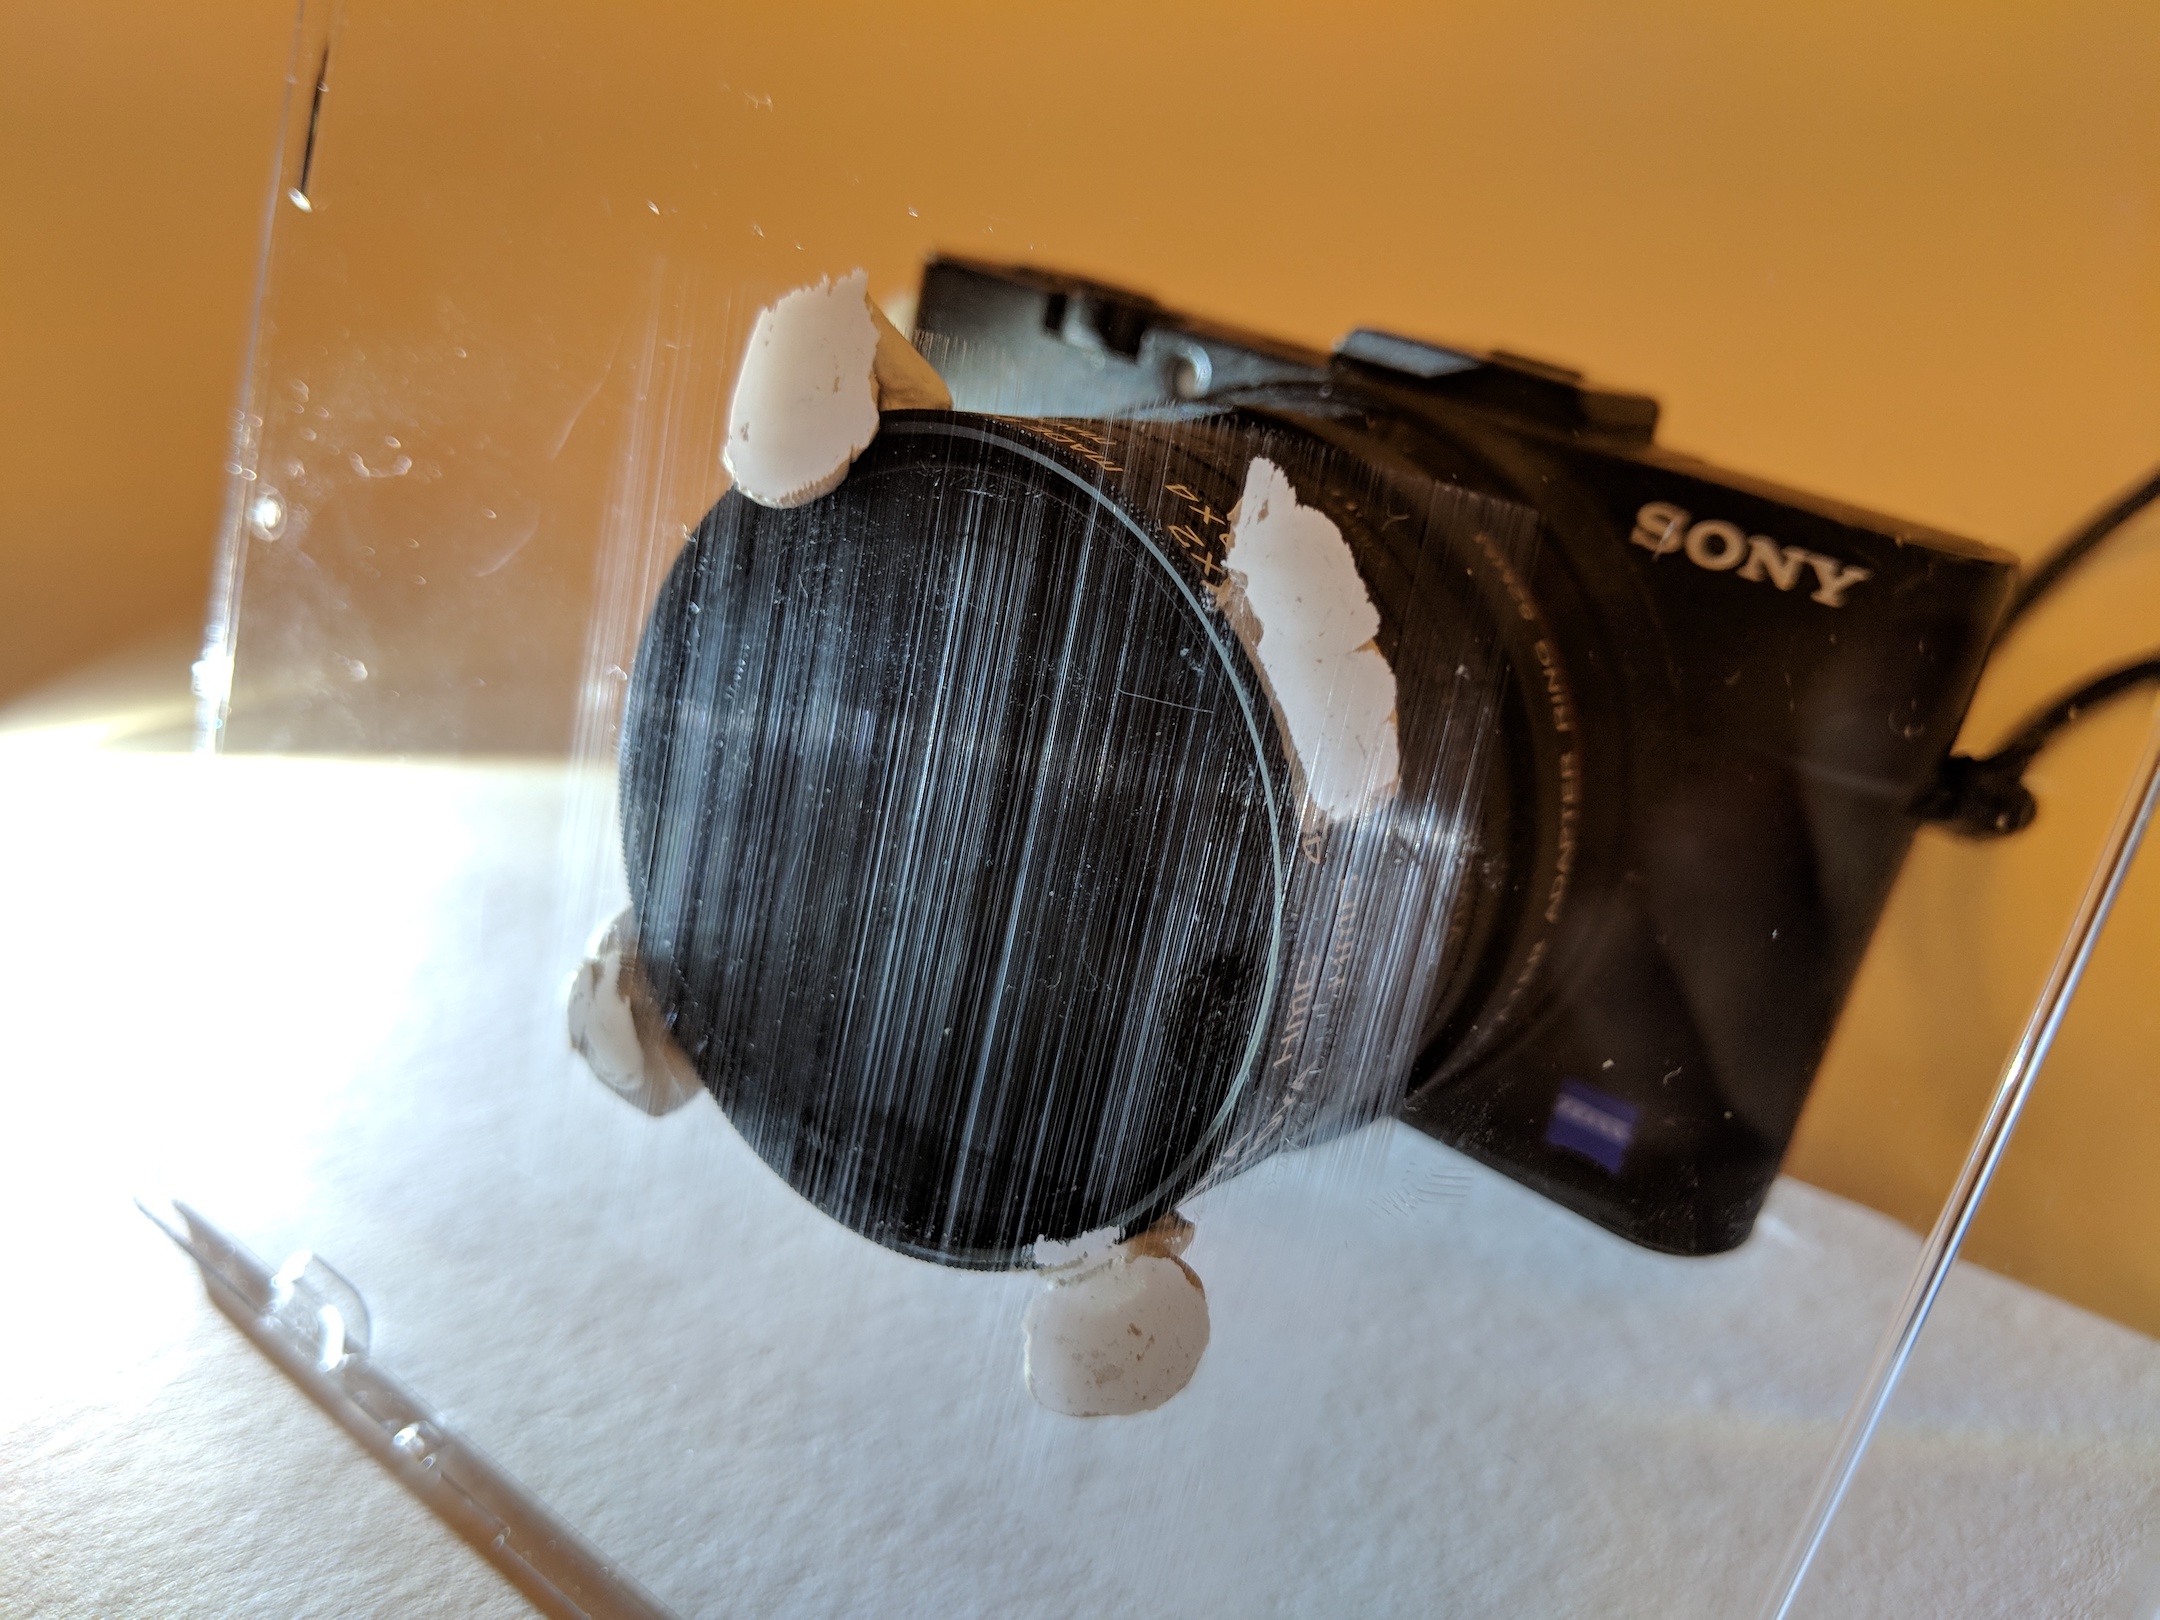
The final filter I add is something of a homemade variety. It’s a cost effective way of creating anamorphic style lens flares and unleashing you inner J.J. Personally I’ve found this gives a much greater control and a realistic flare rather than adding them in post via Photoshop. Plus, its very easy to do. Using a CD case and some sandpaper I create a scored surface to shoot through (13.). Due to the macro nature of toy photography I’ve had to upgrade the line detail, I’ve done this by increasing the grit of sandpaper to 3000. A more everyday day grit sandpaper should do for other types of photography, but with macro the lines need to be very tight together. From experience if you are going to try this make sure you wrap the sandpaper around a hard flat edge so you can get consistent vertically straight lines. If the lines are not perfectly vertical on the plastic, the flares in the photos will be on an angle rather the horizontal flares that an anamorphic lens would create. I would also recommend visiting F-stoppers. This article will give you a full overview of the process and a few tutorial videos too. To attach I usually just tack the CD case onto the other filters so it can be easily moved and adjusted (See in the photo below).
Blur
Finally I may add some vaseline (14.) to the CD case to further blur and filter the flares. It’s a little old school but creates a wonderfully dreamy effect. When working with flares the same rule applies for vaseline as it does with the scores on the CD case, you have to apply it vertically to get horizontal flares. I tend to apply with one end of a cotton bud before removing with the other end. It’s very much like The Karate Kid, “wax on, wax off”. With the photo of the Emperor, I used vaseline around the areas of the lightning to better spread the highlights.
Finally I use a lot of lighting in my setups. Mainly through mini torches and laser pointers (which are particularly great for lighting up lightsabers). In this instance it was a combination of the torches (4.) and some colour filters (3.) to match the torch colour to the lighting plastic. And I also did a bit of light painting with the laser pointer across the lightning pieces to give and extra blue glow.
As a side note to this all creating a very blue photography, I had to reflect light off of my thumb which is just above the mini figs head to reflect a more natural tone on to his face, it was a spur of the moment hack but I’m very happy with the results.
Final thoughts
It was a really interesting exercise to break down how complex a single setup can be. I’ve added more and more little bits to my methods over the years to the point where you don’t realise how much you actually do every time you take a picture. I hope this will give you an idea for a few different techniques or perhaps a retrospective glance of your own.
Tom – TomTomMilton


That’s an awesome photo Tom! I really enjoyed reading about your setup and all the equipment that you used for this shot. My favorite trick was the use of your thumb to add some skin tone to the Emperor’s face 🙂 Very clever!
Lynn
Thanks Lynn,
The thumb thing was pot luck I was just trying to lighten his face holding various things just out of shot and my thumb seemed to give a richer colour to the photo. Not intended, just a happy accident.